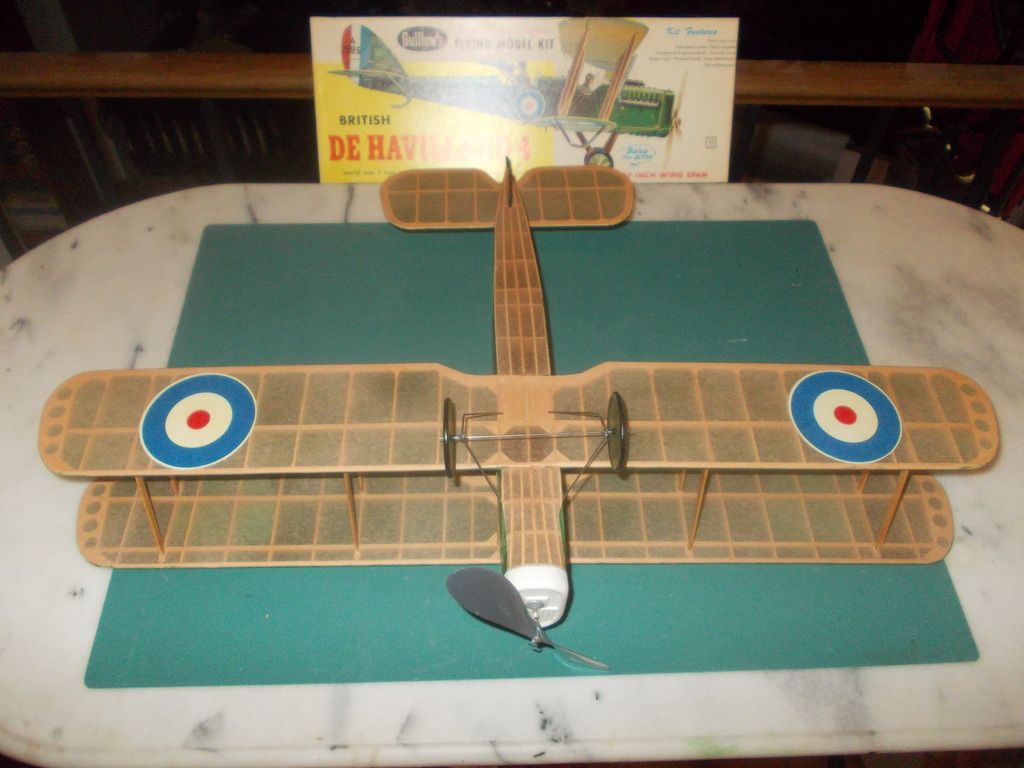
Building and Flying the DH4, kit 205

Ask other modelers for a little help / knowledge ?

Building and Flying the DH4, kit 205

Postby Mitch » Wed May 13, 2015 1:20 am

Hello all Builders, Flyers and Guillow Fans,

I am taking a break from wing construction and though I would post...

I decided to share what I have learned and how I am building this OOP kit! I built this when I was about 12 y/o, and could not get her to fly... well with the recent flight of my OOP kit the SE5, I am starting over on the DH4! I will not post a step by step build, but show you how I make improvements to make this model fly... on a rubber motor... I hope!

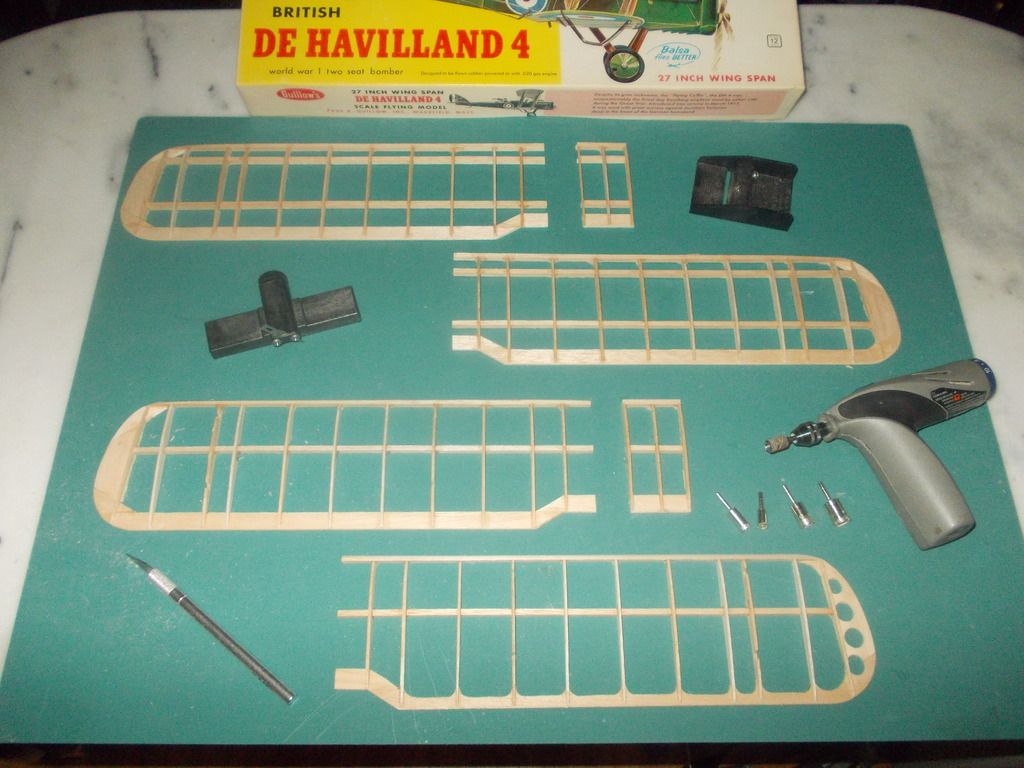
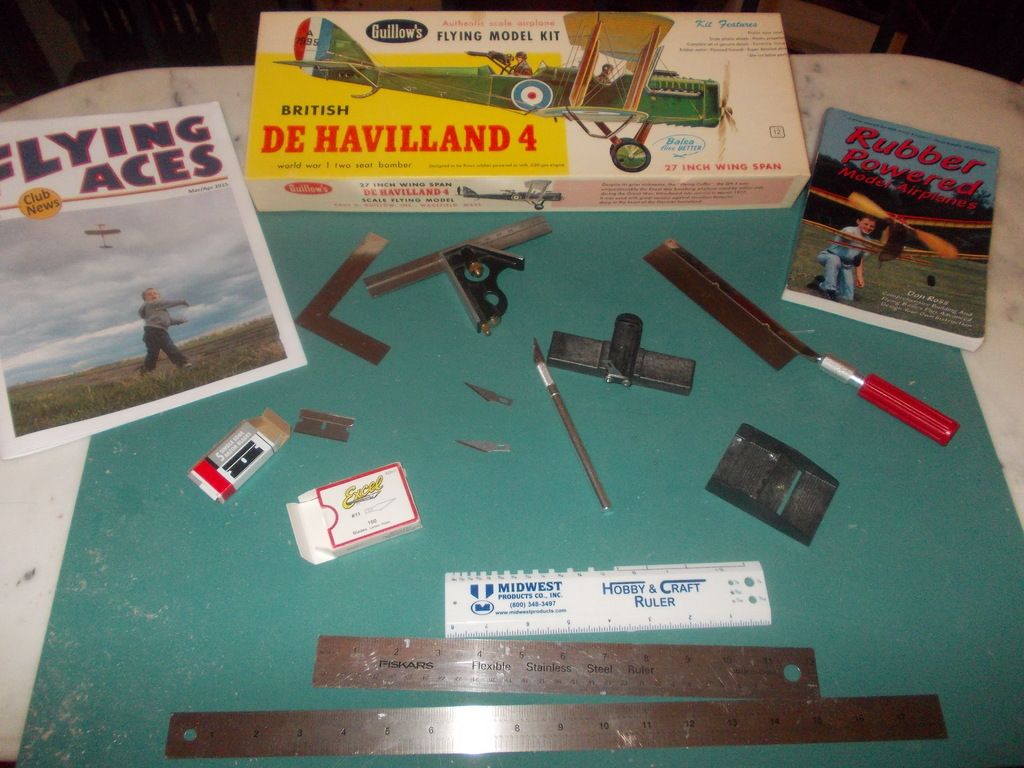
First off the tools:
Image

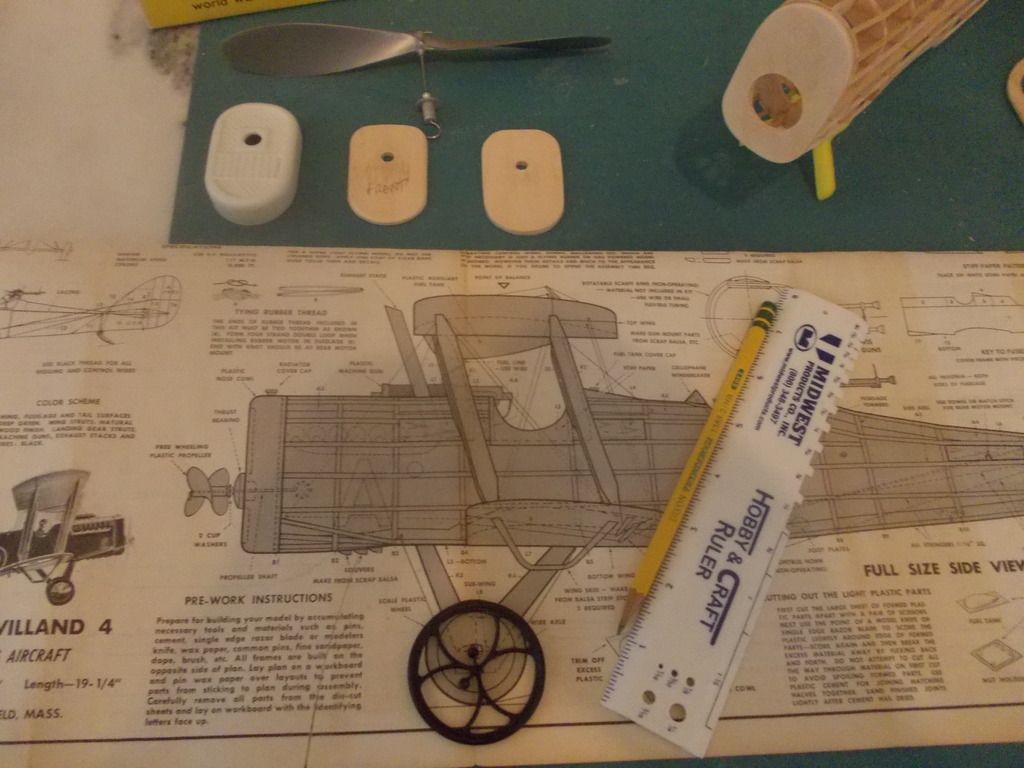
Most important is information. If you do not belong to a club, or have Don Ross' book, I will share what I can here! If I just build the model as I did before I will have similar results... I plan to do better. Here all of my cutting tools. No.11 blades with tool, Straight Razor Blades, and a Razor Saw are most important.

I recently acquired 2 tools which are helpful but not absolutely necessary... The balsa stripper and small block plane. These are both made by Master Airscrew Windsor Propeller Co. They cost less than 5 dollars each and I bought them at my LHS.

Well its day 2 and the wings are almost done... I will post pictures tomorrow and I am already saving weight! I plan to lighten the fuselage, and make a bent balsa rudder, the tail will be from contest wood, and she will have a bigger prop and motor!

See you tomorrow! Mitch
Mitch
 
Posts: 1347
Joined: Mon Aug 22, 2011 9:16 pm
Location: Kent, WA

Re: Building and Flying the DH4, kit 205

Postby Mitch » Wed May 13, 2015 11:26 am

Morning Report Day 3:

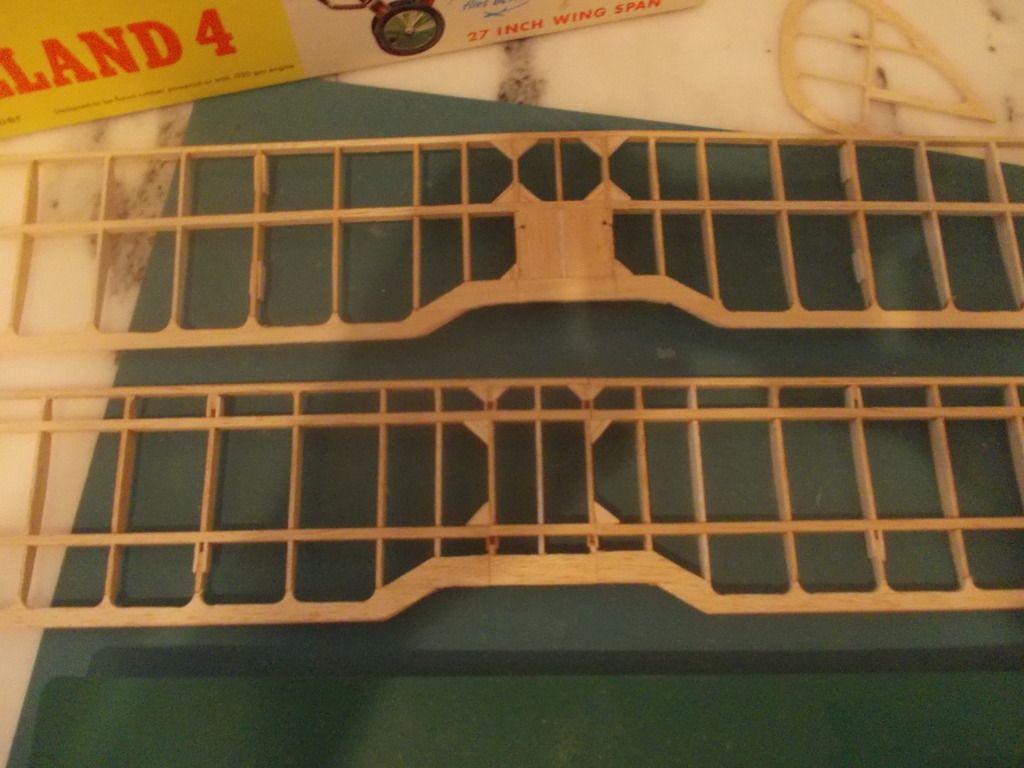
The basic wing construction is done:
Image

Here are the wing parts and the tools used. Weight reduction was 3 fold:

1. Sand all parts until lettering is removed
2. Cut down Trailing Edge to 1/2 width. Leave rounded edge to act as gussets.
3. Lightening holes in wingtip, but not ribs as the wing cord is narrow.

Weight savings 2 grams per wing panel. Total of 8 grams removed.

3rd from top weighs 8 grams...Bottom wing weighs 6 grams. Since the wing ribs are slightly narrower, I plan to use Basswood struts instead of Balsa. I can sand them down skinny so they will fit and still be strong. All ribs that hold struts will get side bracing to make pockets to accept the struts.

Today I will finish wings (weight removal on top 3 wings, and build up) and move on to fuselage and tail parts. If I was only working on this model she would be done by Sunday... Since I am busy, my target date is the following Sunday for flight tests! 10 days to get her ready!

The plans show a dihedral of 1/2 inch. I plan to double that and have 1 inch. I still think it looks scale and I want a stable flyer!

Mitch
Mitch
 
Posts: 1347
Joined: Mon Aug 22, 2011 9:16 pm
Location: Kent, WA

Re: Building and Flying the DH4, kit 205

Postby Mitch » Fri May 15, 2015 5:17 pm

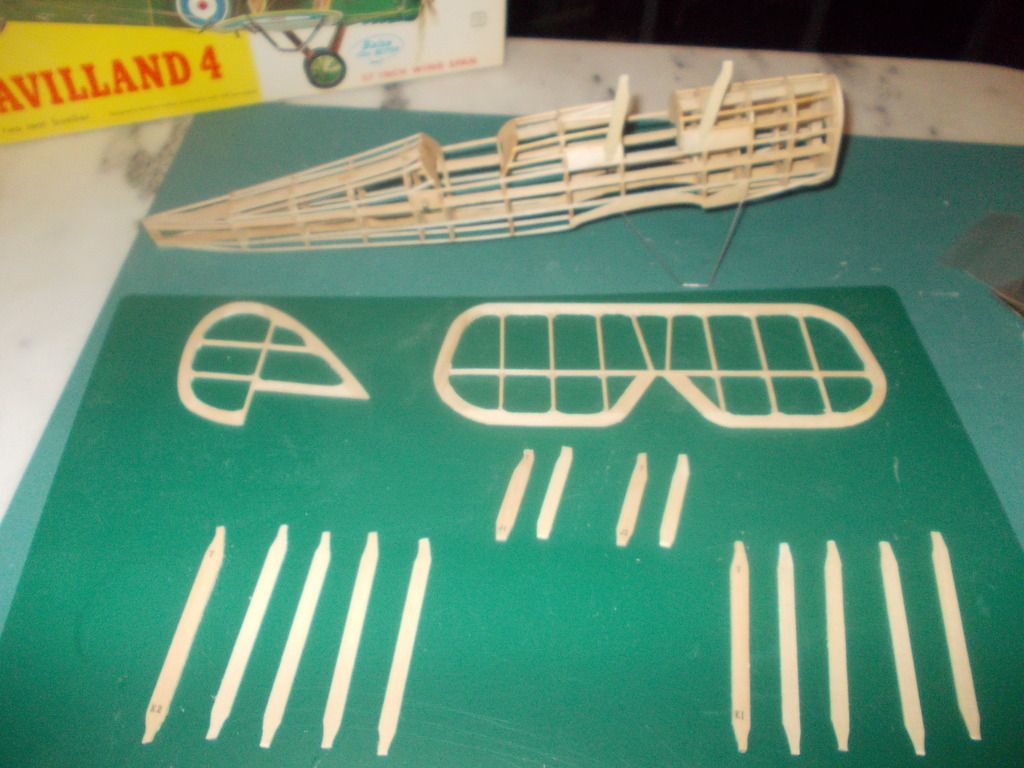
Hey Fellow Flyers here is the progress report:

1. Wings need to be assembled then finish touch up sanding LE... Removed 8 grams!
2. Tail Finished did modest weight removal saved 1 gram + 3 less ballast required = 4 grams!
3. Fuselage frames and side keels are in. At this point I will remove some material for bigger motor and move rear peg position. Extra lightening aft of peg.

Image
I plan to cover this DH4 with Green on top and sides and Linen on bottom, as on box art! I am planning on a larger 2" wheel for the DH 4, rather than the 1-1/2 inch so the 8 inch prop will clear the ground!

Plans also say struts can be made out of plywood if stronger struts are required...Mine will be Basswood! Also front end will be Plywood and adjustable!

I was thinking of really trying a supper light tail, but I am happy with my tail assembly weighing 3 grams. So I am using all kit wood so far, nothing extreme. I just bought another DH4 on ebay for the opening bid of $24.99. So if I am unhappy with this DH4, I can build another! When I build that one she will recieve contest wood and a bent balsa tail. But this first... uh second DH4 that build is mostly kit parts. My first DH4 was built with ALL kit parts and I cound not get her in balance using ALL the clay they provided! That was when I was 12 y/o!

Mitch
Mitch
 
Posts: 1347
Joined: Mon Aug 22, 2011 9:16 pm
Location: Kent, WA

Re: Building and Flying the DH4, kit 205

Postby The Cameraman » Sat May 16, 2015 2:18 am

Hi Mitch,

you're doing a fine job with the lightening etc, great to see the modification's you're making.

Regards

Reggie
Regards

Reggie
The Cameraman
 
Posts: 45
Joined: Fri Apr 06, 2012 7:10 am
Location: Lancashire, England

Re: Building and Flying the DH4, kit 205

Postby Mitch » Sat May 16, 2015 10:44 am

Thank You, and I decided to do just a modest amount of changes. If I was to build a bent balsa tail and stabilizer that may take me a few days to do just that. Sometimes, I will go though several attempts for it to come out right. My tail is all Guillow's will a slight amount of weight removal. Easy for anyone to do with a Dremel tool.

Last night I put in 1 stringer, just above the side keel so I could attach the AA, BB, and CC parts. Those complete the pilot and observer openings. So now I will open up the motor chamber to allow a larger motor for the model. I do this now because I can get my tools where I need them. Once that is done I will add the rest of the stringers.

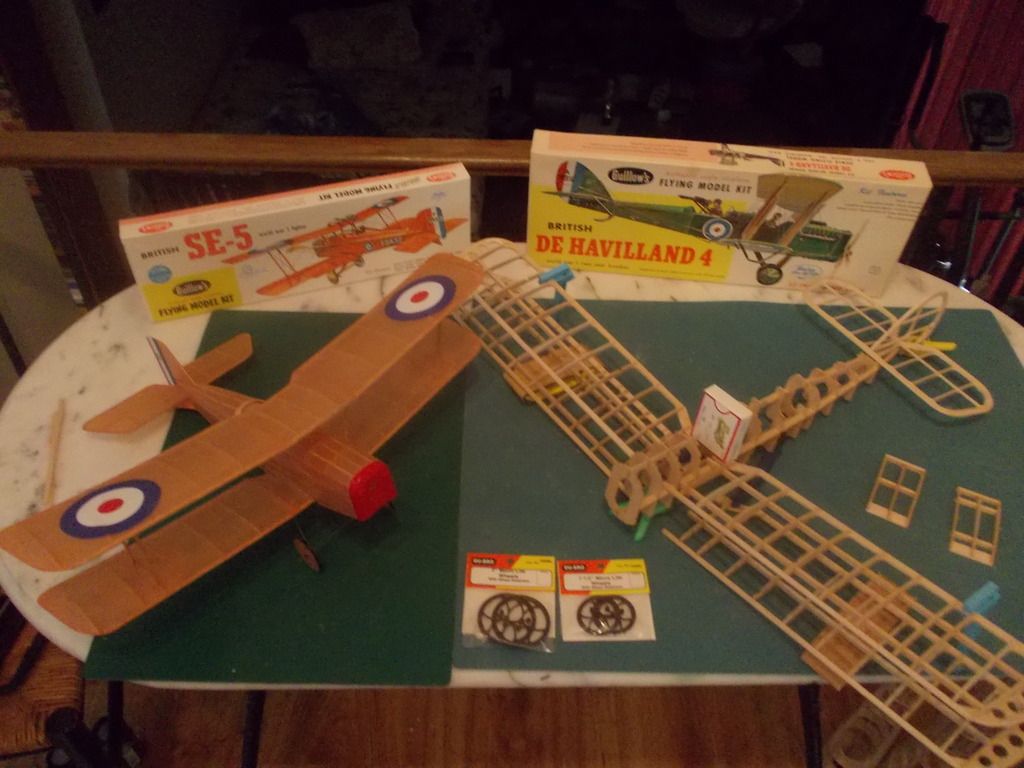
The wheels that come in the DeHaviland kit are the same size as the 100 series. I will use Du-Bro Lightweight wheels and go with the next size larger. The top of the wheel will match the plans. So I will lower the axle 3/8 inch and this will allow an 8 inch prop ground clearance. I looked at pictures of the DeHaviland and I believe the wheel are larger than the wheels of the SE5.

Image
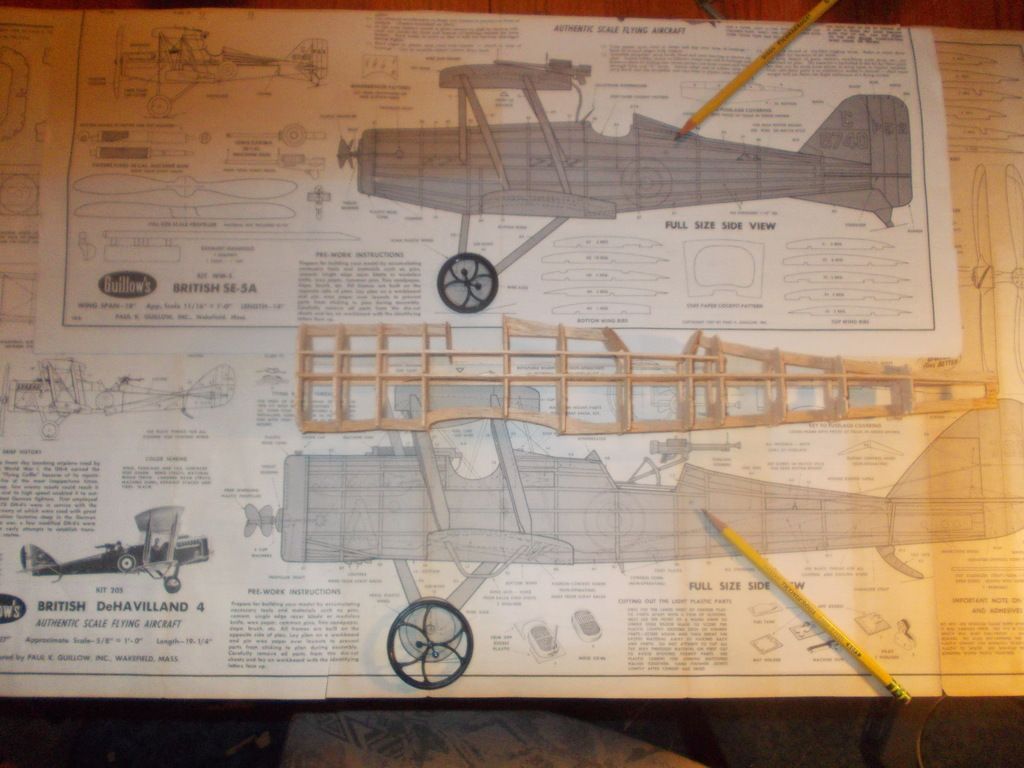
Here is a picture of the plans and the Fuselage frame. The hook to peg length for the SE5 is 7 inches, the hook to peg length in the DH4 will be 9 inches. I do not know if I will be able to get 6 strands of 1/8 rubber in the DH4. I plan to start with 4 strands. That is what I had in the SE5 and I only had 1.2 in oz of torque. I could have had as much as 5 in oz!

I will plan to make a slight adjustment to the landing gear. It will be 1 piece of bent music wire as in my SE5. The forward struts will be moved forward to B3 so I can secure it to the model at that point.

I ordered more rubber and plan to do some breaking tests with the different types and sizes.

Mitch
Mitch
 
Posts: 1347
Joined: Mon Aug 22, 2011 9:16 pm
Location: Kent, WA

Re: Building and Flying the DH4, kit 205

Postby Mitch » Sun May 17, 2015 2:06 am

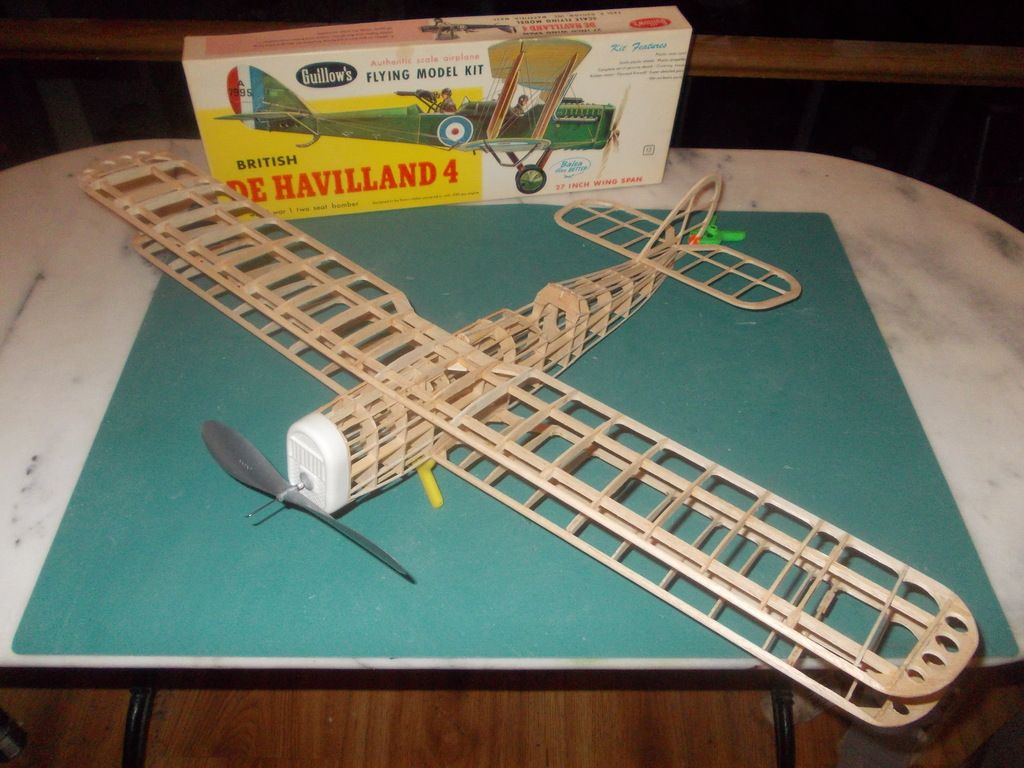
Okay... End of week one and the basic skeleton is finished:
Image
Another modification I did was to add gussets at the wings dihedral joint as those were all butt joints. I think the gussets helped improve the strength of that joint very much. Just a bit more lightening of the rear of the fuselage, mount the landing gear, make the basswood struts, etc...

She should be done this week, but I have other plans for Memorial Day w/e.

The front nose has three pieces of plywood under that cowling. That is the 8 inch Peck prop on the model now.

Mitch
Mitch
 
Posts: 1347
Joined: Mon Aug 22, 2011 9:16 pm
Location: Kent, WA

Re: Building and Flying the DH4, kit 205

Postby NcGunny » Sun May 17, 2015 10:47 am

Mitch can you post a link to where you buy your wheels and props? I always loved bi/tri planes they seem to have a graceful look. I dont know how you guys keep from breaking stuff,I broke a rib on my Stuka just sanding..lol. I think now with one of my kits I will have to see if I can get one to fly.
NcGunny
 
Posts: 203
Joined: Fri Apr 24, 2015 5:48 pm
Location: New York

Re: Building and Flying the DH4, kit 205

Postby Mitch » Sun May 17, 2015 2:31 pm

First... to answer your questions.

Props are Peck propellers. I get them from EasyBuiltModels. You can get Props, Tissue, Building Magnets and more.

Wheels are Du-Bro, from LHS. These are the these are 'Micro-Lite' I use the 1-1/2" for the SE5 and the 2" for the DH4. I also use the light Sport Wheels for the Stuka and Race Planes that have fixed landing gear. All planes with retractable gear are modeled with 'wheels up'.

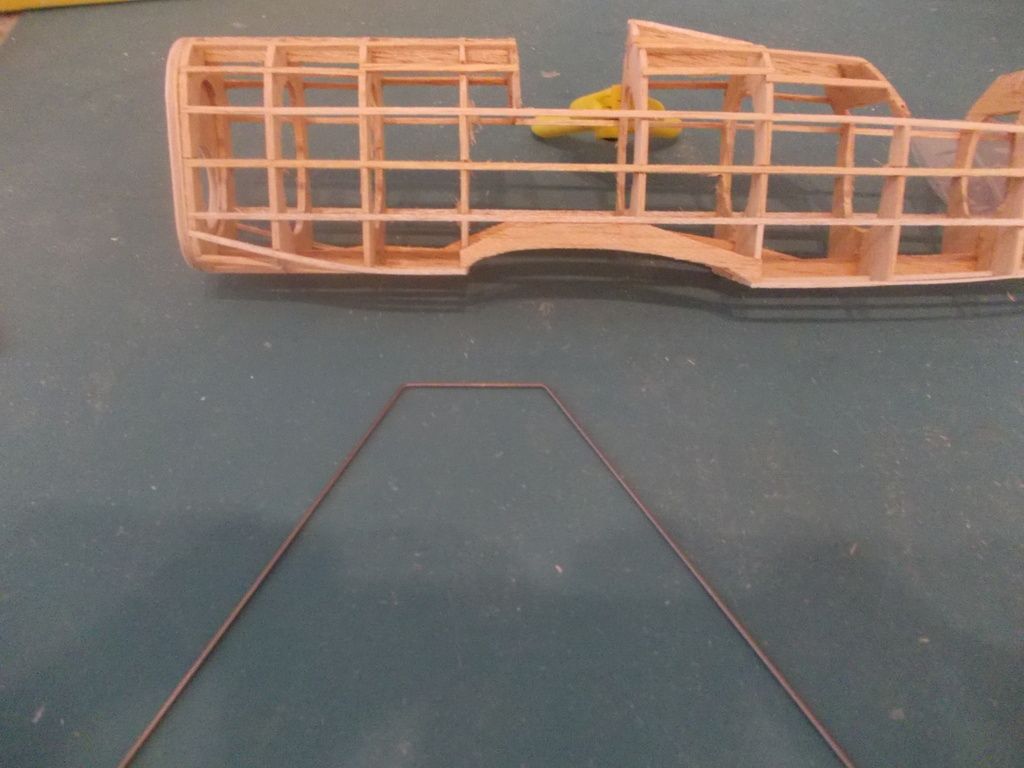
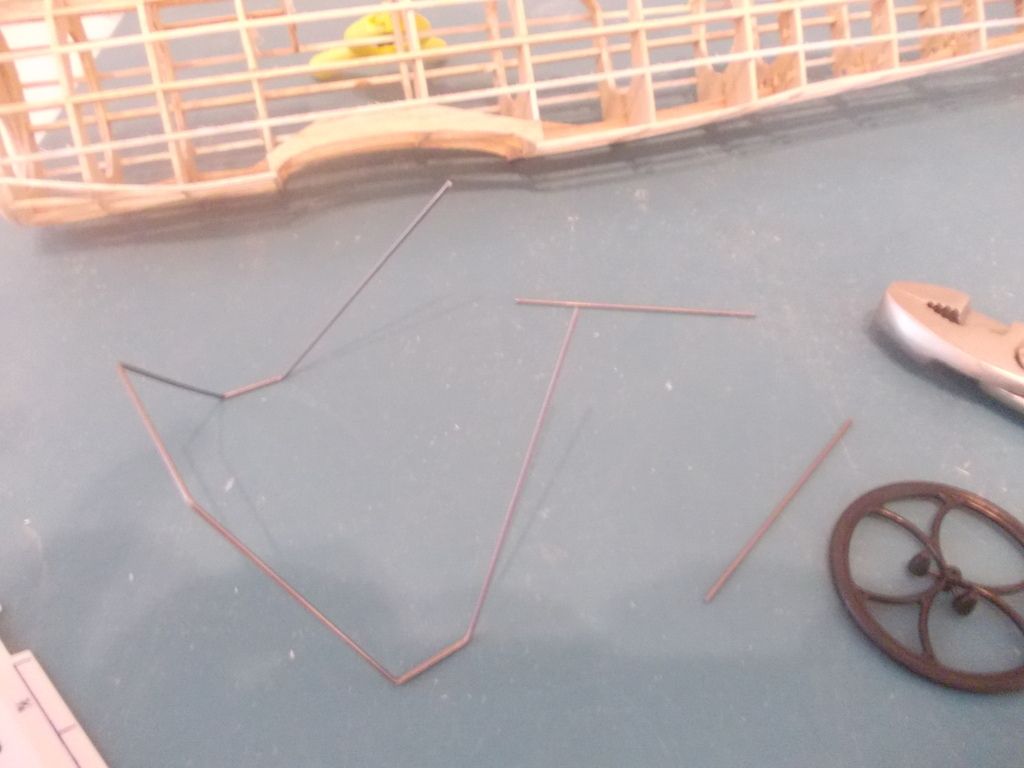
Secondly... I said I was not going to make a detailed build thread, but I am making the landing gear wire and I am following guidelines from Don Ross' book, not Guillow plans, so I will show you what I did!

1. Plan a longer and slightly different configuration so as the front of the gear will be up against B3.
Image

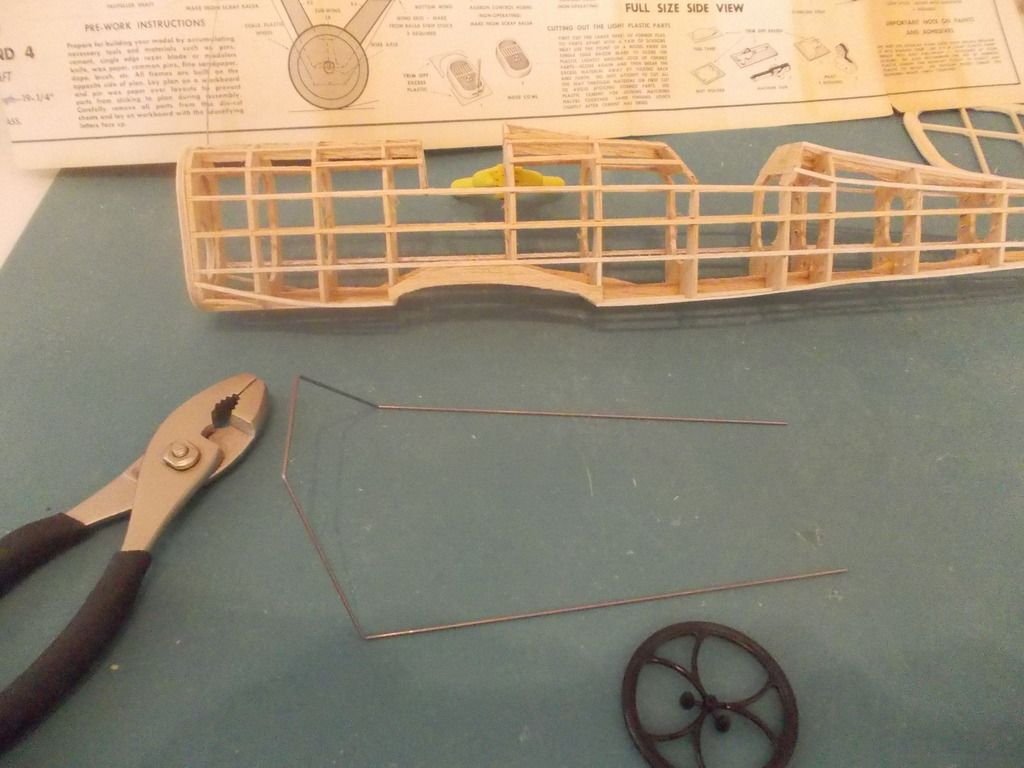
2. Cut a notch in the "A" keel to accept the landing gear wire and start bending the wire. I worked from the middle out and duplicated each bend.
Image

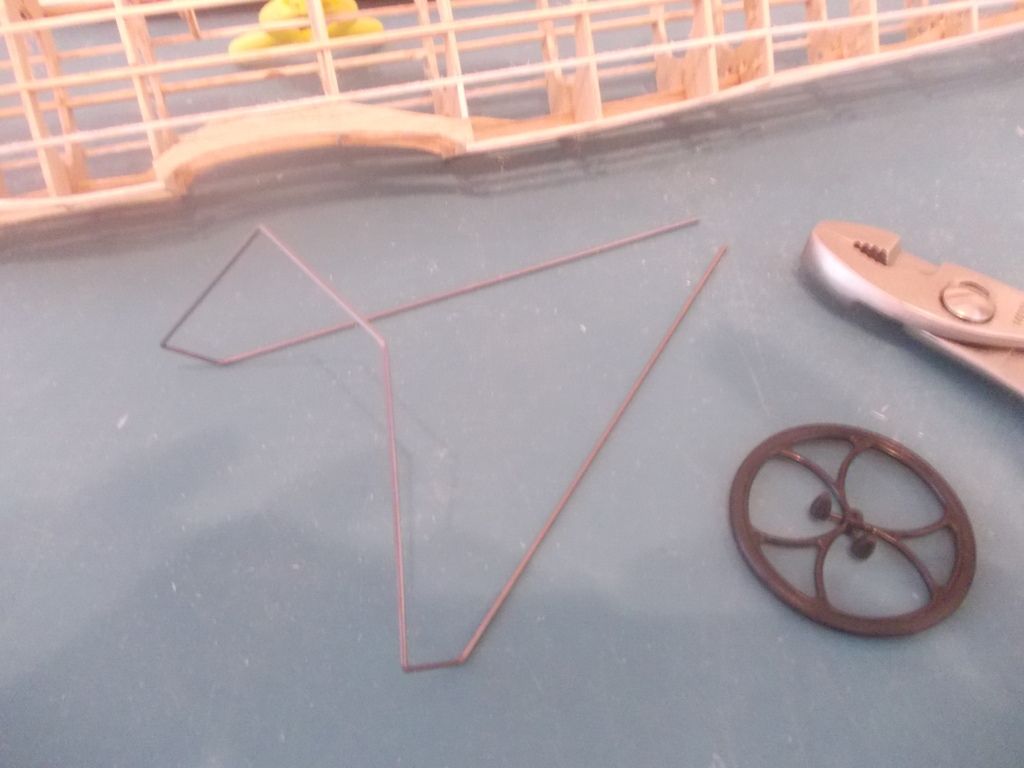
3. Following my plan and measuring each bend make the next pair of bends.
Image

4. The music wire will continue to bend and I made some adjustments to the angle again here.
Image

5. Trim off the excess. If I started at one end rather than the middle I would have enough left over for the axle. However I have plenty of Music wire and will use a 5 inch piece to make the axle.
Image

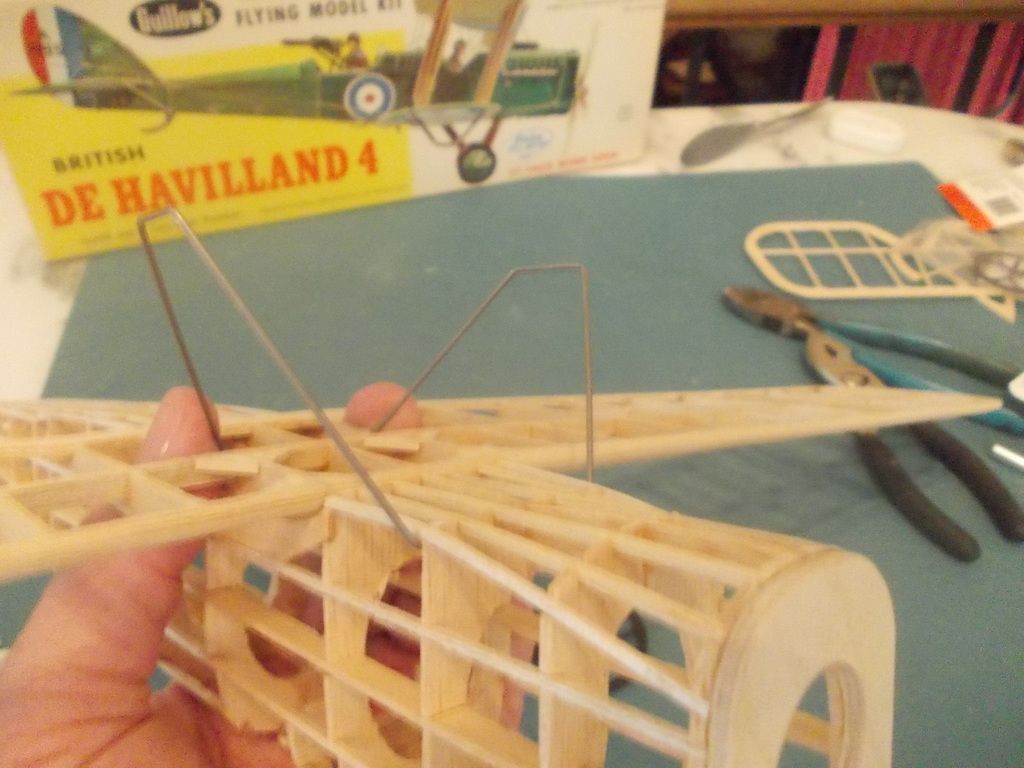
6. Checking the fit in the skeleton:
Image

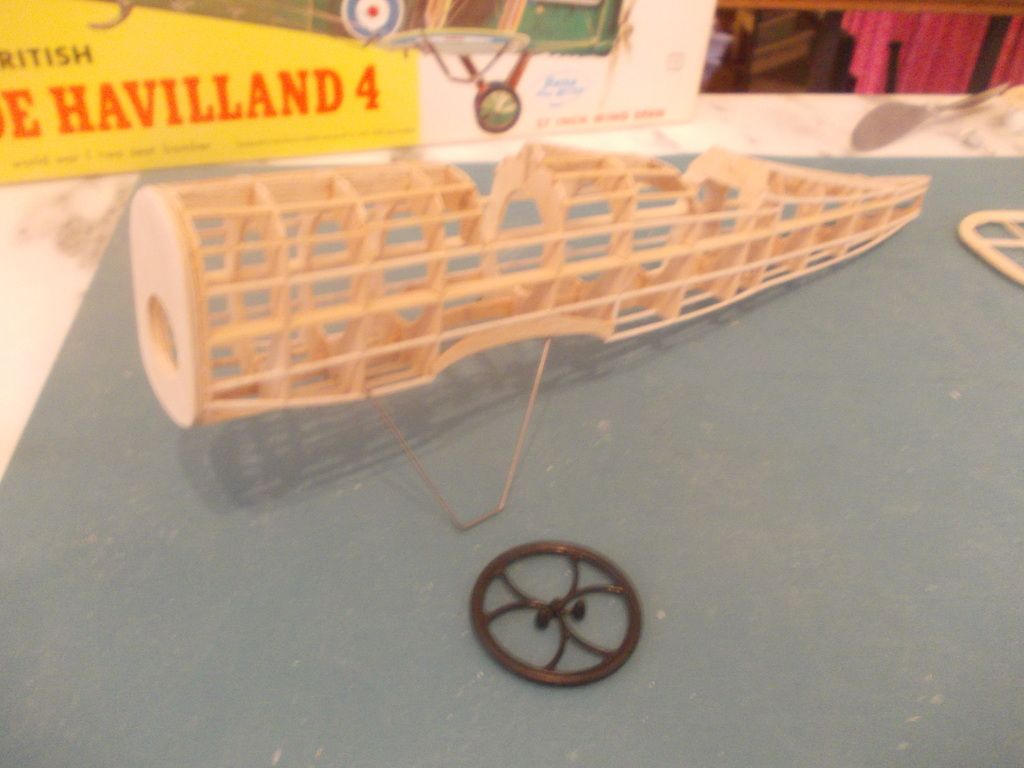
7. The fuselage standing on the gear:
Image

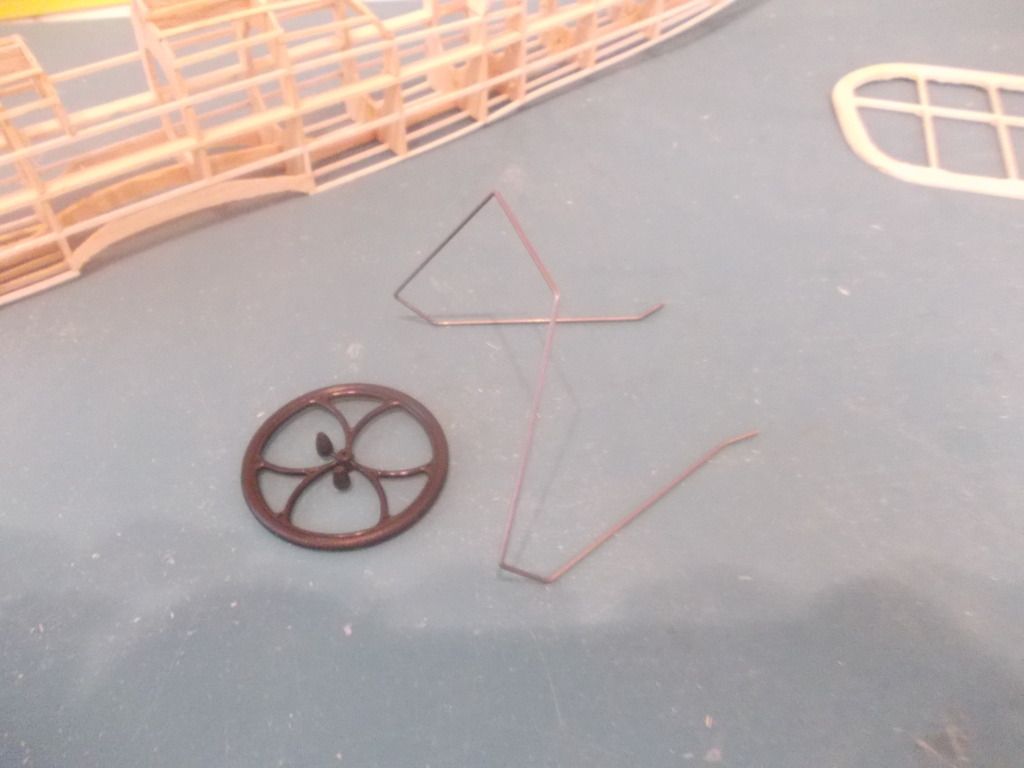
8. The last bend to fit straight up into the fuselage:
Image

The wire gear will now be secured to the model and I will 'sandwich' another piece of balsa (I think I'll make that out of Basswood!) over the gear wire that passes though the fuselage. I will then fill in the opening that the gear passes though the side of the fuselage will balsa to lock in the gear. The back end of the gear will be 'free floating' and give the gear some bounce on landings.

Mitch

PS: I went to my flying field today but it was too wet. Next w/e is Memorial Day. So it will be 2 weeks before I return to the 'Farm' , but when I am ready I can go to my school yard for glide and trim flights!
Mitch
 
Posts: 1347
Joined: Mon Aug 22, 2011 9:16 pm
Location: Kent, WA

Re: Building and Flying the DH4, kit 205

Postby Mitch » Mon May 18, 2015 9:01 am

I finished all the bracing and gussets and "L" parts last night:

Image

I ended up using some of the plywood from the kit to lock in the landing gear:

Image

I cut out all new struts from Bass Wood also. They will receive a coat of Dark Walnut stain from Minwax.

So now the model is ready for covering. I plan to make photo copies of the decals and use the copies. That is what I did for the SE5. The DH4 is moving along and should be ready for initial glide tests in a couple of days!

The landing gear wire stays in at this point, I can slip the bottom wing in and the rear wires fit in the holes of the bottom wing. with the bend in the wire they will not go in farther than I want and still have a springing bounce. The model will be tested with the wire gear, and when finished they will be covered with paper or balsa. I will tie an axle across the bottom of the landing gear struts and slip on the micro-lite wheels, covered with tissue paper as in my SE5.

Mitch

PS: The fuselage skeleton is feeling quite heavy at this point, due to the heavy gauge wire landing gear and plywood front nose. She should not have a problem to get in balance, and with 2 wings of 27 inches (189 square inches) she should have plenty of lift. Although I do know that 2 wings are not as efficient as 1 larger wing I think she will have enough lift to carry her weight.
Mitch
 
Posts: 1347
Joined: Mon Aug 22, 2011 9:16 pm
Location: Kent, WA

Re: Building and Flying the DH4, kit 205

Postby David Lewis » Mon May 18, 2015 10:26 am

Whenever you have a butt dihedral joint at the spar or LE, and you want to reinforce it*, it's better to use a balsa doubler than gussets. According to my tests, gussets don't carry significant load or add bending strength in this situation. The exception is strengthening rib-to-LE joints. Then gussets will give you more gluing area.

The side keels can be omitted entirely and the width of the formers can be reduced, and the fuselage will still be more than strong enough. You don't even need to replace the side keels with a 1/16" square stringer. I think the rationale behind side keels was to keep the completed fuselage half straight after it's removed from the building board. However, they don't appear to be necessary.

On this size model, .032" diameter steel wire is usually about the right size for landing gear.

* On a biplane the dihedral joints may be strong enough without reinforcement. Also, some builders have good results using 5-minute epoxy for these joints.

An airplane is always capable of generating enough lift to carry its weight. The only question is how fast it will have to fly to do it!
Last edited by David Lewis on Sun May 31, 2015 9:40 pm, edited 5 times in total.
David Lewis
 
Posts: 289
Joined: Thu Jun 13, 2013 11:47 am
Location: Orlando FL

Re: Building and Flying the DH4, kit 205

Postby Mitch » Mon May 18, 2015 11:09 am

Thanks for the info David... but it gave me an excuse to use "The Chopper" It was fun and easy to cut out the gussets:

Image
One more 'cutting tool' in my workshop... not necessary, but every FAC'er I know has one!

As far as the frames go, I sanded them all down. When assembled I removed wood from inside up to the side keels, up to frame B7. This is primaraly to increase the area for the rubber motor! I made sure there was a good glue bond at each frame. I drilled lightening holes in all the frames aft of that. If I did not have the side keel in the model would be in 2 parts now, top and bottom halves.

I am satisfied how my DH4 is coming along. Better fit and finish then when I was 12 y/o. I hope to have the model covered today.

Mitch

PS: I hope she will fly slow and graceful, like a lady dancing on the clouds... my SE5 flew very nice and at a slow pace...weaving back and forth like doing the Foxtrot in the air! Today's dance lesson is Argentine Tango! :D
Mitch
 
Posts: 1347
Joined: Mon Aug 22, 2011 9:16 pm
Location: Kent, WA

Re: Building and Flying the DH4, kit 205

Postby Mitch » Tue May 19, 2015 1:16 pm

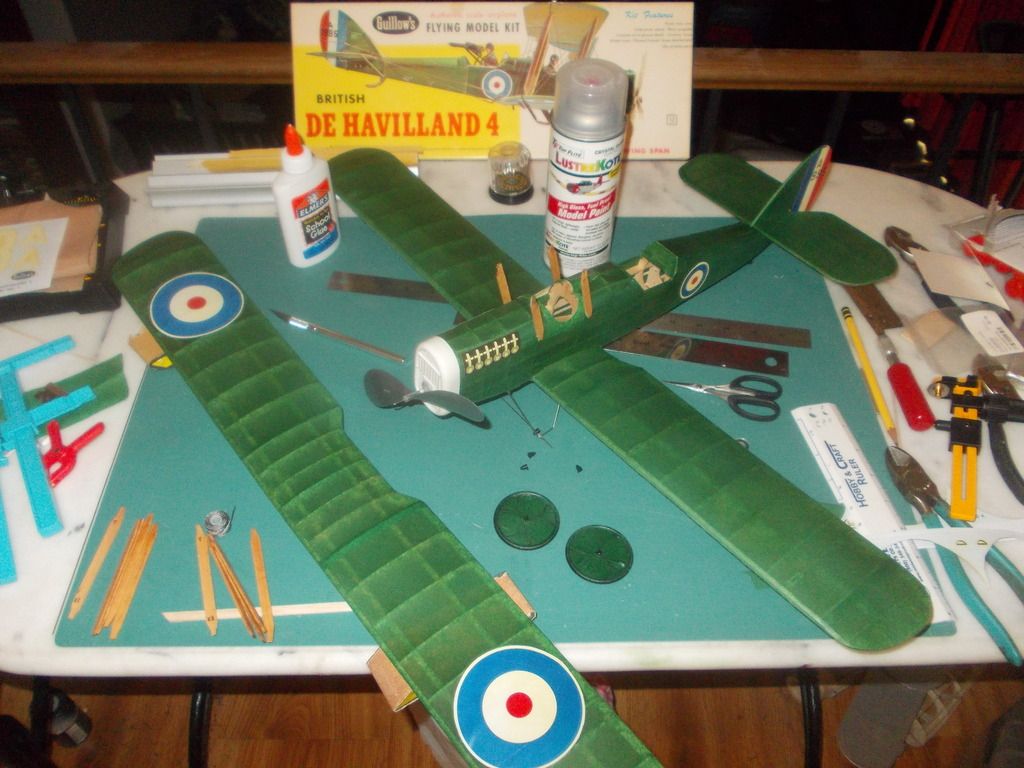
Let's see ... we are at day 6:

Image
Model is covered with one coat of spray dope. photo copies of decals are on. I will install the top wing then 1 more light coat of dope. And she will be ready for test flights in less than a week! I adjusted the position of the marking to miss the struts in the wings, and positioned the fuselage marking aft of the observer to avoid the rear peg. She will gets some test flights before the rest of the details are added. All the struts are stained with "Golden Pecan" the rear skeg is stained with "Dark Walnut". Once installed the landing gear wood will be "Dark Walnut" also.

I made a few mistakes, but have another kit on the way from ebay! I like the Green color. The bottom is "Desert Sand" not "Linen" I used paper I had on hand. I think it looks much better than the orange I did when I was 12 y/o.

So I test fitted the cabane struts. They are glued to the fuselage. When dry I will install the top wing and then fit the inboard, then the outboard struts. I will not use a template, just 'sight of eye' for alignment. That worked for my SE5!

Mitch

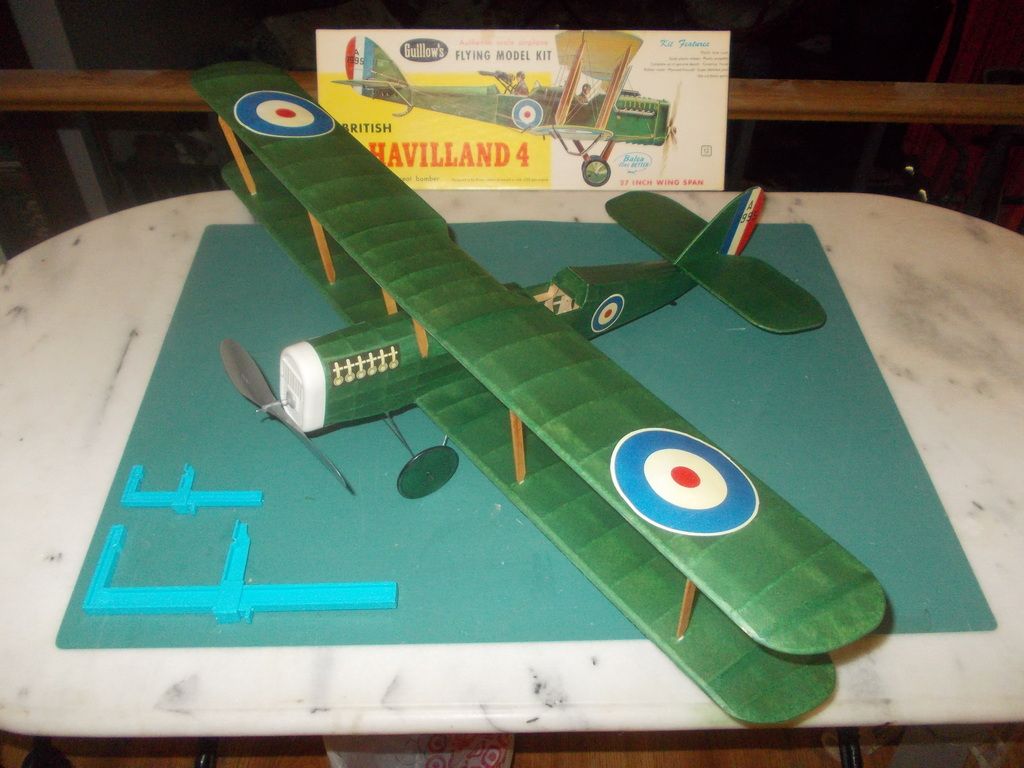
UPDATE: So after the center cabane struts were dry I installed the wing struts... Only poked one hole in the paper :x ! Oh well...

Here she is after 7, not 6 days!
Image
I used the large clamps to pull the wings together as the dihedral was off a bit between the two. I have 4 of each size of these clamps.

I want to let the glue dry for a day before I start glide tests... At this point she weighs exactly 100 grams! Moreover she is very close to balance! :D

Here is a picture of her bottom:
Image

I could have done better and lighter, but for a build in 7 days I am satisfied! :D
Mitch
 
Posts: 1347
Joined: Mon Aug 22, 2011 9:16 pm
Location: Kent, WA

Re: Building and Flying the DH4, kit 205

Postby NcGunny » Tue May 19, 2015 6:13 pm

Mitch did you by chance weigh your carriage for the landing gear? I am going to build the Sopwith for my only flying kit and had thought of making a carriage from round styrene stock. I have the wheels and wooden prop on order now,but figure the weight savings in the carriage will be eatten up on the weight of the prop. I ordered a bunch of the Japanese tissue I found on clearance so that might help in weight. Always love your pics man, nice job.
NcGunny
 
Posts: 203
Joined: Fri Apr 24, 2015 5:48 pm
Location: New York

Re: Building and Flying the DH4, kit 205

Postby Mitch » Tue May 19, 2015 7:49 pm

LOL, Funny you should ask about the landing gear wire... THAT WAS ONE OF MY MISTAKES!!! I used the wrong wire. I have a lot and used a piece that was nearest to me. From a 400 kit, then realized the wire in the 200 kit was much lighter weight! ARGHHHHHHHHHHHHHHHHHHHHHHHHHHHHHHHHHHH!

Be careful making substitutions and make sure what you use is strong enough for the job.

I used a section of the lighter wire for the axle. My new DH4 kit arrived at my house today but I was not home. When I get my new (ebay) kit from the Post Office I will weigh the wire (full length) and compare to the heavier wire (full length) I used. I am also planning changes to the build for my next DH4. Contest Balsa, Bent Tail, Stick construction of fuselage, etc. I think with a little work she will be a competition model.

With this model weighing 100 grams I know she will fly, but not set any records!

Mitch.

PS: Is that the 800 Camel or the old 100 Camel?
Mitch
 
Posts: 1347
Joined: Mon Aug 22, 2011 9:16 pm
Location: Kent, WA

Re: Building and Flying the DH4, kit 205

Postby NcGunny » Wed May 20, 2015 8:07 am

I had ordered a 800 series camel but when I got the kits from the thrift shop I acquired a much older version. Not at home so I am not sure of the model number. Its probably not the best kit for my attempt at a flier but they are duplicates.
NcGunny
 
Posts: 203
Joined: Fri Apr 24, 2015 5:48 pm
Location: New York

Next

Return to General Building Questions

Who is online

Users browsing this forum: No registered users and 7 guests

cron