Bebe project starting

Ask other modelers for a little help / knowledge ?

Bebe project starting

Postby PHS Paddy » Tue Mar 08, 2011 2:19 pm

Well, Bill D’s Bebe Completed Neiuport 11 thread did it and a grand piece of work it is.

Yesterday I ordered the 200 Series Nieuport 11 from Guillow’s and have now started a search for Williams Brothers 1/12 scale Le Rhone cylinder kits so I can start engine construction. I’ve already began my refresher study for carving props too. This will be a build for static display only so I’ll not have to watch weight. If I do an acceptable build then I’ll display it from the ceiling here in the command center. Fingers crossed. :wink:

It’s been sometime since I did any building in the stick and tissue area but I’m really looking forward to this. I enjoy WW I Aero history and the Lafayette Escadrille Nieuports are right up there on the short list.

I see there are a lot of good threads here discussion covering techniques and cover types so I’ll be busy search and reading here on-line.

I look forward to joining you, at least in lurk mode.

All the best,

Paddy :D
PHS Paddy
 
Posts: 20
Joined: Mon Mar 07, 2011 5:07 pm
Location: Wisconsin

Postby cliffm » Tue Mar 08, 2011 3:25 pm

If you have prior experience with the old die cut wood you will find this to be sweet, indeed a cadillac of models. Enjoy.
cliffm
 
Posts: 370
Joined: Fri Feb 27, 2009 11:08 am
Location: fairdale N D

Postby BillParker » Tue Mar 08, 2011 5:19 pm

Lots of kewl stuff here:

http://www.williamsbrothersmodelproducts.com/rc.html

never occurred to me.... hummmm....
William H. Parker Jr. (Bill Parker)
President, Parker Information Resources
http://www.parkerinfo.com/ap.htm bparker@parkerinfo.com
BillParker
 
Posts: 1031
Joined: Sat Jan 19, 2008 1:21 pm
Location: Houston, Texas

Postby PHS Paddy » Tue Mar 08, 2011 6:27 pm

cliffm wrote:If you have prior experience with the old die cut wood you will find this to be sweet, indeed a cadillac of models. Enjoy.


Hi cliffm,
That is really good news and its one of the things that turned my head when Bill D mentioned that fact. :D

BillParker wrote:Lots of kewl stuff here:

http://www.williamsbrothersmodelproducts.com/rc.html

never occurred to me.... hummmm....


Hello Bill,

As you know at the Williams Brothers website under Tips and Tricks is a very good article on building a crankcase, in this case for the Le Rhone cylinders.

http://www.williamsbrothersmodelproducts.com/tips.html

I did send Williams Brothers an e-mail earlier today asking if I may purchase the 1/12 scale Le Rhone cylinders direct from them as I’m not having any luck on E-bay or any where else when searching through the web. Haven’t heard back from WB at this time.

Interesting that I'm even beginning to think about subscribing to Flying Models Magazine which is still my favorite after all these years.

Thanks for stopping by gents and I appreciate your input.

Paddy :)
PHS Paddy
 
Posts: 20
Joined: Mon Mar 07, 2011 5:07 pm
Location: Wisconsin

Postby PHS Paddy » Tue Mar 15, 2011 9:06 pm

Well, the Nieuport 11 arrived yesterday afternoon and I spent time reading the little pre-construction sheet and then started to study the plans. ( This entry is primarily about checking out the photo posting protocol.)

Image

This afternoon I had a chance to actually get the hanger crew in start up mode and decided the first step would be making patterns for the scale prop since this will be a static build. Prop face and profile where traced then rubber cemented to light weight card stock. Tomorrow I’ll cut the patterns out using a #11 blade so I can trace the out line on to basswood in prep for shaping. The reason for the card stock patterns is to facilitate making up more than one prop block.. I’ll probably use one of the extra props for stain and paint practice.

Image

Anyway, off and running with what appears to me at this point to be a fine kit.

Paddy :D
PHS Paddy
 
Posts: 20
Joined: Mon Mar 07, 2011 5:07 pm
Location: Wisconsin

Postby ADW 123 » Tue Mar 15, 2011 9:55 pm

looks like you are having fun! keep it up.
ADW 123
 
Posts: 1158
Joined: Mon Feb 22, 2010 5:22 pm
Location: Cincinnati, Ohio

Postby PHS Paddy » Sun Mar 20, 2011 6:15 pm

Progress report for 3/20/10.

I’ve found only one part that was a disappointment and that’s the firewall which was badly die crunched. Not a big problem. I’ll cut the part from 1/32 plywood and replace it.

The following photo shows dry fitting the formers to set the fuselage crutch(?) widths.

Below the fuselage you can see the templates I’m using to help shape the scale prop. I cut the prop blank on the scroll saw and it is now ready for carving and sanding.

Image

I have a question about thinning the Ambroid glue that I’ll be using and wondering if anyone adds some amount of acetone to thin it out? I didn’t do that in the old days for outdoor free flight aircraft but only with construction of indoor flyers such as a Penny Plane.

Paddy
PHS Paddy
 
Posts: 20
Joined: Mon Mar 07, 2011 5:07 pm
Location: Wisconsin

Bebe project starting

Postby BeeCee » Mon Mar 21, 2011 9:15 am

Paddy,
Couldn't help noticing in your build picture, the small angle irons and other tools that suggest a toolmaker trade. I use a lot of my tool&die stuff to make my builds square and true. Angle irons, 1-2-3 blocks tee slot keys,mikes, verniers, etc. Just wondering if you're a retired journeyman too.

Regards, BeeCee
BeeCee
 
Posts: 7
Joined: Wed Jul 29, 2009 3:33 pm
Location: Massachusetts

Re: Bebe project starting

Postby PHS Paddy » Mon Mar 21, 2011 12:03 pm

BeeCee wrote:Paddy,
Couldn't help noticing in your build picture, the small angle irons and other tools that suggest a toolmaker trade. I use a lot of my tool&die stuff to make my builds square and true. Angle irons, 1-2-3 blocks tee slot keys,mikes, verniers, etc. Just wondering if you're a retired journeyman too.

Regards, BeeCee


Hello BeeCee,

No I’m not but I have always had a great deal of respect for you machinist, tool and die maker types and fascinated to watch your handling of tools, measuring devices, practical designs, and your great ability to diagnose problems when they pop-up or even before they pop-up. Wish I had spent more time in machinist classes when I had the chance. I was just lucky to have been raised by a father who was great with his hands and a grandfather that was a mechanical whiz IMO. Fond memories.

Love good tools and always on the lookout for any that will improve my enjoyment of the hobby and which give you a chance to do a better job with fewer projects ending in the trash bin. :( :lol: :lol:

Best regards,
Paddy :)
PHS Paddy
 
Posts: 20
Joined: Mon Mar 07, 2011 5:07 pm
Location: Wisconsin

Postby Phugoid » Mon Mar 21, 2011 3:40 pm

Nice work Paddy. Following my complaints on my latest build thread....... what are the laser cut parts like? Are they Micron precise?

On the point of wooden props I want to try and carve one for a flying model at some point, is it something you have experience of?

Andrew
Phugoid
 
Posts: 952
Joined: Wed Jan 20, 2010 8:17 am

Postby PHS Paddy » Tue Mar 22, 2011 2:49 pm

Phugoid wrote:Nice work Paddy. Following my complaints on my latest build thread....... what are the laser cut parts like? Are they Micron precise?

On the point of wooden props I want to try and carve one for a flying model at some point, is it something you have experience of?

Andrew


Hi Andrew,

As to the first question, and I hesitate a bit in answering since I’ve had little experience with laser cut parts, but I’ll try to give you what I feel is an accurate answer at least from my prospective.

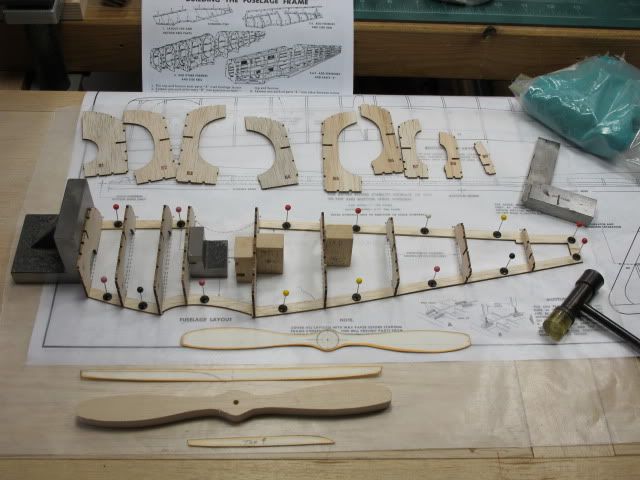
If I use a scale of 1 to 10, and being somewhat of a conservative bloke, I’d rate these parts at around 8.5. If you use an Optivisor and look closely some of the cuts, though tiny, seem to be almost like an out of true fence on a circular saw cut. Now, having said that I would purchase the Nieuport 11 kit again with out blinking an eye. In fact somewhere down the road the DR.1 tri-plane is on my list also.

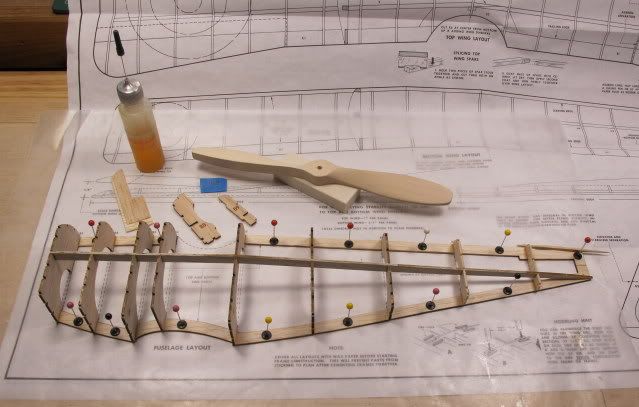
Another thing is the laser is setup to make tiny nubs periodically to help retain the part to the part boards (I think) and need some careful sanding IMO. How do I know about careful sanding…… well, I now need to cut my own fuselage formers B8 and B9 because of being over enthusiastic about clean up. :(

On the prop carving I have done a total of three carved props for an outdoor flyer called the Cloud Tramp. They were my first attempts and it was a fun experience and those little kites flew well. I would take a picture and show you but the shop attack cats managed to imprint them with teeth marks through my own carelessness. :(

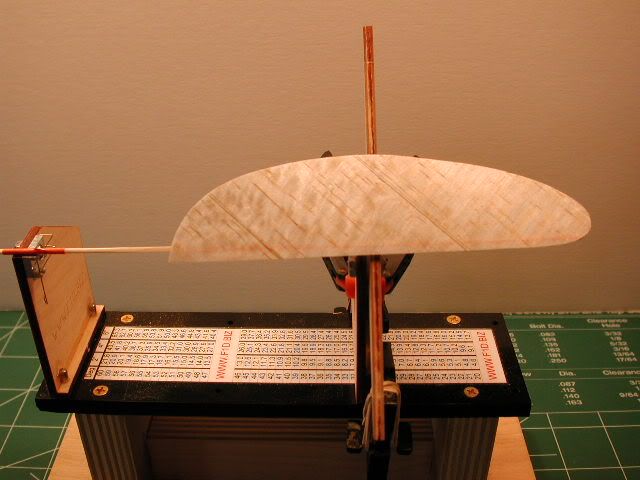
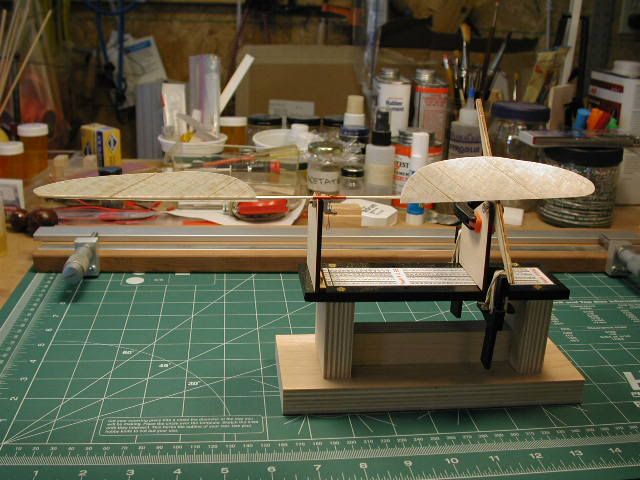
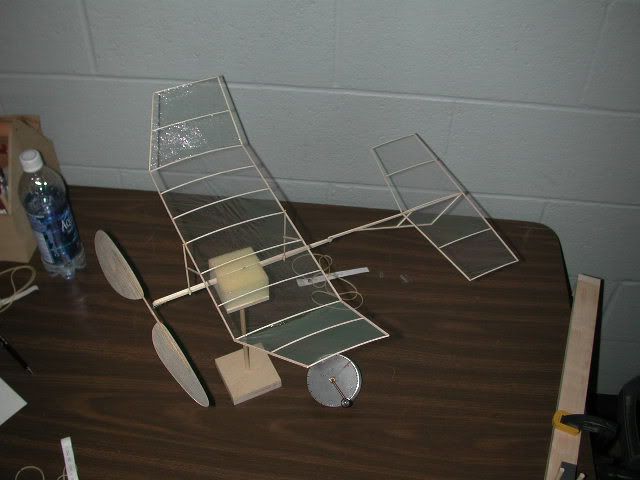
Now my best prop making occurred when I made a prop for my indoor Penny Plane using the prop forming block technique. Please see page 75 of the Don Ross book Rubber Power Model Airplanes. I think this approach can also be successfully used for small outdoor flyers and allows you to build a replacement blade or blades much quicker than carving a prop blank. In effect you carve one forming block and then you can make multiple blades that are formed exactly the same. It’s not that difficult to do and is well worth the time. My first attempt at this was for my indoor Penny Plane that gave me a best time of 6 minutes and 31 seconds in a National Guard Armor with only a 22 foot ceiling. That was a grand experience. The following are some photos of the formed block prop blades being setup and glued using a pitch gauge and then mounted on that grand little Penny Plane where it went to work.

Image

Image

Image

So, a very good place to start if you want to build you own working props, and I hope you do for its fun and rewarding, is study Chapter 8 and 9 of Don’s book. If I can make a few props then anyone can do it. Just follow the cookbook.

Didn’t mean to take up so much band width and drop a tome on your Andrew. :lol:

Regards,
Paddy
PHS Paddy
 
Posts: 20
Joined: Mon Mar 07, 2011 5:07 pm
Location: Wisconsin

Postby Phugoid » Tue Mar 22, 2011 3:29 pm

wow, super precise work Paddy, I take my hat off to your skills

I think that you really know your onions!

Andrew
Phugoid
 
Posts: 952
Joined: Wed Jan 20, 2010 8:17 am

Postby PHS Paddy » Wed Mar 23, 2011 8:27 am

Thanks for that Andrew.

If I’ve learned anything at all about this endeavor of ours, or any endeavor for that matter, it comes from standing on the shoulders of others that have shared their acquired knowledge and techniques with us as you know. One can only hope that in payment we pass on or share something we’ve learned that will help others to enjoy this grand hobby too.

Paddy
PHS Paddy
 
Posts: 20
Joined: Mon Mar 07, 2011 5:07 pm
Location: Wisconsin

Postby Phugoid » Wed Mar 23, 2011 4:54 pm

"If I have seen a little further it is by standing on the shoulders of Giants"

Sir Isaac Newton.
Phugoid
 
Posts: 952
Joined: Wed Jan 20, 2010 8:17 am

Postby PHS Paddy » Sat Mar 26, 2011 7:55 pm

Today’s progress:

Finished making replacement parts for formers B8 and B9 for the port side of the fuselage. I decided to laminate two pieces of 1/32 balsa cross grain with each piece to pickup some strength for the new parts and then proceeded to glue in the side longeron.

Since I double glue I took the drying time to continue work on the prop. I did managed to get the back of the prop close to where I want it.

Image

Looking forward to pulling up this fuselage half and start adding the starboard formers.

Hope everyone is off to a good weekend. Cold here but sunny for a change.

Paddy :)
PHS Paddy
 
Posts: 20
Joined: Mon Mar 07, 2011 5:07 pm
Location: Wisconsin

Next

Return to General Building Questions

Who is online

Users browsing this forum: Bing [Bot] and 13 guests