900 Series T28 North American Trojan

Ask other modelers for a little help / knowledge ?

900 Series T28 North American Trojan

Postby Phugoid » Mon Oct 18, 2010 2:46 pm

Another cheap E-bay find, £6 ($10)

This is quite comprehensive kit and contains all of the basics.

The wood as per usual very variable. One of the sheet B's weighs twice the other and is 20% thicker. It is nearly off my charts for balsa density at 15lb/ft^3 The sheet A is good and is around 7lb.

I shall re-cut the majority parts on the B sheets. This isn't so much for weight but the two side pieces should be of equal stiffness as they are bowed out to make the sides. The completely opposite end of the scale wood density and stiffness for each side would mean a distorted fusalage

Image
Phugoid
 
Posts: 952
Joined: Wed Jan 20, 2010 8:17 am

Postby scigs30 » Tue Oct 19, 2010 7:52 pm

I just bought this kit and I am impressed with the quality of wood. All 3 sheets are 7lb/ft balsa, will make a great flyer. I don't remember the canopy being 2 pieces. I also bought the Aeronca to replace the one I just crashed and I must say I am disappointed with Guillows. I thought maybe they were heading in the right direction with their wood until I opened this kit. The average weight of the balsa is 22lb/ft with the heaviest being 29lb/ft. I don't care how much you sand and shave, she is not going to fly on rubber. I will package this kit and send it back to Guillows. I have proven over and over that Guillows kits can fly great if they supply someone light balsa. I would like to see all rubber kits with 7-8 lb/ft balsa but would settle for under 10lb/ft.
scigs30
 
Posts: 844
Joined: Mon Nov 06, 2006 11:31 am

Postby Phugoid » Wed Oct 20, 2010 5:24 am

Yeah, if i was a resident of the U.S.A. I would have sent the sheets back and asked for a replacement, but I think that they would never entertain sending new wood all the way over here bearing in mind the low cost of the kits.

I agree, I think if the sheets were less than 10Lbs then I would always be happy enough to build with it esp if the sheets were matched for density when there are two sheets with identical parts on like this one.....

The questions is with the two sheets that I had was "would you have been able to have built the model at all?" The answer would be "no" No matter of skill or experince would have seen that construction go together properly. In a way that's fine for us, but a "newbie" would just be put off straight from the outset, which for Guillows is bad for buisiness in an era when new modelers are short in supply

There is some snobishness about these kits, I was never a fan myself but when you realise that they are made for building and flying FUN rather than for "serious" guys (like some of the guys on the SFA) you get to like them. Seeing my £10 Piper Cub flying like it did, and watching your flight videos is testament to that! I just wish like yourself the niggles with the quality of the balsa could be sorted out.....
Phugoid
 
Posts: 952
Joined: Wed Jan 20, 2010 8:17 am

Postby Phugoid » Wed Oct 20, 2010 6:26 pm

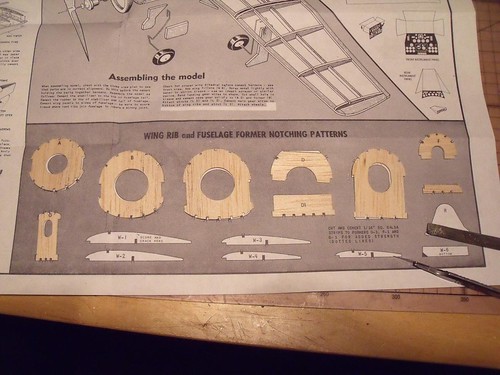
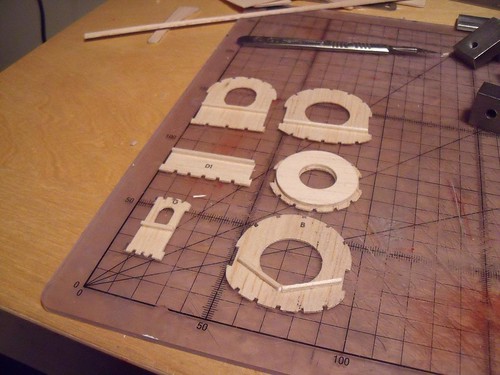
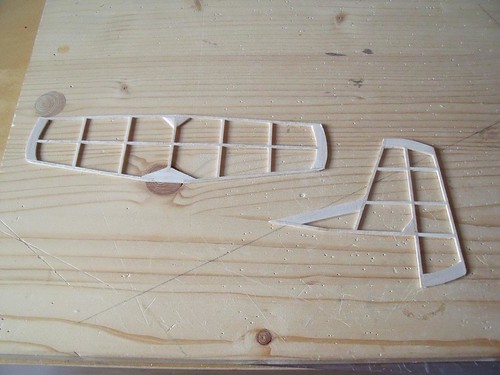
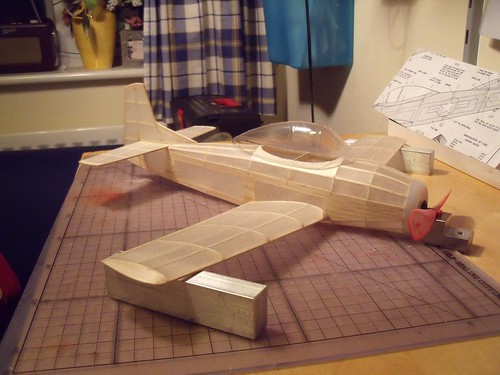
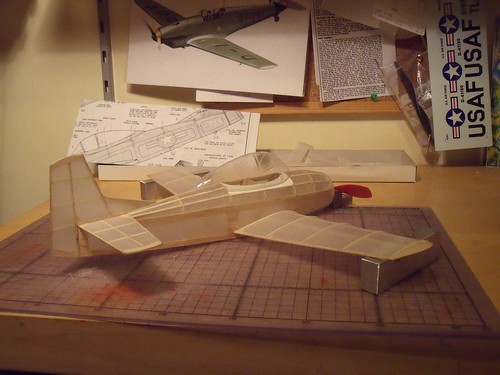
The B sheet formers have been notched to the plan. Not having the notches die cut in some ways makes this kit superior than others since you can make the notches a good size and nice and tight to the stringers.

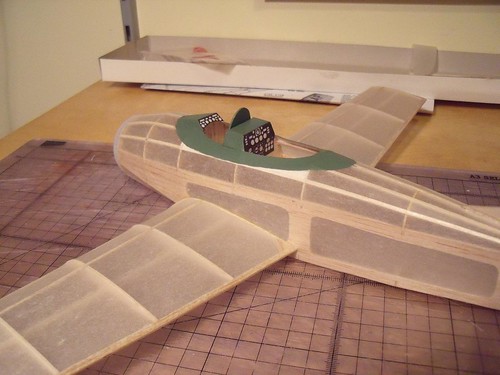
I've strengthened up all of the formers where the grain is verical including cutting a round strengthener for former "A". These will add little weight but will make the whole thing a lot more robust during construction and will help the model survive to odd dink.

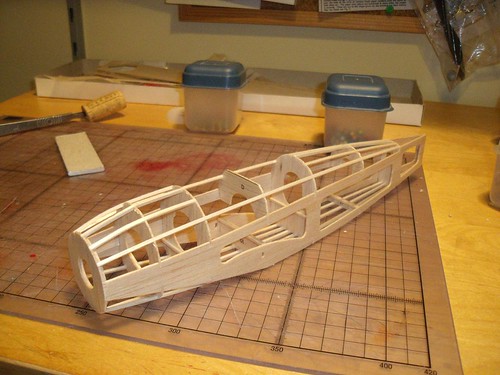
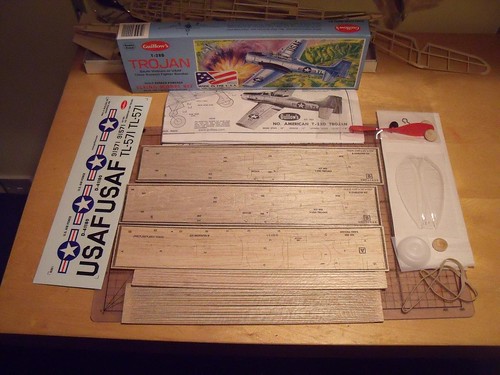
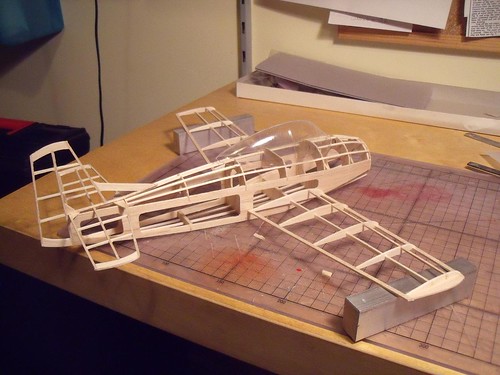
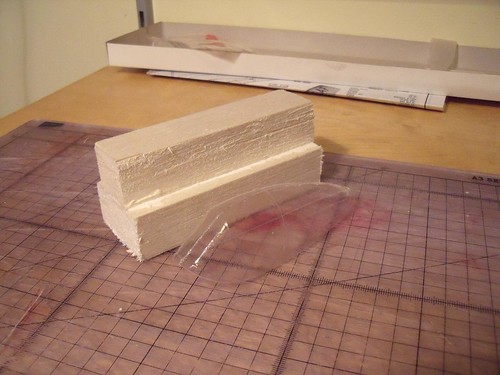
I did not use the stringers in with the kit for the fuselage. They are quite light but very stiff, which makes them very valuable for other projects as fin and tailplane leading edges and for wing spars for example. New stringers were made by cutting 1/16" strips from some 8.5 lb balsa sheet.

I also added a couple of stiffners between the formers A and B from 1/16" x 1/4 strip. At the end of the day I'll be adding noseweight here anyhow so I might as well make the weight serve some structural purpose.

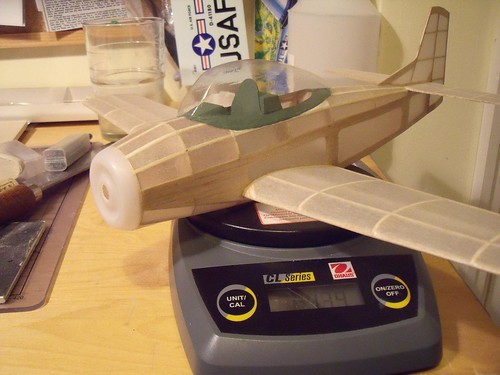
The construction was a little tricky to ensure that that the fuselage was nice and straight but I think that it turned out ok.

Image

Image

Image
Phugoid
 
Posts: 952
Joined: Wed Jan 20, 2010 8:17 am

Postby Phugoid » Sat Oct 23, 2010 7:12 am

I've now built up the tail plane and fin.

Because I was going to cut out new parts from the B sheets I cut new fin and tail plane parts from light 1/16" sheet.

I used the guillows 1/16" strips for the outside and spanwise pieces and used some 1/16" strips from light balsa for the chordwise pieces. I think that the tail surfaces will need to be quite strong on this one as I think it could be quite tricky to trim and will fly quite fast. I've notched the tips of bot the tail plane and fin to accept the strips, I think that this makes for a stronger joint in those positions.

Image
Phugoid
 
Posts: 952
Joined: Wed Jan 20, 2010 8:17 am

Postby Phugoid » Sat Oct 23, 2010 2:19 pm

All the basic frames are done.

I Recut all of the ribs from light 1/16" sheet using the very hard ones as templates (they made very good templates) Even though the new ribs are thicker wood they weighed a lot less. I weighed all of the ribs from the original sheet and they weighed 0.6g. All of the new ribs ie twice the number of new parts weighed only 0.8g. I ommited a rib 2 on each side because I intend to fly "wheels up". I will add corner gussets to the wings before covering. It is quite a good looking albeit chubby little fellow.....

Image

The canopy is very tricky to make and less than ideal. I assume that guillows had to make it in two halves so that it would fit in the box. It weighs 3g which is a lot when the rest of the airfame weighs only 8g so is quite heavy. I think it would be impossible to join the two halves together invisibly but I've tried the best I can. I have considered plunge moulding a new canopy which would be in one piece and would be lighter, but I don't think it is worth the outlay in time and effort.

Image
Phugoid
 
Posts: 952
Joined: Wed Jan 20, 2010 8:17 am

Postby cliffm » Sat Oct 23, 2010 8:02 pm

My wife thinks I'm crazy for saving every piece of molded clear plastic from packaging of different items but they sometimes come in handy for just the circumstance you have here. P.S. I am one up on the wife, I know I'm crazy.
cliffm
 
Posts: 370
Joined: Fri Feb 27, 2009 11:08 am
Location: fairdale N D

Postby Phugoid » Tue Oct 26, 2010 5:37 pm

I have a few bits, but I'm waiting for easter to collect more. The plastic they use for packaging the kids chocolate Easter eggs is ideal for canopy forming according to what I've read.

I've now covered the wings and tail surfaces, no wrinkles at all which is nice. I've put in 1/32" washout in the left wing and 1/16" in the right, hopefully this will stop it spiraling in on the left turn by keeping the left wing up.

Image

What you see here weighs around 9.5g.
Phugoid
 
Posts: 952
Joined: Wed Jan 20, 2010 8:17 am

Postby Phugoid » Sun Oct 31, 2010 5:03 am

I've now covered the fuselage and glued on the nosecone, fin and tail plane.

The "nipple" on the thrust button seemed to make the prop stick out a long way from the nose, so I've cut it off and smoothed over the end before fitting the prop. As always the Guillows props are too small, but I'll stick with it for now and perhaps try a larger prop later on.

Image

Image

I've just got to glue the wings on, and add the cabin detail before I paint it. The colour on the box is silver, but Silver is really tricky to get right so I've seen a few of these on the internet in light grey so I'll probably go for that.
Phugoid
 
Posts: 952
Joined: Wed Jan 20, 2010 8:17 am

Postby scigs30 » Sun Oct 31, 2010 10:30 am

Build looks great. I thought the canopy used to be one piece, but I am not 100 percent sure. If it was, then I might order an older version on ebay and use that canopy.
scigs30
 
Posts: 844
Joined: Mon Nov 06, 2006 11:31 am

Postby Phugoid » Sun Oct 31, 2010 12:31 pm

I think the canopy is in two halves to get it in the box, I don't think that that it would have fit in otherwise. Perhaps the older ones came in bigger boxes?

It is a real shame as it does marr the looks of what is otherwise quite a handsome little model.
Phugoid
 
Posts: 952
Joined: Wed Jan 20, 2010 8:17 am

Postby Phugoid » Mon Nov 01, 2010 5:18 pm

I've now glued the wings on and fitted the interior parts to the cockpit. The cockpit has ben painted with Humbrol "cockpit green":

Image

After much musing I've decided to make a new canopy. The heavy two part one in the kit just bugged me too much.

I'll plunge mould the new one. The "framework" won't be able to be made, so this will simply have to be painted on. The payback for this simplification should be a canopy which will probably be only 1/3rd of the weight and be in one piece without the horrible join line.

I'm slightly worried about the overall size and depth of this one but I'll give it a go and see what happens

This process starts with a lump of wood. If anyone wants to know more then I'll post some more pictures as I go......

Image
Phugoid
 
Posts: 952
Joined: Wed Jan 20, 2010 8:17 am

Postby scigs30 » Mon Nov 01, 2010 6:00 pm

I am bugged by the 2 piece canopy but will probably end up using it since I am too lazy to make another. I think if I were to make another canopy, I would just pour my mold material into the canopy and have an instant male mold.
scigs30
 
Posts: 844
Joined: Mon Nov 06, 2006 11:31 am

Postby Phugoid » Mon Nov 01, 2010 6:39 pm

I don't have stuff to do that and I sometimes have a strange and some might say sadidtic desire to spend an hour or so hacking and sanding away at a bit of balsa.....

This is the "buck" pretty well much hacked out. I need to infill where I joined the two pieces and sand the profile smooth but it's pretty well much there.

Scigs do you want one if they work out ok?

Image
Phugoid
 
Posts: 952
Joined: Wed Jan 20, 2010 8:17 am

Postby Phugoid » Tue Nov 02, 2010 6:37 pm

To see whether I got the shape right I've tried the roughed out "buck" on some plastic sheet that I found in my desk drawer at work. It was quite thick, but I think it needed to be to be able to get the depth of moulding without the material tearing. Things worked out ok:

Image

and the fit is fine:

Image

I was over ambitous with the potential weight saving. The new canopy is still half the weight of the original at 1.5g, but not the 1/3rd I thought I might get. Since the whole model including the canopy is just less than 14g that 1.5g is significant, plus of course no nasty join line.

The material was quite thin at the flanks of the moulding, so next time I won't plunge in quite so deep.

I can now give the buck some spit and polish to get the final moulding off it
Phugoid
 
Posts: 952
Joined: Wed Jan 20, 2010 8:17 am

Next

Return to General Building Questions

Who is online

Users browsing this forum: No registered users and 31 guests