Stearman PT-17 in progress
32 posts
• Page 2 of 3 • 1, 2, 3
![]() by cliffm » Wed Oct 20, 2010 6:59 pm
by cliffm » Wed Oct 20, 2010 6:59 pm
Jack, I guess every body highjacked your post and did'nt even give you a clue,sorry. When I put mine together I made sure the struts fit nicely in the slots with the edges bottoming out equally put Elmers in the slots and just set the wing evenly in place. I have some tall paint bottles that I placed at the tips of the top wing and spaced them equally from the bottom tips and it dried fitting very nice. Hope this helps.
- cliffm
- Posts: 370
- Joined: Fri Feb 27, 2009 11:08 am
- Location: fairdale N D
Fear of Crashing
![]() by jack lee » Thu Oct 21, 2010 7:04 pm
by jack lee » Thu Oct 21, 2010 7:04 pm
Thanks for the reality check. I somehow thought I could build one to fly, day after enjoyable day, with no damage: Everyman's dream I guess.
I've just started the tissue, working very s l o w l y and enjoying the craft of it. I'll post some photos soon.
I've just started the tissue, working very s l o w l y and enjoying the craft of it. I'll post some photos soon.
- jack lee
- Posts: 44
- Joined: Mon May 31, 2010 3:53 pm
- Location: Sonoma County, CA
High Wing
![]() by jack lee » Thu Oct 21, 2010 7:46 pm
by jack lee » Thu Oct 21, 2010 7:46 pm
Thanks, Cliff.
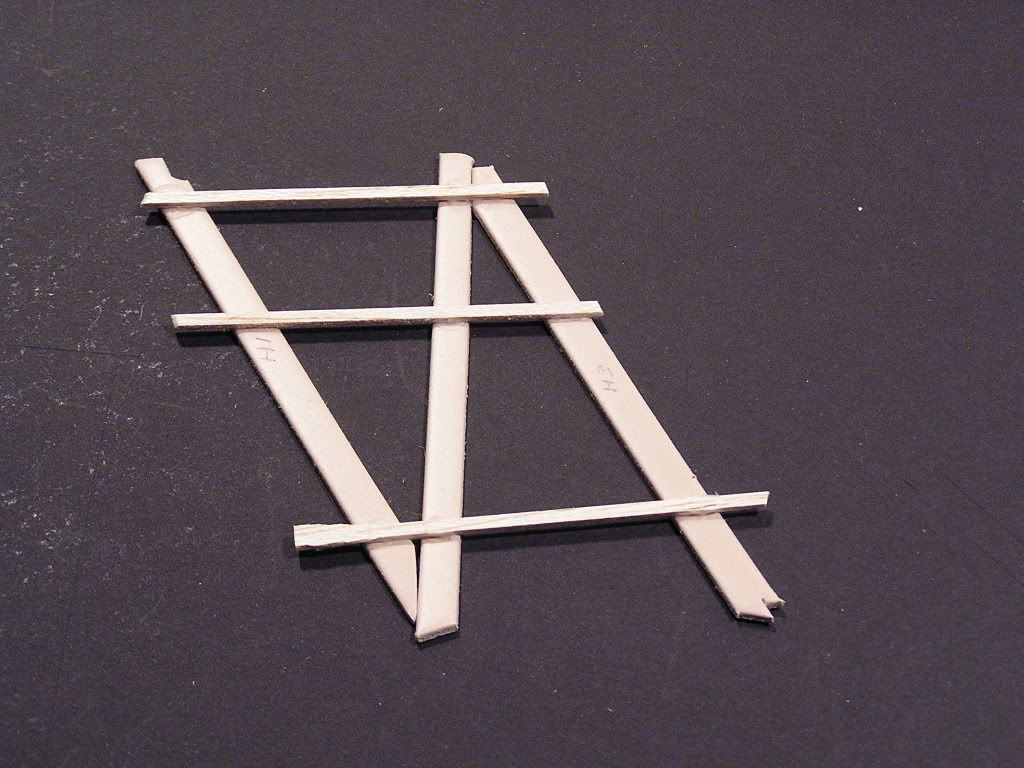
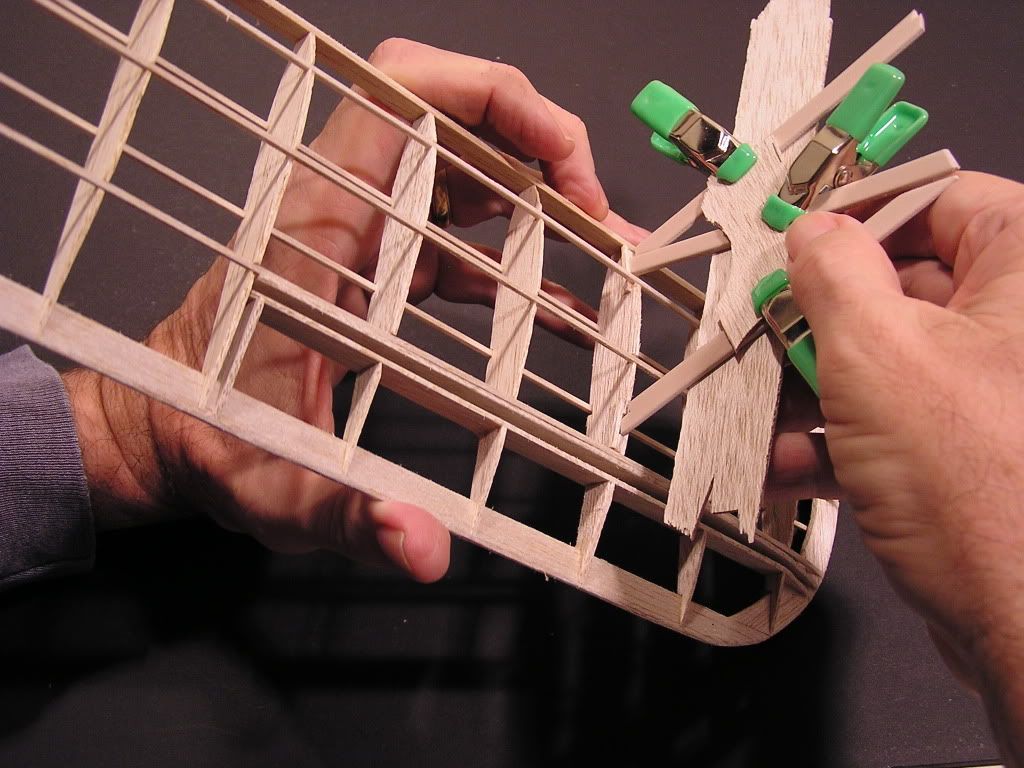
I experimented with two different "temporary" pre-fab wing struts. The photos are below. The alignment was a big problem so I started to think about how to stick build them while holding the high wing in place. Your paint bottle system sounds good. Thanks for your tip about adjusting the rigging too. I was going to build some sort of scaffold.
For sure the big element is to trim the struts first, so they fit. I've been carefully trimming them; it's awkward though. I've also been considering using balsa instead of the vinyl that comes in the kit. I like working with the wood, better.
Being so much in the dark, I put off the wing challenge till later and started the tissue process since I have to tissue the wings first anyway.
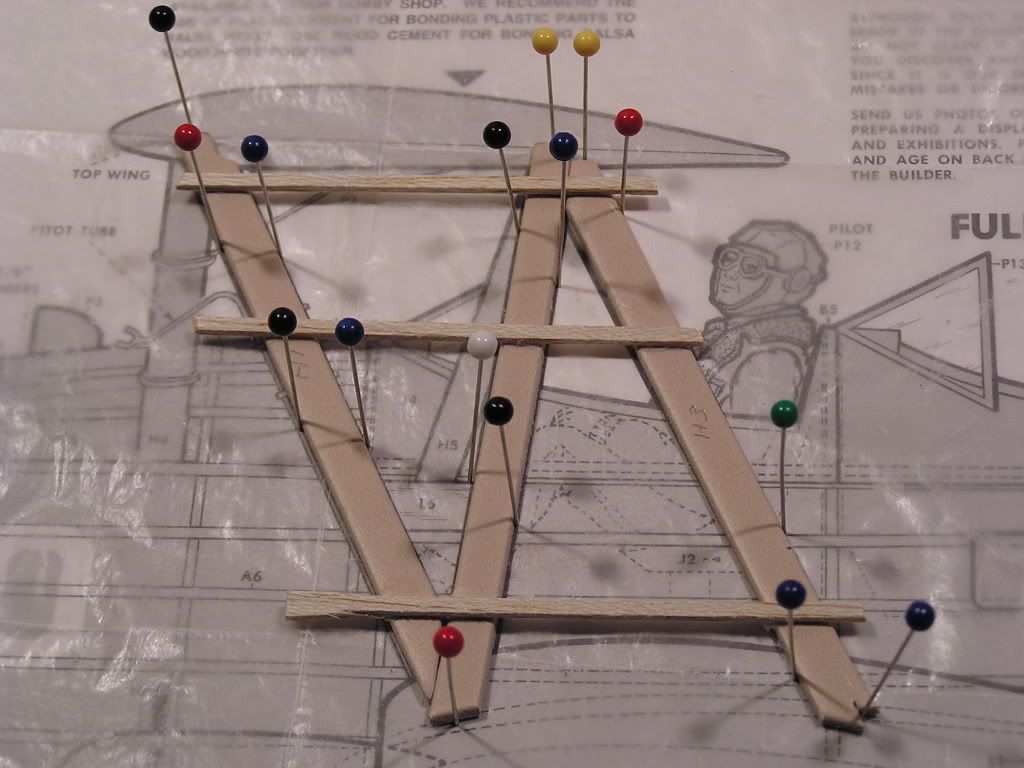

High Wing
Low Wing
I experimented with two different "temporary" pre-fab wing struts. The photos are below. The alignment was a big problem so I started to think about how to stick build them while holding the high wing in place. Your paint bottle system sounds good. Thanks for your tip about adjusting the rigging too. I was going to build some sort of scaffold.
For sure the big element is to trim the struts first, so they fit. I've been carefully trimming them; it's awkward though. I've also been considering using balsa instead of the vinyl that comes in the kit. I like working with the wood, better.
Being so much in the dark, I put off the wing challenge till later and started the tissue process since I have to tissue the wings first anyway.
High Wing
Low Wing
- jack lee
- Posts: 44
- Joined: Mon May 31, 2010 3:53 pm
- Location: Sonoma County, CA
![]() by cliffm » Fri Oct 22, 2010 10:28 am
by cliffm » Fri Oct 22, 2010 10:28 am
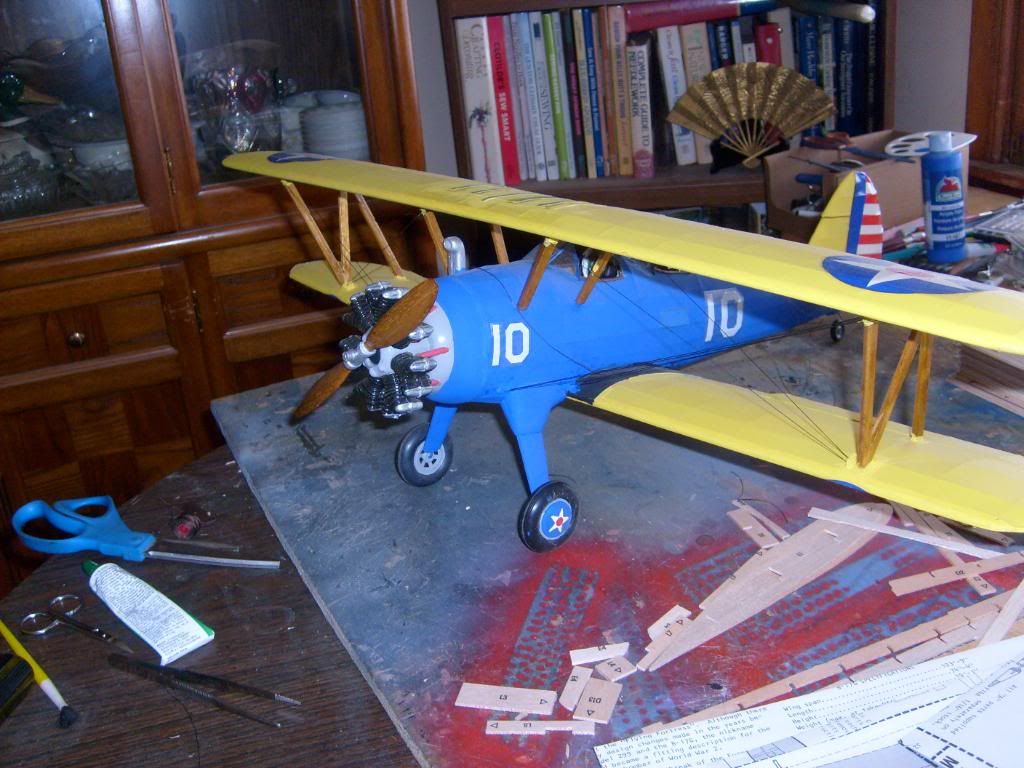
When I was putting the plastic propreller halfs together too much glue got put into the process and I ended up with apiece of jelly so I ended up carving one from balsa. After stain and varnish it looked so good that I got rid of the plastic struts and made them of wood too. The rubbery ugly vinyl in the kit to me is a poor substitute for what should be plywood or maybe basswood, anything is better than that vinyl that needs special attention to get decent fusion with wood and any slight pressure makes it warp and give. Anyway, the wood worked much better for me.
- cliffm
- Posts: 370
- Joined: Fri Feb 27, 2009 11:08 am
- Location: fairdale N D
![]() by jack lee » Fri Oct 22, 2010 4:46 pm
by jack lee » Fri Oct 22, 2010 4:46 pm
Cliff,
Maybe the vinyl adds some strength for the flying model? But, I exactly agree with what you're saying about the balsa, Thanks!
Since I'm building static I'll give it a try.
If you have any photos of your Stearman, I'd love to see them.
Maybe the vinyl adds some strength for the flying model? But, I exactly agree with what you're saying about the balsa, Thanks!
Since I'm building static I'll give it a try.
If you have any photos of your Stearman, I'd love to see them.
- jack lee
- Posts: 44
- Joined: Mon May 31, 2010 3:53 pm
- Location: Sonoma County, CA
![]() by Phugoid » Fri Oct 22, 2010 5:23 pm
by Phugoid » Fri Oct 22, 2010 5:23 pm
I'm with Cliffm on the use of wood it will be much better even on a flying model I'd have thought....
I've used Basswood before. It's probably the best thing to use unless you can get a small piece of 1/16" ply.
Good luck with your build, I'm really looking forward to seeing the end result.
I've used Basswood before. It's probably the best thing to use unless you can get a small piece of 1/16" ply.
Good luck with your build, I'm really looking forward to seeing the end result.
- Phugoid
- Posts: 952
- Joined: Wed Jan 20, 2010 8:17 am

![]() by cliffm » Sat Oct 23, 2010 7:38 pm
by cliffm » Sat Oct 23, 2010 7:38 pm
Well, I thought I had the picture transfer method down, but, my iliteracy on the computer is showing again. I got them transfered to photobucket but getting them on this forum must have some special formula. Maybe later after I get a tutorial from someone.
- cliffm
- Posts: 370
- Joined: Fri Feb 27, 2009 11:08 am
- Location: fairdale N D
Photobucket Tutorial
![]() by jack lee » Wed Oct 27, 2010 2:35 am
by jack lee » Wed Oct 27, 2010 2:35 am
It's pretty easy, Cliff.
1.Go to "Post a Reply" on the builders forum to write your message.
2.Open a second "window"( internet connection) and go to Photobucket. So, both the builders forum reply screen and photobucket are open at the same time.
3.Pick the photo you want to attach to your message.
4.Under "share this image" are four sets of codes. Left click on the IMG Code.(not the letters IMG Code, but the actual long code in the box. It will highlight in blue.
5.Right click, then left click on "copy".
6.Now go back to the Reply box on the builders forum and
left click under your message to locate where the photo will be.
7.Right click.
8.Click "paste" The photo code should appear right away. Like this:
9.Click the preview button to see if it loaded.
10.If you can't open two browser windows at the same time, you can still copy the IMG Code of your photo on Photobucket, then log out and go to the builders forum and paste the code into your message.
Hope this is clear enough. I'll try to answer your questions if you get stuck.
- jack lee
- Posts: 44
- Joined: Mon May 31, 2010 3:53 pm
- Location: Sonoma County, CA
 got it down now,one more to make sure
![]() by cliffm » Thu Oct 28, 2010 9:49 am
by cliffm » Thu Oct 28, 2010 9:49 am
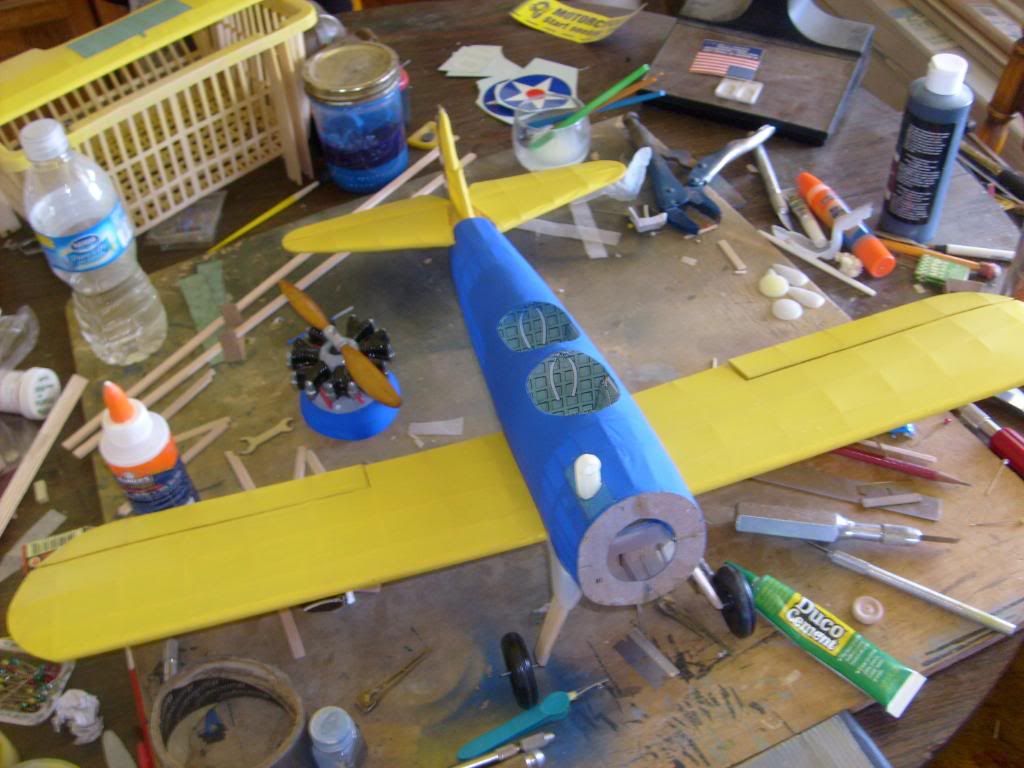
If you look closely on the first pic the edging around the cockpits was made from the insulation from some 14-16 gauge wire that is a leatherish color brown. If you know about the C.G. on these planes when flown solo they used the back seat unless you had about a 35lb. wght to put in the tail. So, if you put the little man in the back seat of your model you need to modify the front bulkhead in the rear cockpit. Oh, and thanks Jack for the tutorial on the picks ,now when someone else asks there is a thread even I can understand.
- cliffm
- Posts: 370
- Joined: Fri Feb 27, 2009 11:08 am
- Location: fairdale N D
![]() by jack lee » Sun Nov 07, 2010 5:44 am
by jack lee » Sun Nov 07, 2010 5:44 am
I apologize for taking so long to reply. It's typical for me: Things get busy around here.
I really like your wood propeller and the wing struts. (I'm happy you figured out how to post the photos: Thanks!) Your model has much more detail than I'm expecting to be able to do with mine. I've almost completed the tissue and will be posting some updated photos soon.
What you said about the weight in the cockpit and the CG is very interesting and clears up a question that's been on my mind for a long time about why the pilot sits in the back seat when flying solo. I never understood it before.
- jack lee
- Posts: 44
- Joined: Mon May 31, 2010 3:53 pm
- Location: Sonoma County, CA
![]() by cliffm » Sun Nov 07, 2010 11:18 pm
by cliffm » Sun Nov 07, 2010 11:18 pm
I think I remember a thread where you said you were doing your pilot's license. That's plenty time consuming and financially stressing to wonder where you get the time for model airplanes. But, for me I make time for the things I enjoy or you will never get to enjoy them. I learned to fly in an old 85 hp champ,wheels & ski's, no radios, flight plans,or any electrics, or tronics. I'd have to hit the books and a good ground school if I got into it again. Anyone who has the opportunity to go flying should jump at the chance, but, alas some people are numb to it,more clear sky for true aviators. Me, I'm totally dis-abled so it's a little beyond me now so I stay content with my memories and models which someday I'll get one to stay airborn for more than 10 seconds. Cheers.
- cliffm
- Posts: 370
- Joined: Fri Feb 27, 2009 11:08 am
- Location: fairdale N D
32 posts
• Page 2 of 3 • 1, 2, 3
Return to General Building Questions
Who is online
Users browsing this forum: No registered users and 91 guests