Guillows Series 300 - Beechcraft Musketeer

Ask other modelers for a little help / knowledge ?

Guillows Series 300 - Beechcraft Musketeer

Postby BillParker » Fri Apr 30, 2010 10:45 am

Image

Me and several of the guys here at the Guillow's Forum had a discussion
recently about converting Guillow's planes in general to U-Control. Most
of the larger planes come with the parts, (bellcrank, wing fence, pushrods,
nuts, bolts, screws, washers, etc) to make the plane fly the circle. The
little ones however are more about rubber or 1/4a (.010, .020 COX) freeflight.
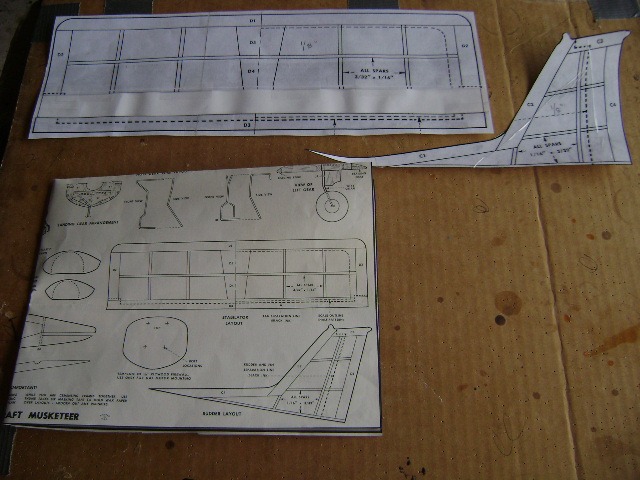
The 500 series planes have "destructions" for the old "fishing pole" circle,
where it's more about centrifical force than anything else. (always thought
it looked dangerous, a nitro fueled spinning prop, at the engd of only one
string...) Anyway, I thought it would be far more interesting to convert a
Guillow's plane that was never designed for U-Control over to circular flight.
So here we go...

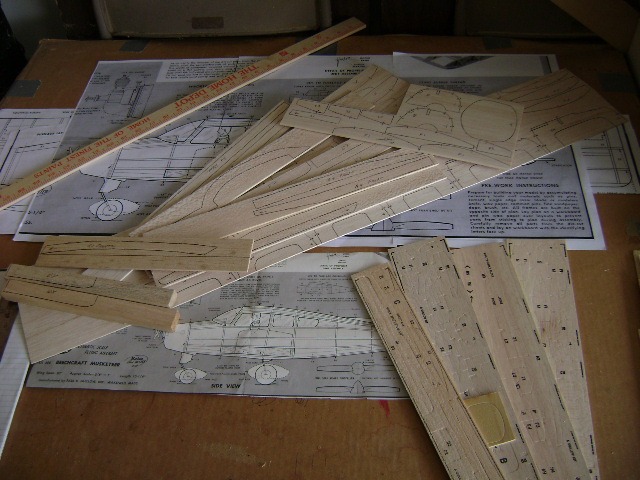
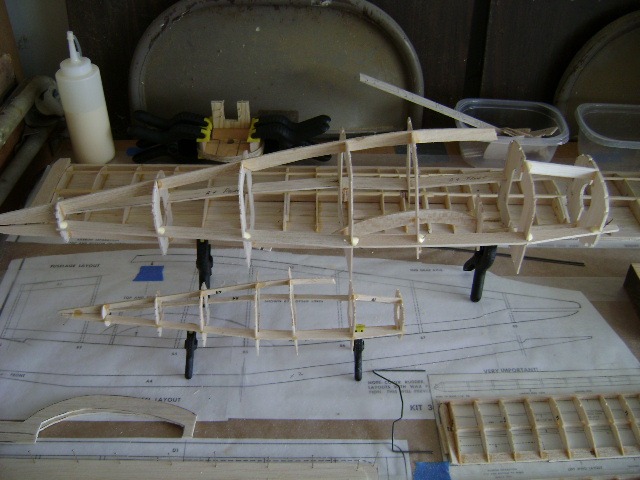
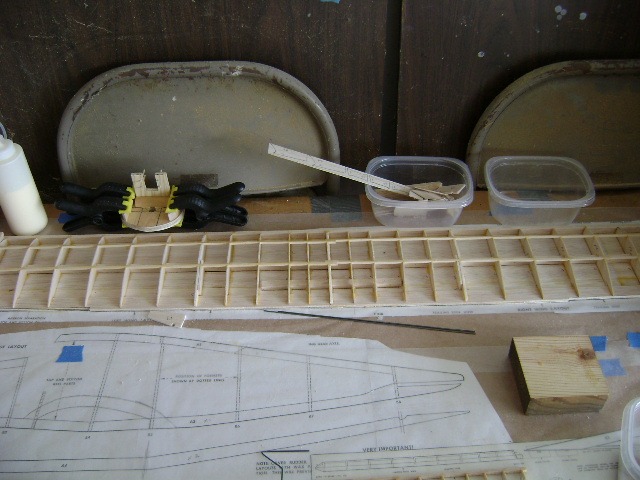
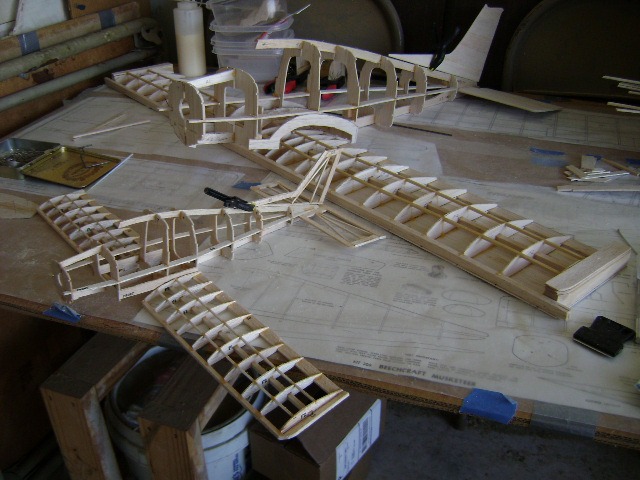
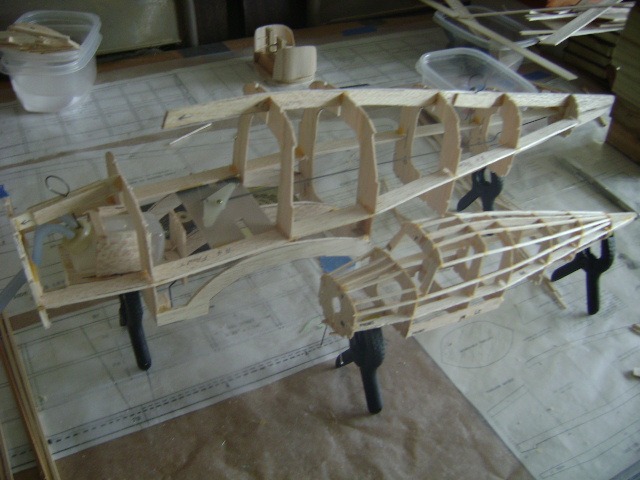
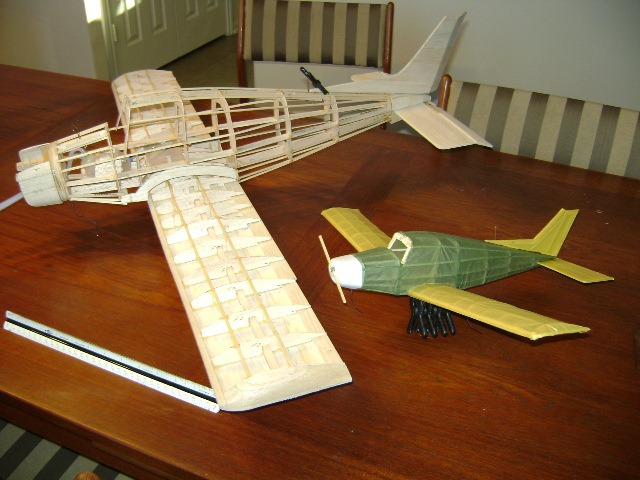
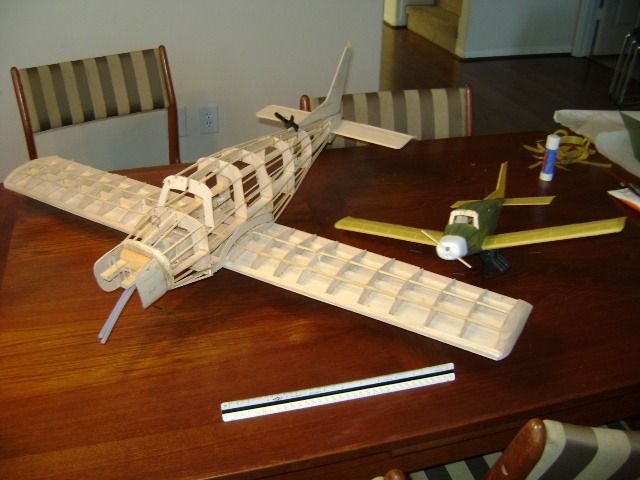
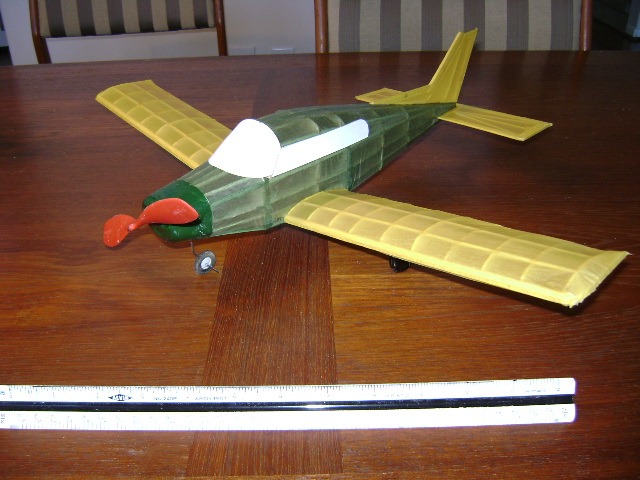
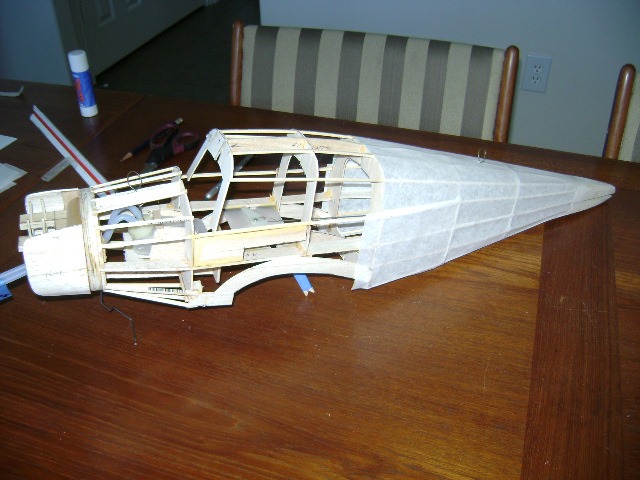
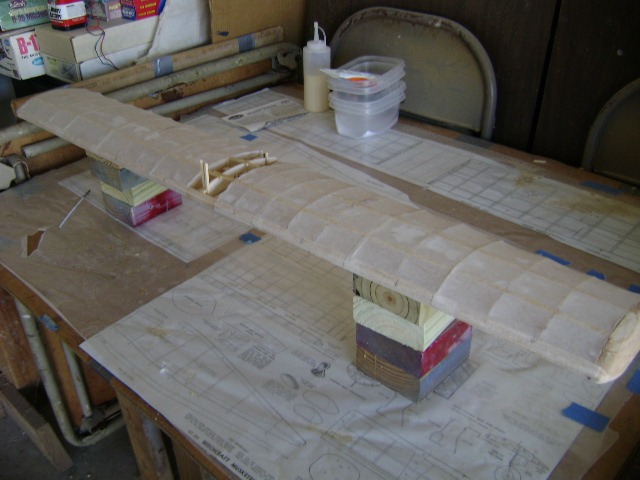
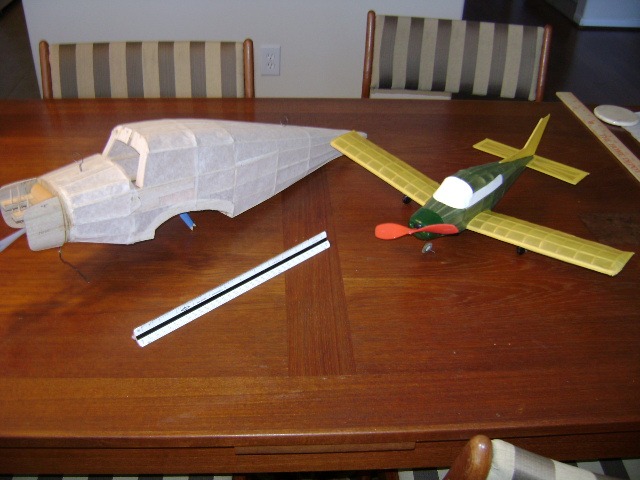
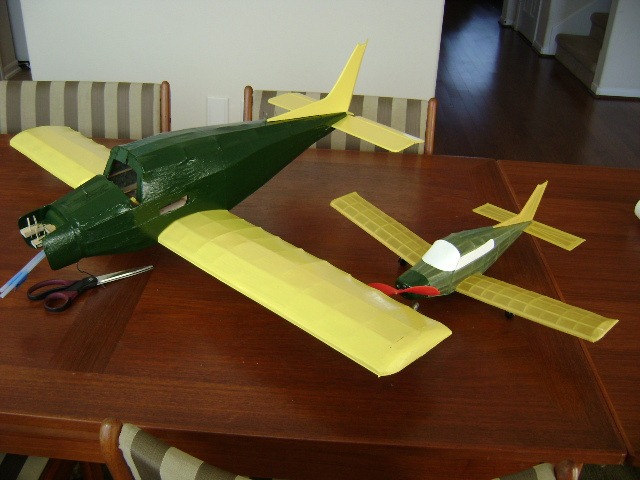
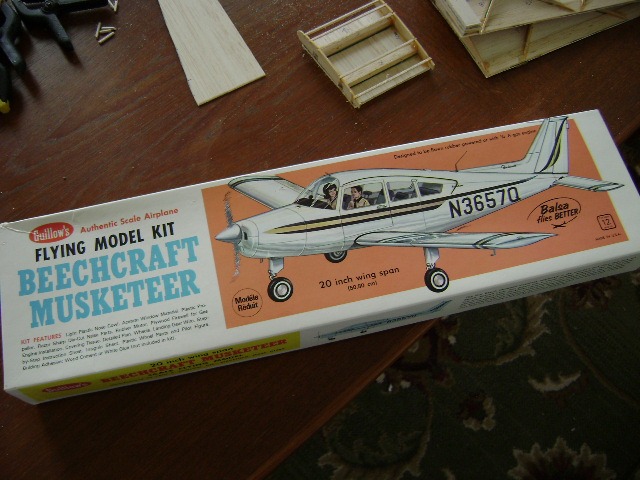
I'm building one out of the kit box, and the other is double size. Kit
is 20" wingspan, the big dog is 40" wings...

Image

Rubber power on the little one, .09 U-Control on the big. (rubber power
is code for throw it once, and hang it on the ceiling...)

Image

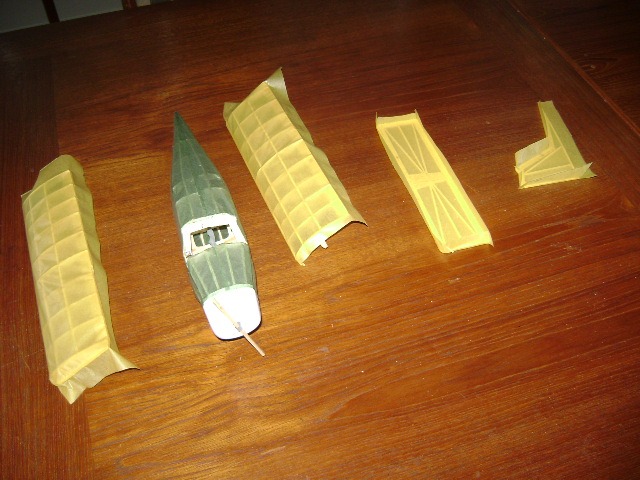
I scored a whole bunch of ESAKI tissue in all colors on sale for 5 bucks
a box from A to Z Supply, so the little feller will be green and yellow
tissue, no paint. (I think...) The big guy will be painted silkspan.

Image

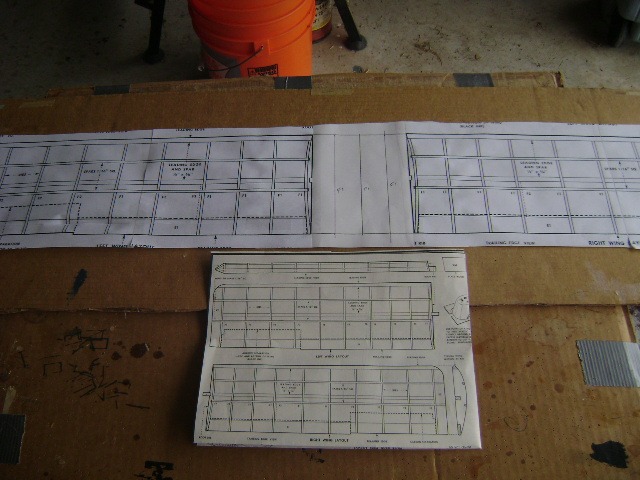
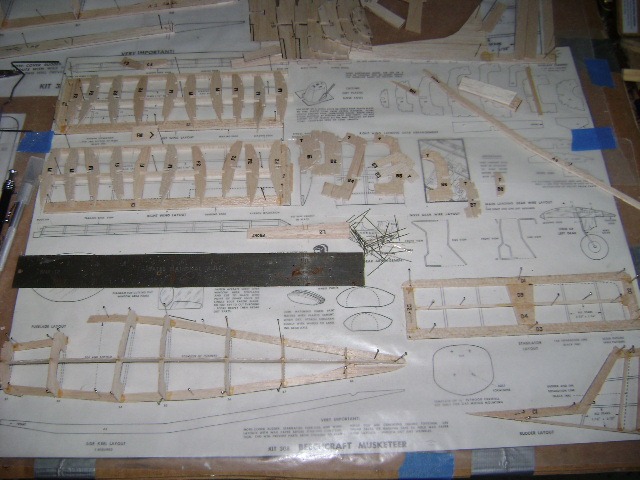
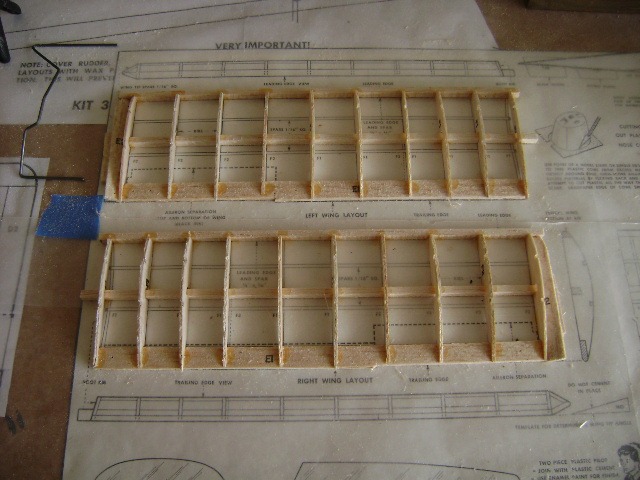
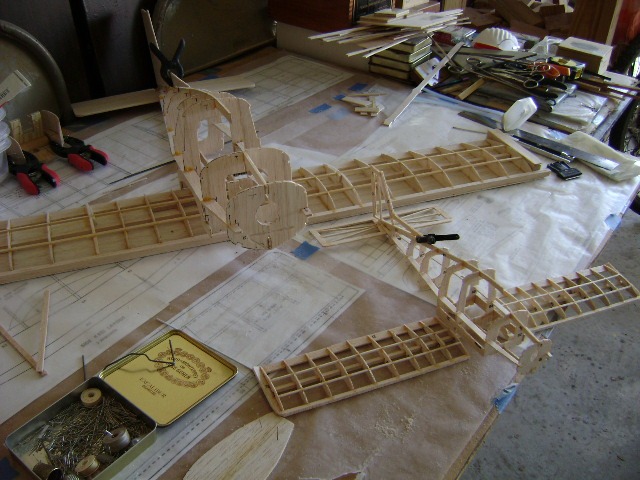
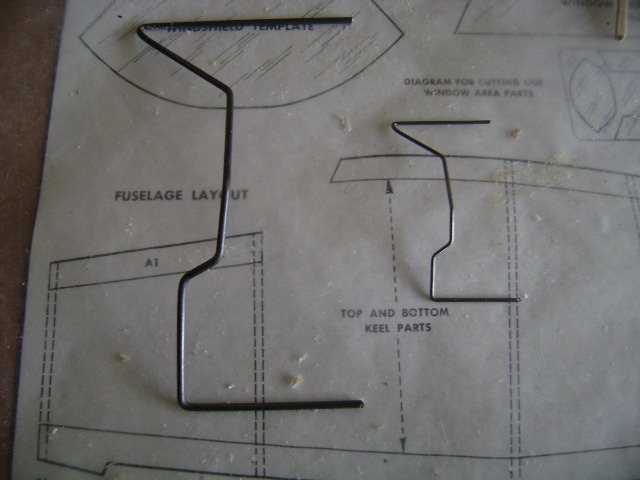
The little one has a two piece wing, but I re-engineered the big one
with a one piece wing, thus the changed lower keel you see on the big one.

Image

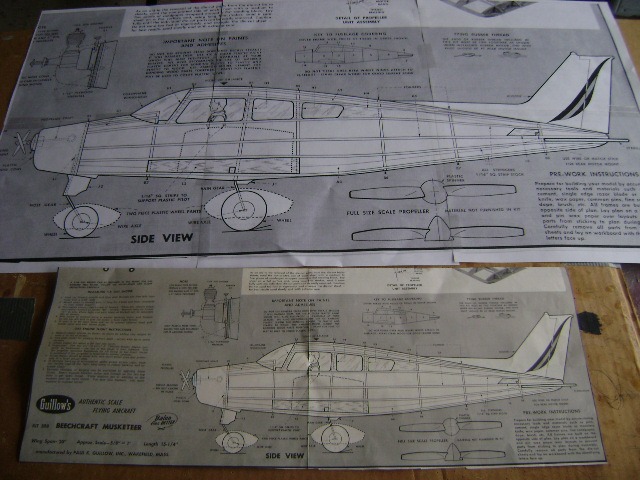
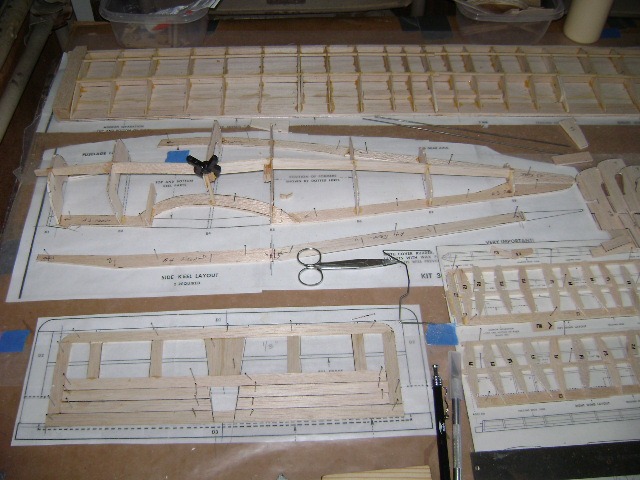
I will admit that I've fallen in love with the lines of
this fuse. Coming from a warbird guy, this is big!
William H. Parker Jr. (Bill Parker)
President, Parker Information Resources
http://www.parkerinfo.com/ap.htm bparker@parkerinfo.com
BillParker
 
Posts: 1031
Joined: Sat Jan 19, 2008 1:21 pm
Location: Houston, Texas

Postby BillParker » Fri Apr 30, 2010 11:18 am

Image

Kit parts are lower right, and the big boy parts are upper left. The
kits parts were typically "crushed" but this is a "vintage" kit off of
E-Bay. Based on everyone's current experience, quality has come WAY up
recently, so kudos to you, Guillow's!

Image

Tail feathers, fuse, and wing coming together on the little feller...
There is a "scale outline" and a "flying model outline" on the plan
for the horizontal tail feather. The little plane will have the flyer.

Image

The larger plane will have the scale horizontal, with U-Control modification.
(wider control surface...) Note one piece wing at top, and "over the wing"
lower keel on fuse.
William H. Parker Jr. (Bill Parker)
President, Parker Information Resources
http://www.parkerinfo.com/ap.htm bparker@parkerinfo.com
BillParker
 
Posts: 1031
Joined: Sat Jan 19, 2008 1:21 pm
Location: Houston, Texas

Postby BillParker » Fri Apr 30, 2010 11:21 am

Image

1/32" balsa sheeted tail feathers on the big plane. Yellow ESAKI tissue
on the little guy's tail... Note improv on crossmembers on the small parts.

Image

"Little baby chicken wangs..." Note size of front landing gear strut for
the biggun'....

Image

The big wing is just visible in the background, the little up front right.
The "over the wing" boards are in the front left for the big guy... And
now we see the difference in size of the fuses... The big one is exactly
double the size of the small, but look SO much larger than that.

Image

Added an extra "stiffener" to wing center, and sheeted the bottom of the
wing with 1/32" balsa.

Image

First "mock-up." There's my purty girls!

Image
William H. Parker Jr. (Bill Parker)
President, Parker Information Resources
http://www.parkerinfo.com/ap.htm bparker@parkerinfo.com
BillParker
 
Posts: 1031
Joined: Sat Jan 19, 2008 1:21 pm
Location: Houston, Texas

Postby BillParker » Fri Apr 30, 2010 11:24 am

Solid wing tips, as introduced to me by my friend and mentor,
"Boss" David Duckett, (*WINK* to you, Dave) are simply the only
way to go on a flying model. You rubber guys don't reall have
this luxury, but you can really make em smooth this way.

Image

Once you learn how to achieve a really light touch, you can make
all sanding chores take just minutes, and sometime just seconds,
(I bore easily) with a mouse sander. Commonly used for knocking
the high spots off of small furry rodents, my sander is one of my
best friends...

Image

See what I mean Billy Jean? I was even able to sand the leading
and trailing edges on the small plane's wings with this sander.
Came out perfect!

Image
William H. Parker Jr. (Bill Parker)
President, Parker Information Resources
http://www.parkerinfo.com/ap.htm bparker@parkerinfo.com
BillParker
 
Posts: 1031
Joined: Sat Jan 19, 2008 1:21 pm
Location: Houston, Texas

Postby BillParker » Fri Apr 30, 2010 11:25 am

I love the smell of Nitro Methane in the morning... With this
tank my .09 TEEDEE motor will run about 30 minutes... Dizzying!

Image

Okay! With all the various problems solved, I can finally begin
putting longerons on the fuse of the big plane. (the little one
is almoist done.) Problems included, putting a fuel tank into plane
never designed for a fuel tank. Hard points alway need to be installed
on any flying model, to help make it easier to store when not flying.
A plane that gets in the way always seems to get damaged. Installing
a bellcrank in a plane never designed for a bellcrank and pushrod.
The one piece wing issue really screwed up the longeron placement on
the lower portion of the fuse, so all sorts of new slots had to be
milled into the fuse formers to cure all those allignment problems.
I think, unless I run into any other issues that I'm off to the
longeron races...

Image

You guys who can use CA Glue, are very fortunate. (I'm apparently
allergic to the stuff) For y'all it's just like "spot welding."
Around here, we have to "watch the glue dry." With a little luck,
considering our humidity this week, I can get more than a couple
of stringers per day stuck on the big guy. The little bird needs
a front landing gear strut, before I add any more sticks...

Image

Another size comparison... Front landing gear struts...

Image
William H. Parker Jr. (Bill Parker)
President, Parker Information Resources
http://www.parkerinfo.com/ap.htm bparker@parkerinfo.com
BillParker
 
Posts: 1031
Joined: Sat Jan 19, 2008 1:21 pm
Location: Houston, Texas

Postby Supercubber95 » Sat May 01, 2010 9:03 am

Man! That's AWESOME!!! Can't wait... :D
Supercubber95
 
Posts: 218
Joined: Wed Apr 21, 2010 2:13 pm
Location: Belle Fourche, South Dakota

Postby r wheatley » Sat May 01, 2010 9:06 am

very interesting build report, I look forward to seeing more of the WIP.
I have a set of plans of the aronca champ I have enlarged to 200% I plan to try my hand at, was wondering what method you use to transfer the plan sheet (like ribs) to sheet wood ? for cut out.
thanks, Ronnie
r wheatley
 
Posts: 81
Joined: Wed Dec 05, 2007 11:15 pm
Location: alabama

Postby BillParker » Sat May 01, 2010 9:14 am

I laminate the templature on the plan with clear packing tape, (one side only, as it makes it too slick on the bottom) cut em out with scissors, and then transfer the shapes onto the balsa with an ink pen. Cut em out and sand em to blueprint.

Some guys use carbon paper and transfer the shapes that way. See:

http://www.parkerinfo.com/ap49.htm

This is a detailed build on the Guillow's Corsair 1000 series blown up seriously large.

bp
William H. Parker Jr. (Bill Parker)
President, Parker Information Resources
http://www.parkerinfo.com/ap.htm bparker@parkerinfo.com
BillParker
 
Posts: 1031
Joined: Sat Jan 19, 2008 1:21 pm
Location: Houston, Texas

Postby BillParker » Tue May 11, 2010 4:46 pm

Okay! Where were we? Oh yeah, we needed some tissue on the little dude.
ONE WORD: ESAKI... This stuff is the shizniz, the dizzle, er... good stuff!
I put the shiny side out, and put it on with a drugstore gluestick. Glue
sticks by the way are the... let's not start that again... Anyway, pre dope,
and looking nice...

Image

It was easier to just stick it together, then dope it. Handling less
parts is better than handling more parts. So we're all glued up...

Image

Image
William H. Parker Jr. (Bill Parker)
President, Parker Information Resources
http://www.parkerinfo.com/ap.htm bparker@parkerinfo.com
BillParker
 
Posts: 1031
Joined: Sat Jan 19, 2008 1:21 pm
Location: Houston, Texas

Postby BillParker » Tue May 11, 2010 4:47 pm

Two coats of SIG AEROGLOSS BUTYRATE (SIG Direct online order in quarts)
50/50 thinned with pure ACETONE. (Home Depot by the gallon...) Esaki shrunk
up nicely. Managed I think to keep any of it from twisting up. Humidity
down here around Houston is a b*tch...

Image

This is medium weight Silkspan, again purchased directly from SIG Mfg. online.
Unfortunately, all the LHS's aroung here think that ARF's is all anyone will
buy, so guys like us go begging... Or go online... Again this is all stuck
on the fuse with a drugstore gluestick...

Image

Same Silkspan on the wing. left the wing center section open and added some
little "bracketoids" to the center wing former to facilitate holding the wing
on the plane. Kind of like "locator pins" they'll help make sure the wing is
straight with the lower keel on the fuse...

Image
William H. Parker Jr. (Bill Parker)
President, Parker Information Resources
http://www.parkerinfo.com/ap.htm bparker@parkerinfo.com
BillParker
 
Posts: 1031
Joined: Sat Jan 19, 2008 1:21 pm
Location: Houston, Texas

Postby BillParker » Tue May 11, 2010 4:47 pm

Finished fuse will be double dipped in 50/50 dope, as will the wing.

Image

And there's my girls! Long way to go yet on the big one, but I have to go
finish that FULMAR, and see if I can get rid of it right quick, so I can start
a new big plane....

Image
William H. Parker Jr. (Bill Parker)
President, Parker Information Resources
http://www.parkerinfo.com/ap.htm bparker@parkerinfo.com
BillParker
 
Posts: 1031
Joined: Sat Jan 19, 2008 1:21 pm
Location: Houston, Texas

Postby BillParker » Tue May 11, 2010 7:59 pm

Paul K. Guillow, Inc. 40 New Salem Street Wakefield, MA 01880

Image
William H. Parker Jr. (Bill Parker)
President, Parker Information Resources
http://www.parkerinfo.com/ap.htm bparker@parkerinfo.com
BillParker
 
Posts: 1031
Joined: Sat Jan 19, 2008 1:21 pm
Location: Houston, Texas

Postby ADW 123 » Thu May 13, 2010 11:14 am

so you blow up the plan.... that is the easier part i guess, but then how do you make the enlarged parts?
ADW 123
 
Posts: 1158
Joined: Mon Feb 22, 2010 5:22 pm
Location: Cincinnati, Ohio

Postby BillParker » Thu May 13, 2010 1:59 pm

I'm just today starting the P-39 Guillow's plan. I will be doing a complete "how to" on my Airplane Site:

http://www.parkerinfo.com/ap62.htm

I'll go step by step from the drafting stage to completion. I'm going to go set up the page now. There won't be much there yet, but I'll add to it daily, so keep checking back...

There's also a new thread for the P-39D blown to 70" on this forum.


bp
William H. Parker Jr. (Bill Parker)
President, Parker Information Resources
http://www.parkerinfo.com/ap.htm bparker@parkerinfo.com
BillParker
 
Posts: 1031
Joined: Sat Jan 19, 2008 1:21 pm
Location: Houston, Texas

Postby BillParker » Thu May 13, 2010 3:28 pm

Sorry everybuddy the link above is for the Super Thunderbolt...

This is for the P-39D

http://www.parkerinfo.com/ap63.htm

I'll go step by step from the drafting stage to completion. I'm going to go set up the page now. There won't be much there yet, but I'll add to it daily, so keep checking back...


bp
William H. Parker Jr. (Bill Parker)
President, Parker Information Resources
http://www.parkerinfo.com/ap.htm bparker@parkerinfo.com
BillParker
 
Posts: 1031
Joined: Sat Jan 19, 2008 1:21 pm
Location: Houston, Texas

Next

Return to General Building Questions

Who is online

Users browsing this forum: No registered users and 27 guests