500 Series Hellcat Kit
32 posts
• Page 2 of 3 • 1, 2, 3
![]() by Phugoid » Mon Feb 01, 2010 3:42 pm
by Phugoid » Mon Feb 01, 2010 3:42 pm
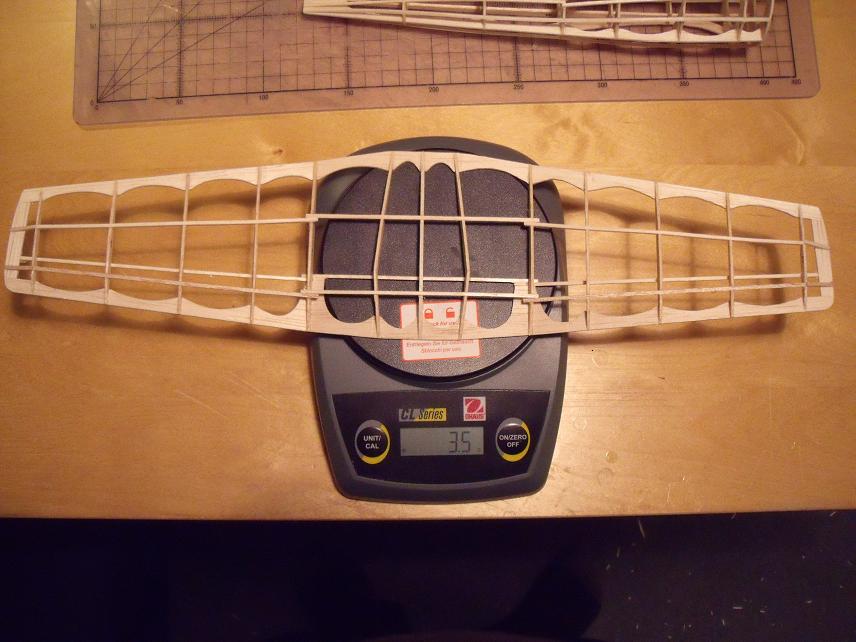
Here's everything together. At this rate I should have a flying weight of around 27g or so I hope. Weight has also been kept down as I'll fly the model "wheels up"
With the generous wing area of this model it should fly well at that weight.
With the generous wing area of this model it should fly well at that weight.
- Phugoid
- Posts: 952
- Joined: Wed Jan 20, 2010 8:17 am
![]() by FLYBOYZ » Wed Feb 03, 2010 9:46 am
by FLYBOYZ » Wed Feb 03, 2010 9:46 am
Hi Phugoid I think the hellcat is one of the better flyers in this series.I lighting it by sanding the froumers and when the fuse was built I remove all the inside wood much as possible It flew very stable because of its big wing.But when I painted it the type of paint I used killed its flight time.Looks like the one you built will do great.Fantastic build 
- FLYBOYZ
- Posts: 87
- Joined: Sat Feb 14, 2009 11:52 am
![]() by scigs30 » Thu Feb 04, 2010 8:38 pm
by scigs30 » Thu Feb 04, 2010 8:38 pm
I built two of these, one was completely modified and used quality balsa. The second one I built 2 months ago with Guillows wood and no attempt to lighten it, heck I even painted it. The stock kit weighed in at 27-30 grams balanced. The modified one was around 20 grams. Here is the kicker, they both flew great. For all the work I put into modifying it, I don't think it made much of a difference. Anyway, this is a great flying kit. Yours looks great.
- scigs30
- Posts: 844
- Joined: Mon Nov 06, 2006 11:31 am
![]() by Phugoid » Fri Feb 05, 2010 5:45 am
by Phugoid » Fri Feb 05, 2010 5:45 am
Thanks all for the kind comments.
Yeah I wanted to use the kit wood throughout, and I did mainly other that the one sheet but it was heavier than basswood, and I just could not bring myself to use it.
I think (and you have proved) that this one will fly well even if a bit of the hefty side. I thing it is just a good one for rubber power. Mine balances uncovered inc. rubber with no noseweight on at all which is unusual even given the cowl moulding and heavy prop. That weight saving and a good wing area makes for good news.....
I should get the wings covered this weekend, I've not done anything all week, been too busy at work and home.
- Phugoid
- Posts: 952
- Joined: Wed Jan 20, 2010 8:17 am
![]() by Phugoid » Sat Feb 06, 2010 6:38 pm
by Phugoid » Sat Feb 06, 2010 6:38 pm
I have always used the "dope and thinners" method of attaching tissue. However this time I decided to give the white glue method a try. I was very pleasantly surprised. One thing is for sure I found it faster and certainly a lot more pleasant in terms of the smell, and the resukts came out pretty good. I also used the tissue wet when covering the fusalage.
Apart form a couple of little wrinkles it turned out pretty well. I have had second thoughts on the finish, I think I will paint after all. I need to glue all of the bits together first though.
One question, does anyone know whether the plastic nose mouldings are damaged by celulose thinners? I normally thin the enamel paint with it when airbrushing as it seems to bite into the doped surface better than the enamel thinners.
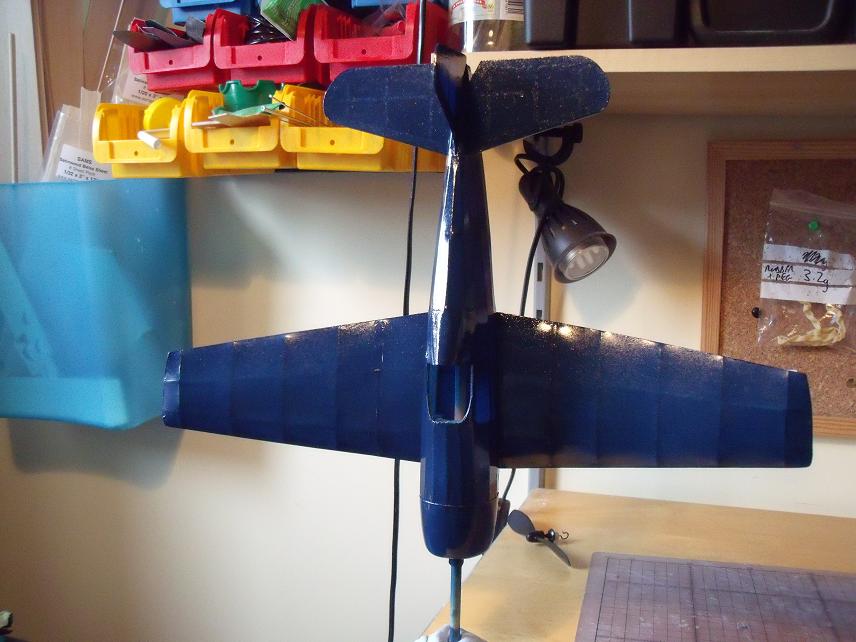
I won't do anthing fancy with the paint just dark blue all over
Here's a picture so far
Apart form a couple of little wrinkles it turned out pretty well. I have had second thoughts on the finish, I think I will paint after all. I need to glue all of the bits together first though.
One question, does anyone know whether the plastic nose mouldings are damaged by celulose thinners? I normally thin the enamel paint with it when airbrushing as it seems to bite into the doped surface better than the enamel thinners.
I won't do anthing fancy with the paint just dark blue all over
Here's a picture so far
- Phugoid
- Posts: 952
- Joined: Wed Jan 20, 2010 8:17 am
![]() by Phugoid » Sat Feb 13, 2010 7:48 am
by Phugoid » Sat Feb 13, 2010 7:48 am
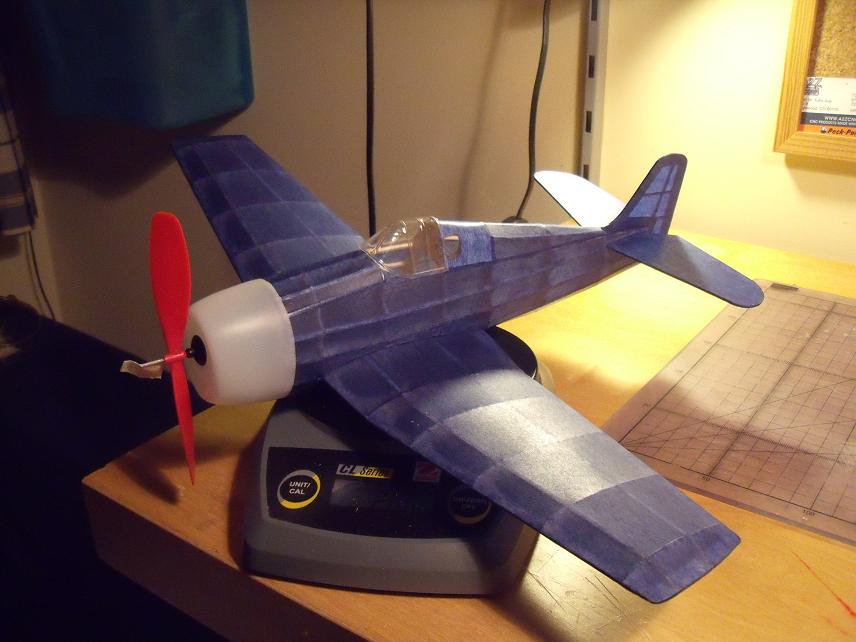
I've had chance to give the Hellcat a blast of paint with my very basic airbrush. I try to give it an even opacity and colour with minimum additional weight rather than "solid" colour" thus you can still see the structure beneath especially when there is light behind. The paint was Humbrol Enamel (colour 15) thinned with dope thinners.
- Phugoid
- Posts: 952
- Joined: Wed Jan 20, 2010 8:17 am
![]() by scigs30 » Sat Feb 13, 2010 1:49 pm
by scigs30 » Sat Feb 13, 2010 1:49 pm
I have never used Enamels with Dope thinners, always seemed too heavy and I would have to thin the paint too much. I really enjoyed the colored dope, sprayed on nice and smooth and was lighter than enamels. Colored dope is hard to come buy unless I order it online. Also airbrushing it can be messy and smelly. I have switched over to Testors acrylics and I am really happy with them. Does not add much weight but it also has draw backs. The biggest is masking can be a pain. If I mask something, I wait a few days for the paint to day before adding the tape. Acrylics are famous for lifting. The best part, Testors has a bunch of colors.
- scigs30
- Posts: 844
- Joined: Mon Nov 06, 2006 11:31 am
![]() by Phugoid » Sat Feb 13, 2010 3:19 pm
by Phugoid » Sat Feb 13, 2010 3:19 pm
I tend to go with the humbol enamels because of the huge range of colours and each pot is only about £1.25. The thing is too that the small size of the pots stop you from caking too much on! As a kid I never bothered at all, I barely had enough pennies to pay for the kits never mind paint. Since I got back into these little machines I followed the Mike Stuart example of using the enamels and dope thinners, The paint on this one cost around 0.8g weight wise. I don't worry about the smell and mess too much, I either do it in the garage or in the workshop at work after hours.
I've never used any other finishes on a complete model, in the UK testors aren't available in the shops near us, I've tried car paints and enamels in cans on samples but they cover too thick too quickly, so I guess it's what you like best.
You might be able to answer a question here Scigs, did testors make models too. When I was a kid I bought a silver plastic control line plane and it was made in the states by "Testors" was that the same company?
Andrew
- Phugoid
- Posts: 952
- Joined: Wed Jan 20, 2010 8:17 am
![]() by Phugoid » Thu Feb 18, 2010 11:34 am
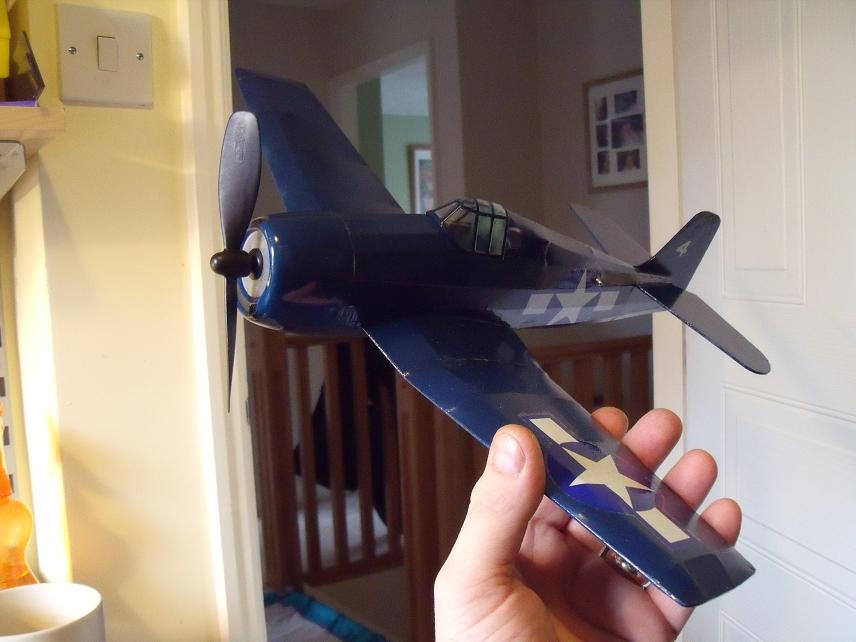
by Phugoid » Thu Feb 18, 2010 11:34 am
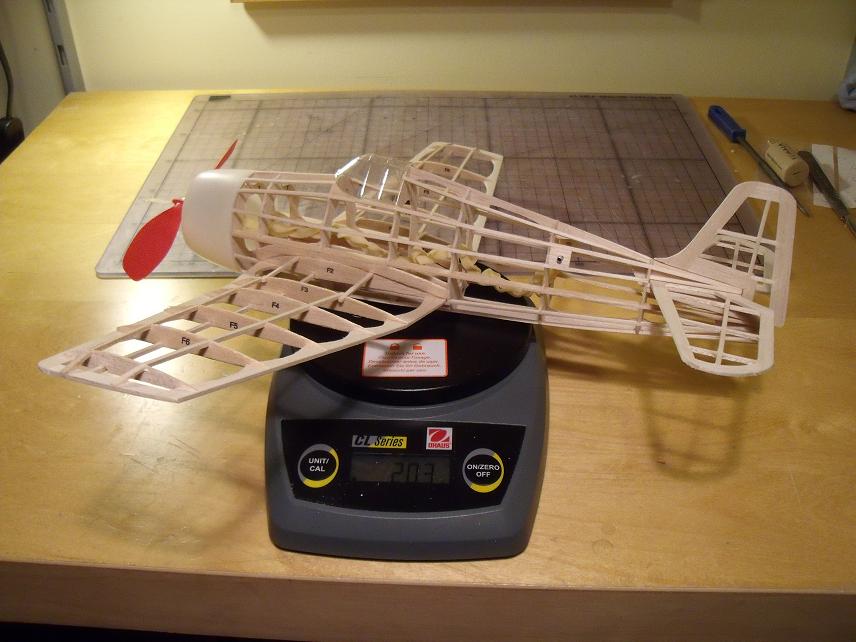
Here she is with everything fitted up. The machine less rubber weighs 22.8g and glides nicely without any noseweight, the rubber (a piece of tan rubber 4.5mm wide and 1.5 prop to hook length) weighs around 3g and with that fitted I think I'll need about 1 to 1.5g of noseweight to balance it out, so not to far from my 27g estimate.
- Phugoid
- Posts: 952
- Joined: Wed Jan 20, 2010 8:17 am
![]() by Phugoid » Sun Mar 07, 2010 1:13 pm
by Phugoid » Sun Mar 07, 2010 1:13 pm
I mangaed to get half a dozen flights including some short trimming hops today
I'm rubbish at taking action pictures (digital camera's always seem to slow for action pictures) I'm none to clever at video either, as I'm always too busy gawping at things to press to go button.
Nevertheless, here is a clip of the Hellcat note the dive bombing action at the end when the rubber runs down. Still some work to do on the trimming front, but not bad for a start.....
http://www.youtube.com/watch?v=_NgdqVHwaqM
Andrew
- Phugoid
- Posts: 952
- Joined: Wed Jan 20, 2010 8:17 am
32 posts
• Page 2 of 3 • 1, 2, 3
Return to General Building Questions
Who is online
Users browsing this forum: No registered users and 29 guests