500 Series Hellcat Kit

Ask other modelers for a little help / knowledge ?

500 Series Hellcat Kit

Postby Phugoid » Sun Jan 24, 2010 5:26 pm

After the sucessful but short lived Hurricane I bought a Hellcat kit.

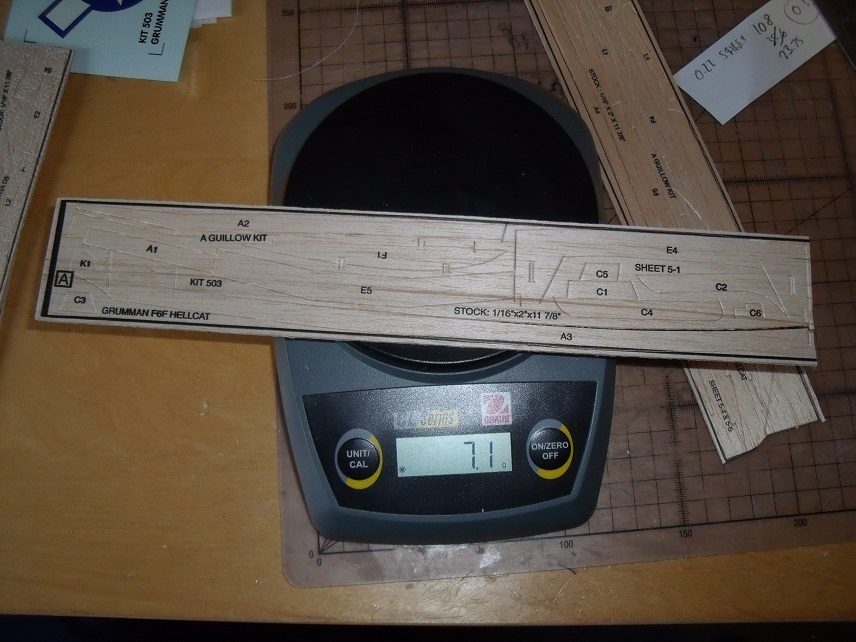
The first thing I did was weigh the kit wood. The lighest sheets were 2.7g but there were was one sheet (A) which was very very heavy (see picture). The remaining two sheets were around 5.1g. The A sheet must be the heaviest and densist balsa I've ever seen, infact it was off the charts I have to grade it.

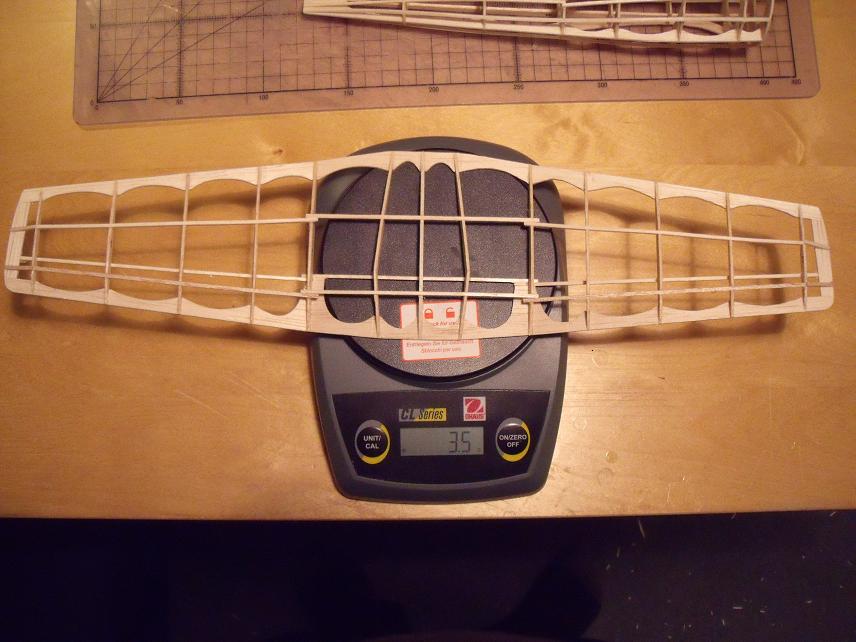
I took all of the bits from the very heavy sheet and I cut round round them out of 8.5lb balsa, the middle weight sheets were sanded to 1mm thick and only the fuselage formers were used, the stab parts, wing parts and trailing edges ere re-cut as were the leading edges from the very lightest sheets.

Image
Phugoid
 
Posts: 952
Joined: Wed Jan 20, 2010 8:17 am

Postby Phugoid » Sun Jan 24, 2010 5:30 pm

Try this pic instead!

Image
Phugoid
 
Posts: 952
Joined: Wed Jan 20, 2010 8:17 am

Postby Phugoid » Sun Jan 24, 2010 5:39 pm

Oh I give up! what a pain to upload pictures! When On Flickr I don't know how to get the URL for one particular picture, I've spent more time trying to figure this out today than building planes!

Never mind....
Phugoid
 
Posts: 952
Joined: Wed Jan 20, 2010 8:17 am

Postby Mfezi » Mon Jan 25, 2010 12:12 am

Hi Phugoid

I don't have a Flickr account, so I don't know what it looks like when you are logged in. However, when I go to your link:
http://www.flickr.com/photos/darby1/4301832384/

I see there is a button on the top left that says "all sizes". When I click on it, it gives you various options for sizes and seems to show the biggest one by default in the window. I then right-click on the actual picture and select properties. Under "location" I get the full URL:

Code: Select all
http://farm5.static.flickr.com/4017/4301832384_e9d70ac72e_o.jpg


I then high-light it, copy it and paste it into this edit window on the forum. I then highlight again what I had just pasted and click on "Img" from the menu on the top of "Post a Reply", which adds the Img tags.

I personally use photobucket, and when you go to your album there it gives you the direct link for each picture, so you don't have to do the roundabout way that I explained above. Maybe Flickr also has that option when you are actually logged into your account.

Image
Mfezi
 
Posts: 52
Joined: Thu Dec 24, 2009 7:58 am
Location: Pretoria, South Africa

Postby Phugoid » Mon Jan 25, 2010 2:58 am

Thanks again, the first time I thought I had it, but it was both the wrong pic and only a thumbnail.

I'll follow your instructions, thanks for your help....

Andrew
Phugoid
 
Posts: 952
Joined: Wed Jan 20, 2010 8:17 am

Postby Phugoid » Mon Jan 25, 2010 3:57 pm

just notched the formers and laid the keel this evening, third time lucky uploading a picture maybe?

Image
Phugoid
 
Posts: 952
Joined: Wed Jan 20, 2010 8:17 am

Postby Mfezi » Mon Jan 25, 2010 7:01 pm

Andrew, that picture came out perfectly. I am actually also working on the same kit - mine is just about ready for paint.

Regards,
Bennie
Mfezi
 
Posts: 52
Joined: Thu Dec 24, 2009 7:58 am
Location: Pretoria, South Africa

Postby Xanadu » Mon Jan 25, 2010 11:50 pm

What are the black "plugs" on your pins. I know what they are doing, just never seen them before.
Xanadu
 
Posts: 497
Joined: Wed Sep 27, 2006 9:48 pm
Location: Anola, MB, Canada

Postby Phugoid » Tue Jan 26, 2010 6:16 am

They came as an optional extra with the pins, they are a nice sliding fit on the pins and work really well to hold the wood flat to the board, they only cost £2.00 or so. I think that they were Peck items, but I've been to bed a few times since I bought them so I don't remember exactly.

I like them as I never stick pins through the wood, unless it is very very wide, they are also very useful to hold wing formers uright and in good contact with the leading and trailing edges....

Looking forward to seeing some pics Bernie, I'm not painting mine, I think it will just be a simple blue Esaki tissue finish on this one.

As I build these to fly I will often go with a simple tissue finish especially if weight is a potential issue. This is a Hurricane from an old Keil Kraft plan that I built - The real aircraft was silver

Image

Andrew
Phugoid
 
Posts: 952
Joined: Wed Jan 20, 2010 8:17 am

Black pin clamps

Postby wmikedavis » Tue Jan 26, 2010 3:00 pm

I was wondering what they were also...found them at
A2Z Corp E-Commerce Store
$1.25 for 28 of them
wmikedavis
 
Posts: 44
Joined: Sun Nov 15, 2009 9:37 pm
Location: Seattle, WA

Postby Phugoid » Thu Jan 28, 2010 4:47 pm

I've completed both halves now.

I've started to stablize the structure with the stringers. I've cut new stringers from sheet stock as the ones in the kit are too heavy and brittle. I do this with a rule and by eye it only takes 15 minutes or so to make 20 stringers.

As you may notice I've started to scallop the keels. The keels in these kits are very over-engineered to make sure that when the structure is lifted from the board it doesn't bend or twist So when the sides are complete and stringers go in, I cut out the excess material with a scalpel. This will save around 0.5g which does not sound a lot, but is 10% of what I expect the balsa in the fusalage to weigh when I'm done

Image[/img]
Phugoid
 
Posts: 952
Joined: Wed Jan 20, 2010 8:17 am

Postby Phugoid » Sat Jan 30, 2010 10:20 am

I've finsihed the fuselage and removed weight from the formers by remove excess material. Not only does it reduce the weight but I think it makes the covering look more streamlined when complete.

Image
Phugoid
 
Posts: 952
Joined: Wed Jan 20, 2010 8:17 am

Postby Phugoid » Sat Jan 30, 2010 10:23 am

My estimates of the weights was er.... spot on! This doesn't happen that often!

Image
Phugoid
 
Posts: 952
Joined: Wed Jan 20, 2010 8:17 am

Postby Phugoid » Mon Feb 01, 2010 3:36 pm

I managed to get a fair bit done over the weekend.

Here are the wings complete.....

Image
Phugoid
 
Posts: 952
Joined: Wed Jan 20, 2010 8:17 am

Postby Phugoid » Mon Feb 01, 2010 3:38 pm

and here after a bit of surgery. This knocks off a lot of weight for little work and loss of strength.....
[img]
http://farm3.static.flickr.com/2726/432 ... 3918_o.jpg[/img]
Phugoid
 
Posts: 952
Joined: Wed Jan 20, 2010 8:17 am

Next

Return to General Building Questions

Who is online

Users browsing this forum: No registered users and 24 guests