500 Series P-40 Build

Ask other modelers for a little help / knowledge ?

500 Series P-40 Build

Postby scigs30 » Sat Jan 16, 2010 7:40 pm

I am starting on another P-40 build. I built one 2 years ago and covered with colored domestic tissue. Now I want to build one for the 500 challenge and will paint it............I am having fun painting so why stop? I just finished building a Comet Corsair and can't wait to fly her. This wood was pretty good, weight is 9-12 lb\ft. Not contest balsa, but good enough for getting a 500 series plane to fly. This should be the weight range for all Guillows freeflight birds. I will build stock with no mods other.

Image
Image
Last edited by scigs30 on Sun Aug 18, 2019 9:27 pm, edited 1 time in total.
scigs30
 
Posts: 844
Joined: Mon Nov 06, 2006 11:31 am

Postby scigs30 » Sat Jan 16, 2010 9:11 pm

My kit came with an extra sheet of balsa and no stringers.....Oh well I have a box of Guillows stringers. First thing I do is sand the back of the wood with 220 grit paper. This helps with taking the parts out of the tree so they don't break. I then run a sharp razor through the parts so they come out perfect. All parts out, next I will match them up with the plans and sand them smooth.
Image
Image
Image
Image
scigs30
 
Posts: 844
Joined: Mon Nov 06, 2006 11:31 am

Postby scigs30 » Mon Jan 18, 2010 9:19 pm

I have all the parts sanded and the notches are cut out. I sand the print off so the build will look like the picture on the box and planes. The wood is pretty hard so I use a dremel with cut off bit to make my notches. Normally with contest balsa I use a notcher tool, but that takes forever with hard wood.
scigs30
 
Posts: 844
Joined: Mon Nov 06, 2006 11:31 am

Postby scigs30 » Mon Jan 18, 2010 11:12 pm

Image
Image
scigs30
 
Posts: 844
Joined: Mon Nov 06, 2006 11:31 am

Postby scigs30 » Tue Jan 19, 2010 12:14 am

Half shell is complete, everything is straight, will work on other side later this week.
Image
Image
Image
scigs30
 
Posts: 844
Joined: Mon Nov 06, 2006 11:31 am

Postby scigs30 » Fri Feb 05, 2010 7:09 pm

I found some time to work on my P-40. Built per the plans with no mods. So far as shown she weighs 20 grams. Will have removebale landing gear. I will finish sanding and cover with Esaki and airbrush.
Image
Image
Image
Image
Image
Image
Image
scigs30
 
Posts: 844
Joined: Mon Nov 06, 2006 11:31 am

Postby r wheatley » Sat Feb 06, 2010 9:35 am

your builds always look so neat and cleanly built, I just bought the same kit
and would really like to know how yours flys, being built oob and using the kit blue rubber

thanks ,Ronnie
r wheatley
 
Posts: 81
Joined: Wed Dec 05, 2007 11:15 pm
Location: alabama

Postby scigs30 » Sat Feb 06, 2010 10:30 am

Ronnie, It is a little heavy built straight from the box, but they can fly. I do not use the kit rubber, it was for the picture only.
scigs30
 
Posts: 844
Joined: Mon Nov 06, 2006 11:31 am

Postby r wheatley » Sun Feb 07, 2010 3:29 pm

thanks, that was what i was wondering because I knew you did not favor the kit rubber, I try to read as many of your post, and others and would like to say I have really learned a lot about building these guillows kits from you guys here :D
r wheatley
 
Posts: 81
Joined: Wed Dec 05, 2007 11:15 pm
Location: alabama

Postby Xanadu » Sun Feb 07, 2010 4:48 pm

Ya know...........I just have to go and buy a couple of small ones to build in between things.
Getting way behind everyone!
Xanadu
 
Posts: 497
Joined: Wed Sep 27, 2006 9:48 pm
Location: Anola, MB, Canada

nice!!

Postby peterc4 » Mon Feb 08, 2010 5:10 pm

WOW great looking build! I have this kit hanging around...I keep getting distracted by other projects...I have to get going on it. I'm looking forward to following your build!!
peterc4
 
Posts: 28
Joined: Thu Aug 27, 2009 3:40 pm

Postby scigs30 » Tue Feb 09, 2010 10:53 pm

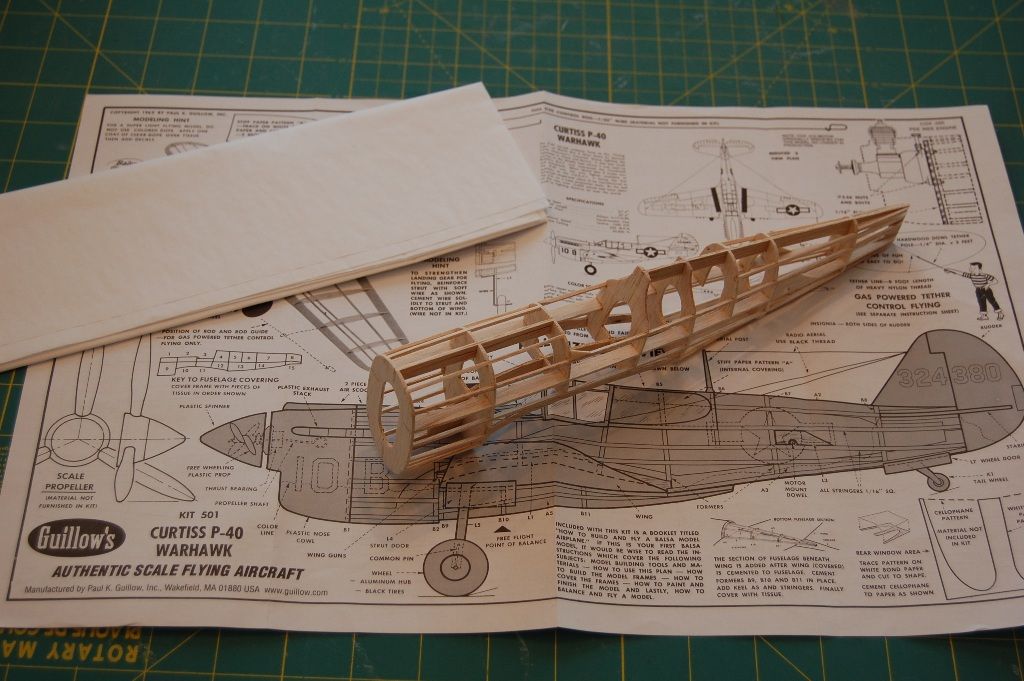
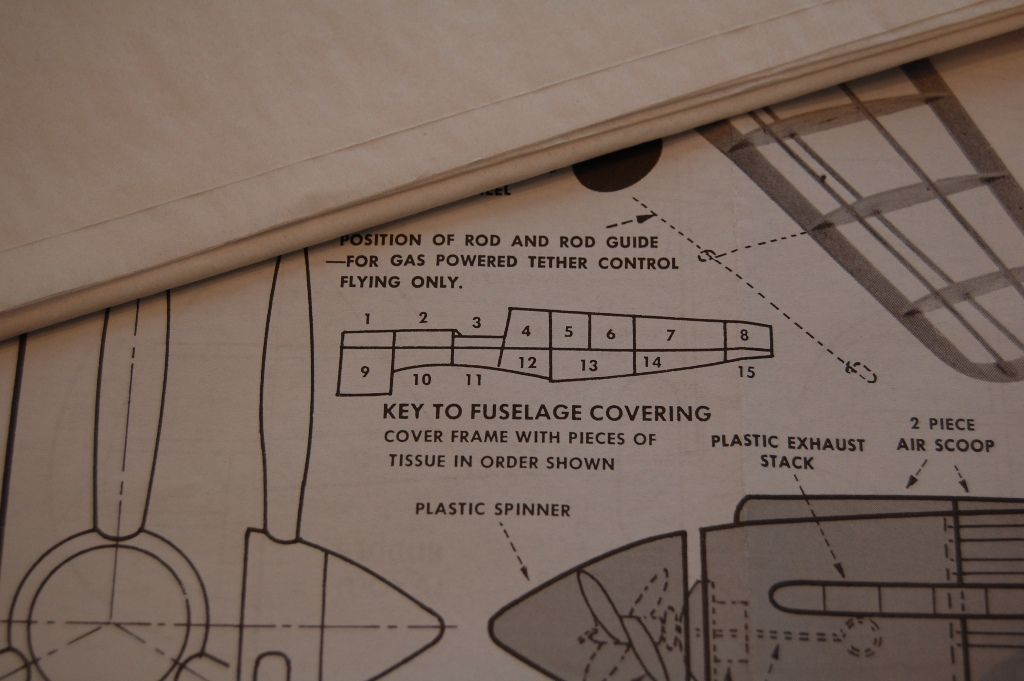
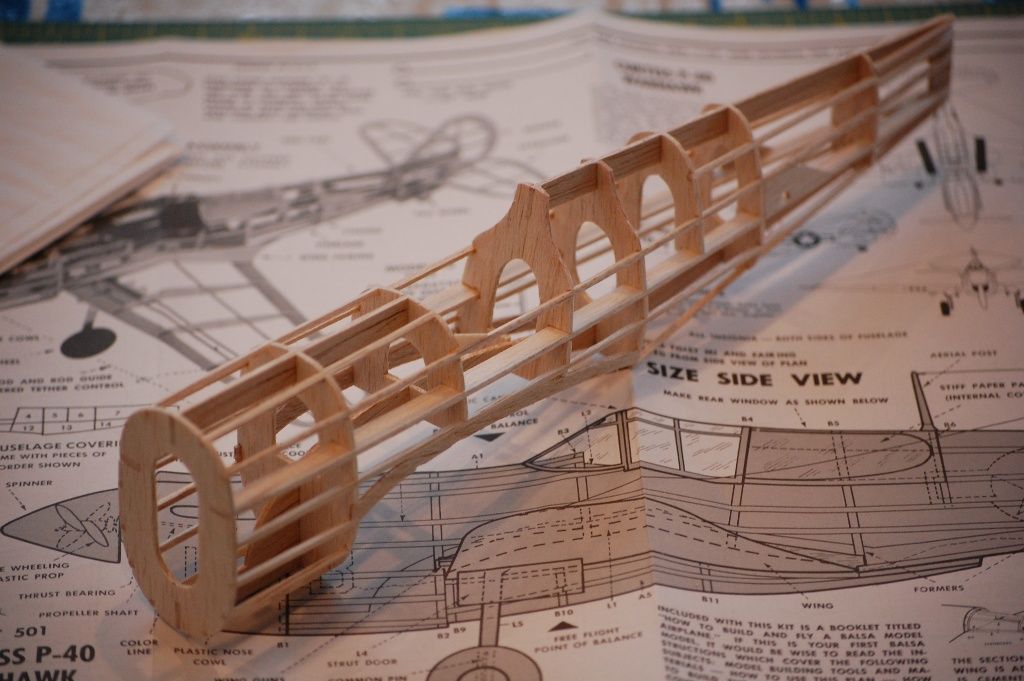
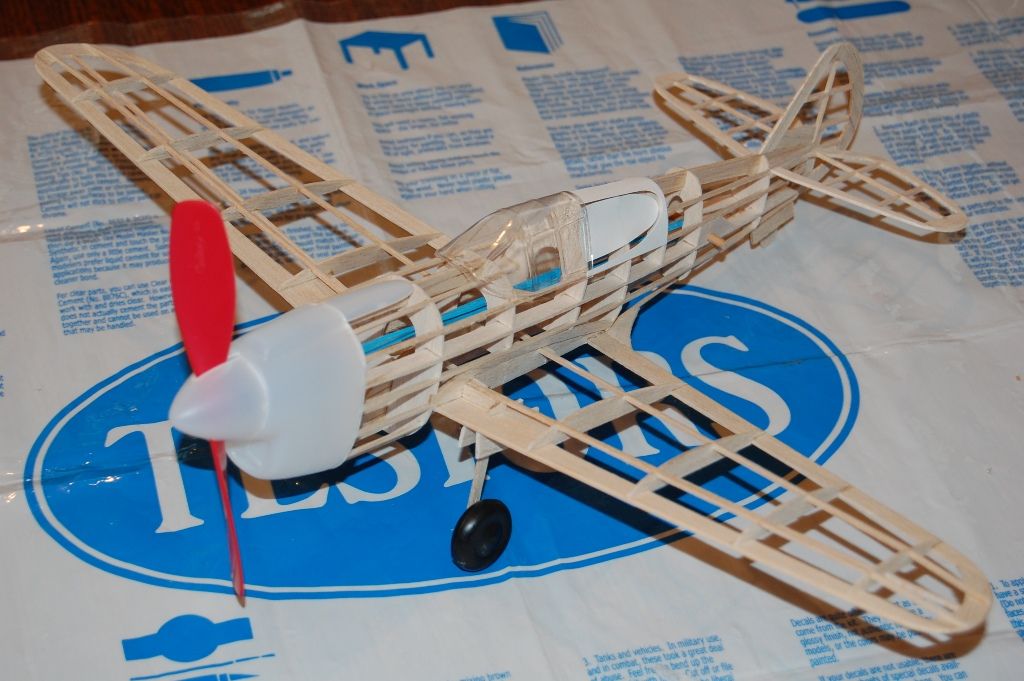
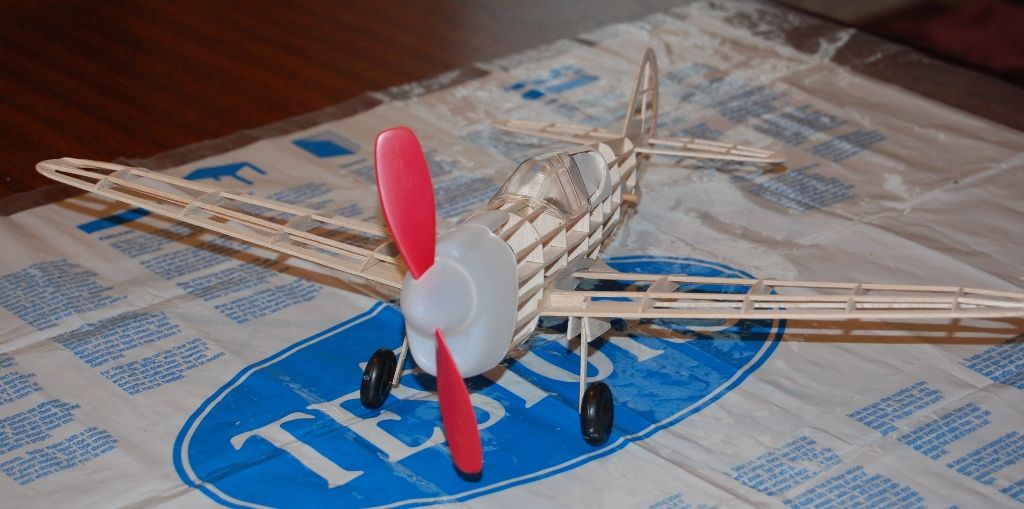
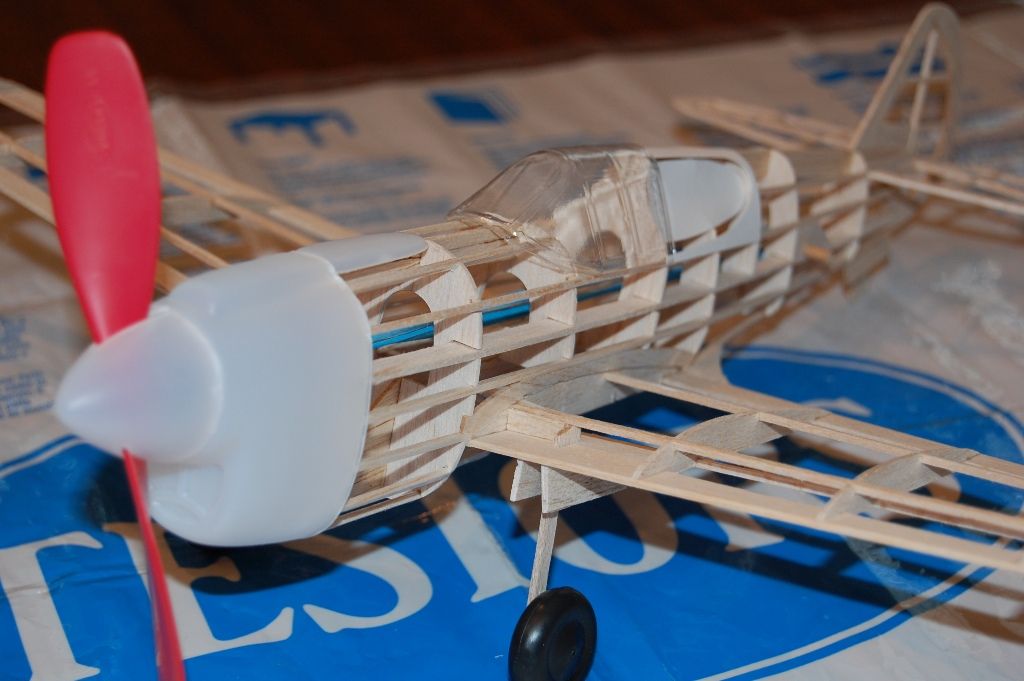
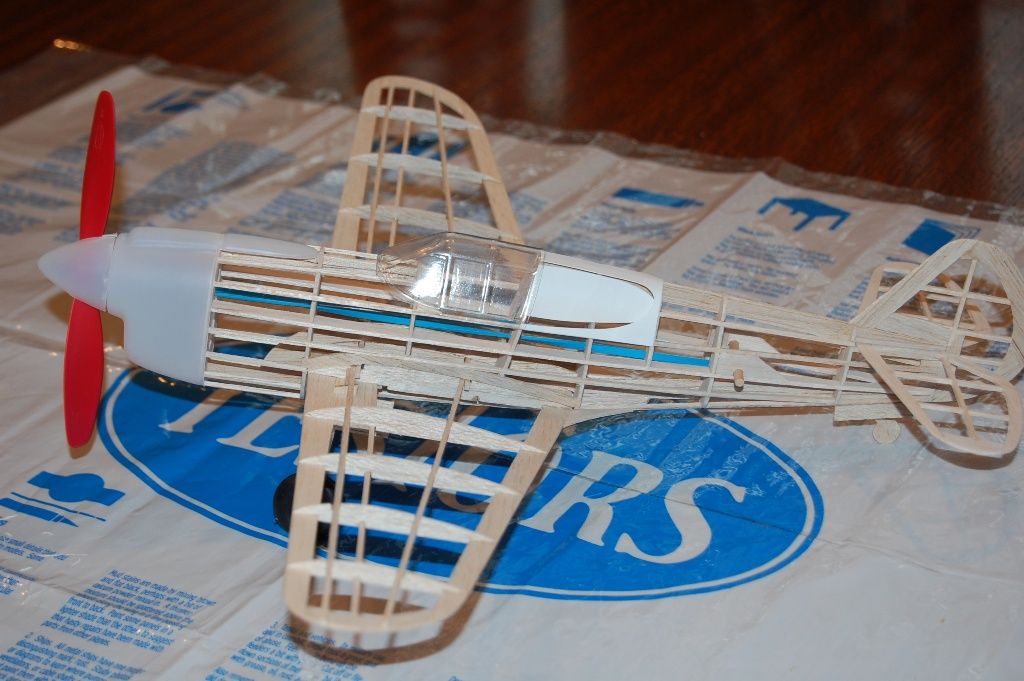
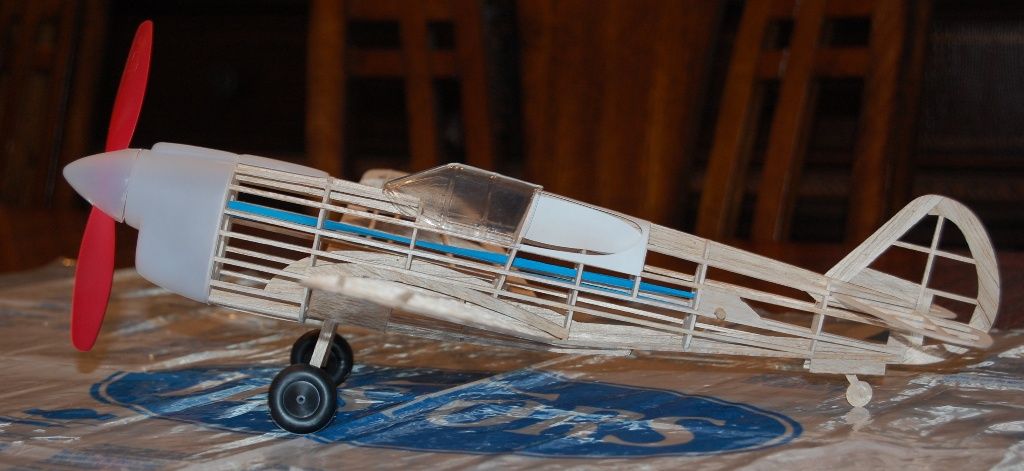
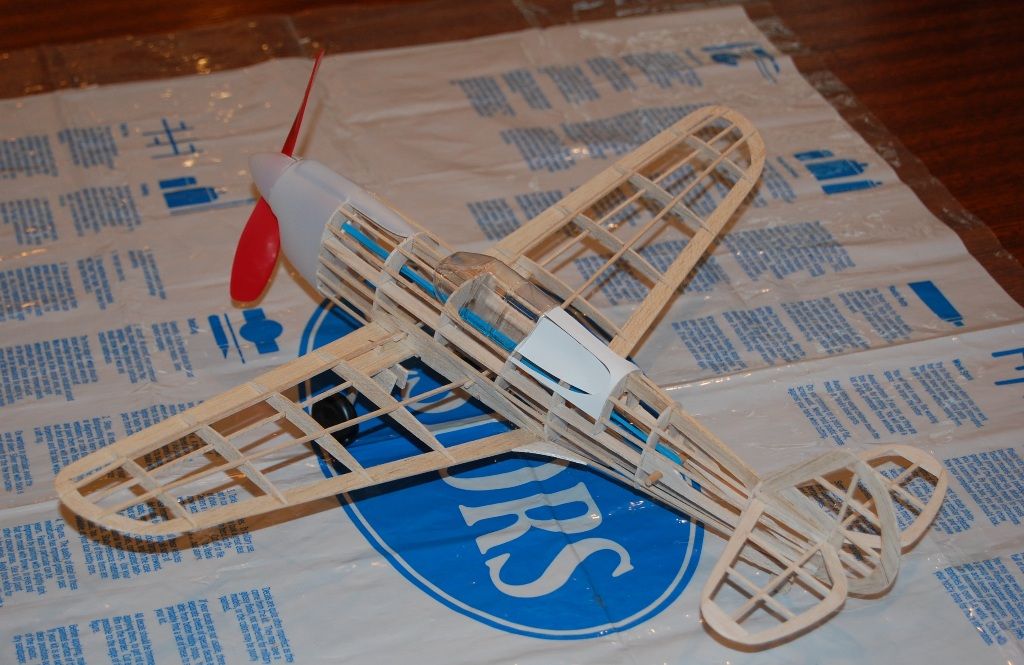
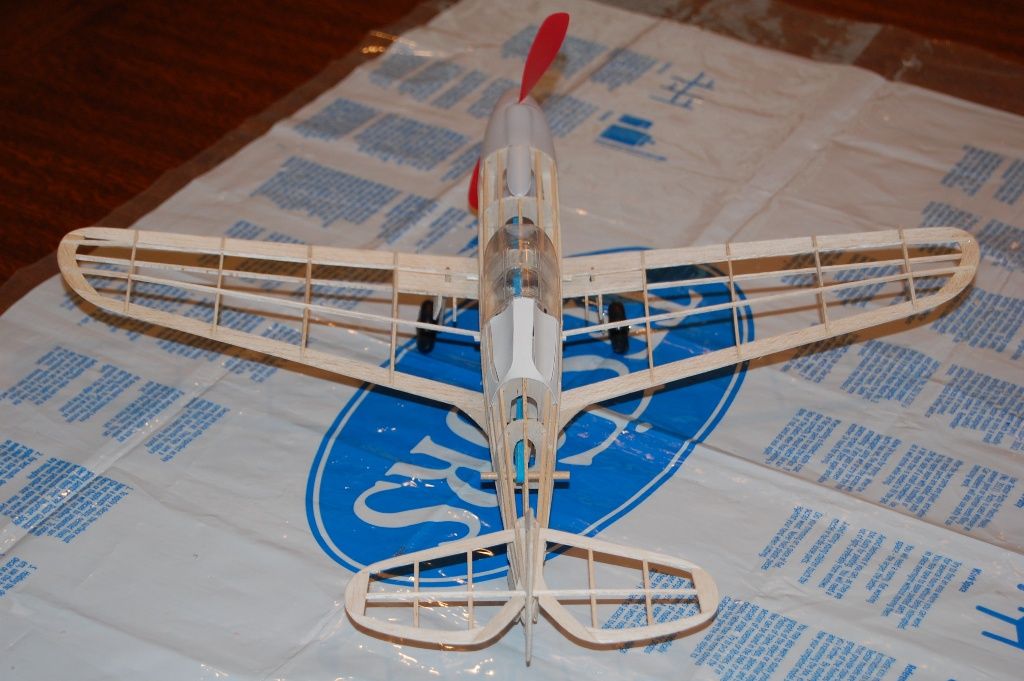
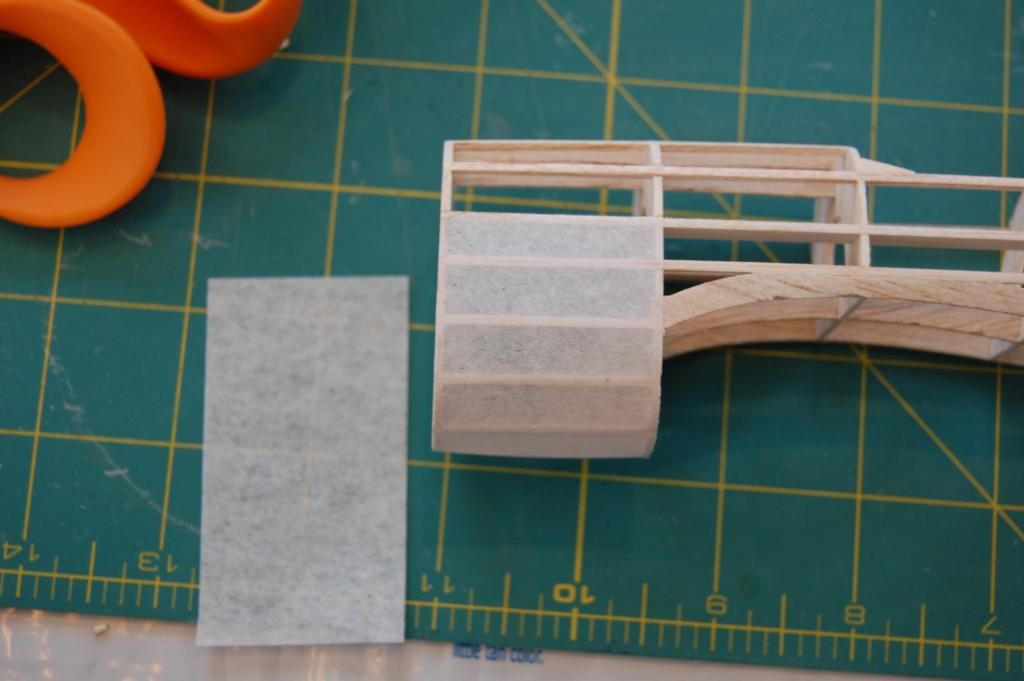
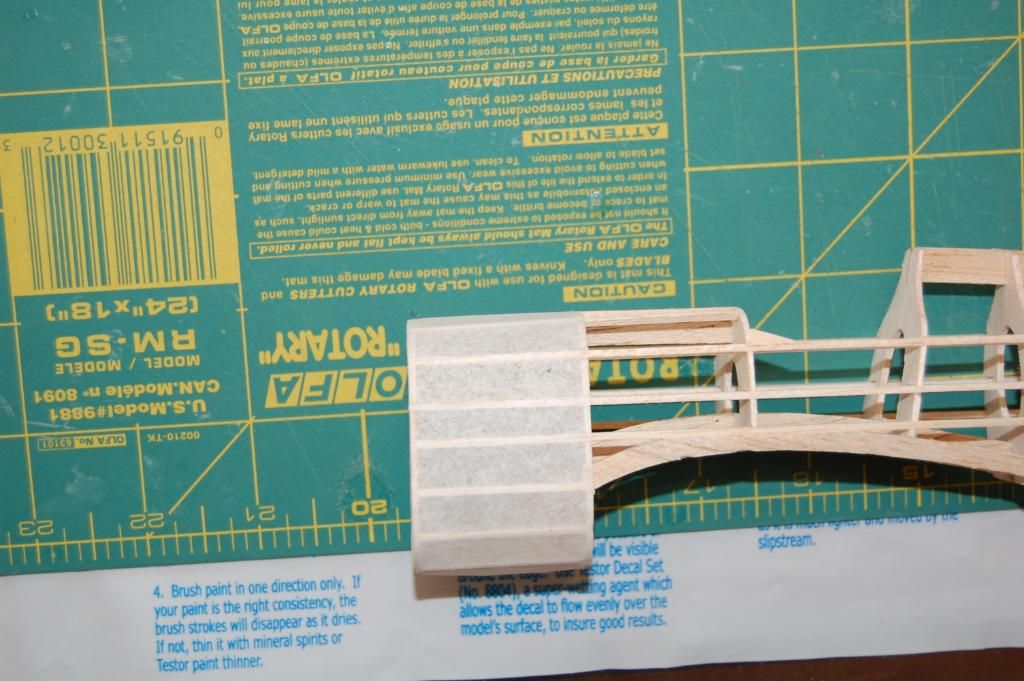
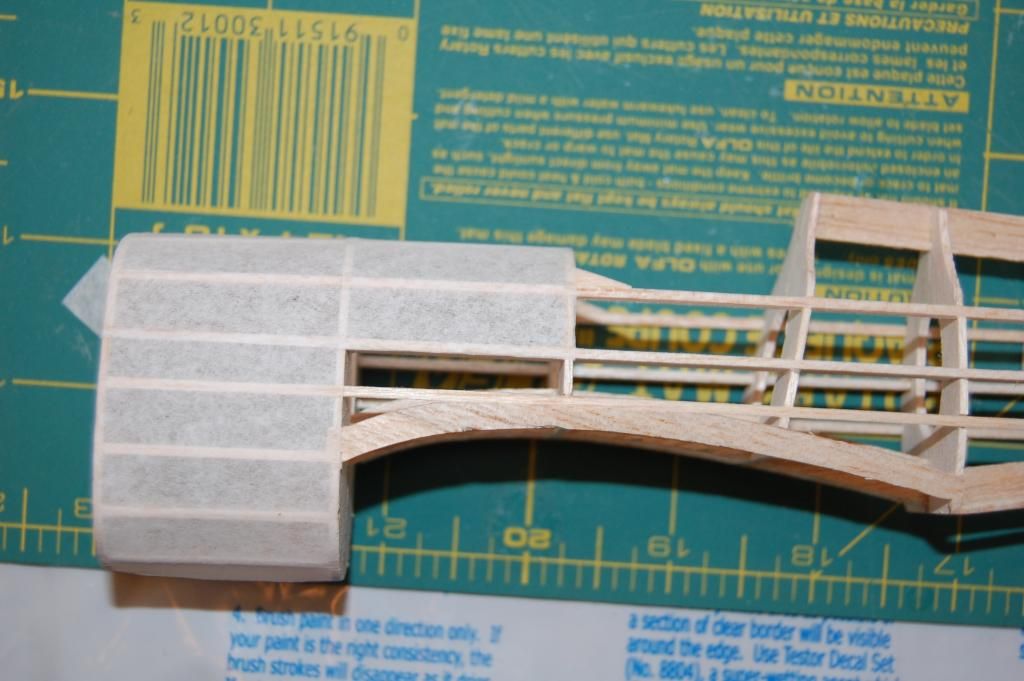
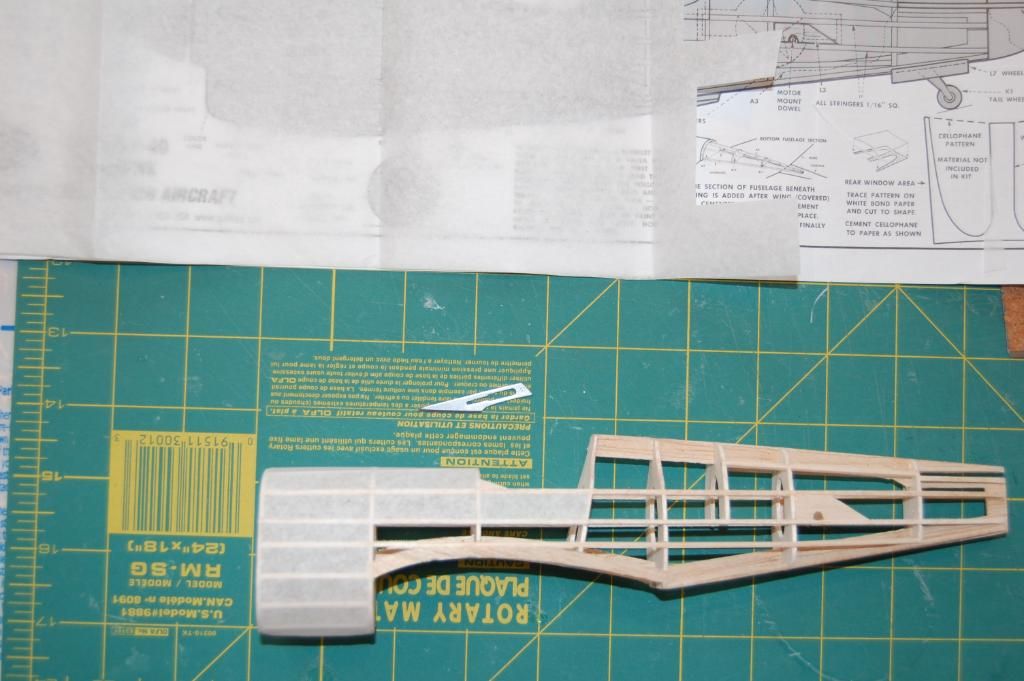
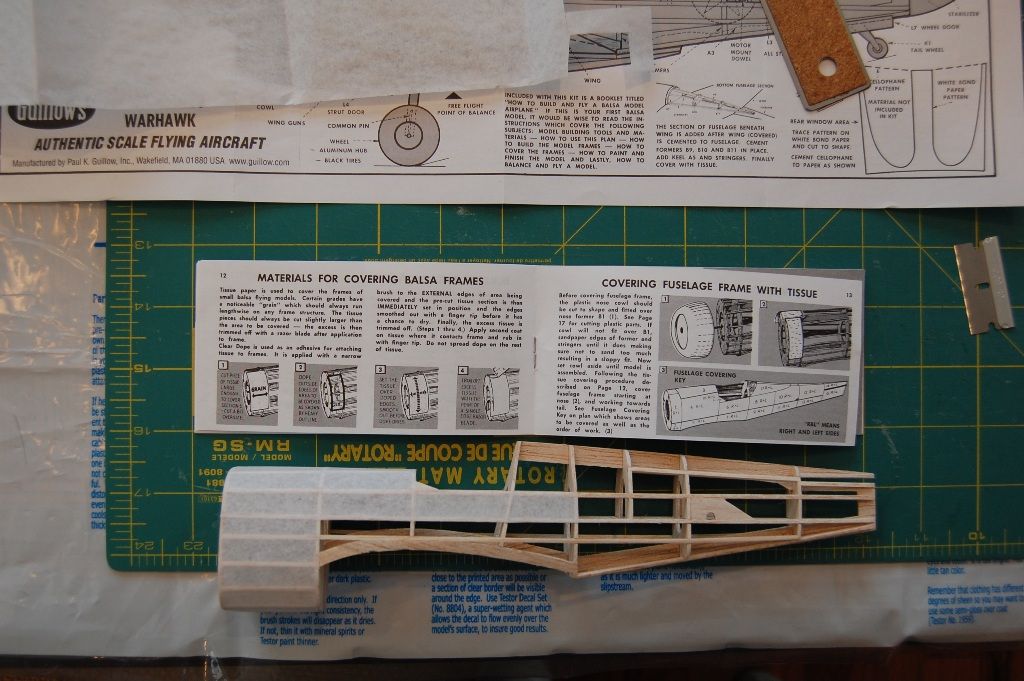
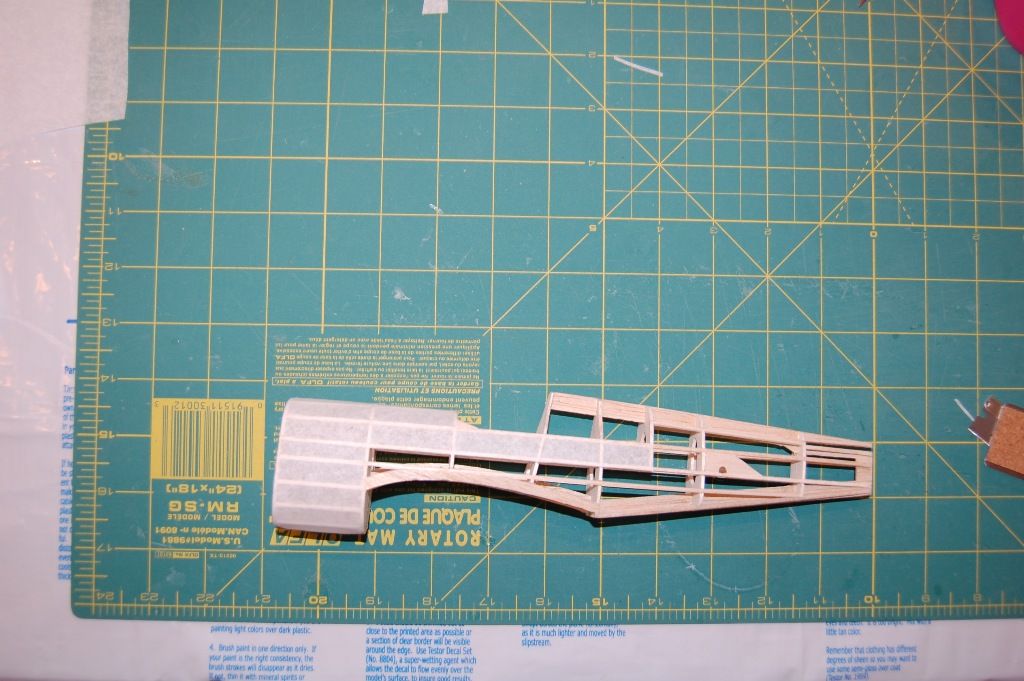
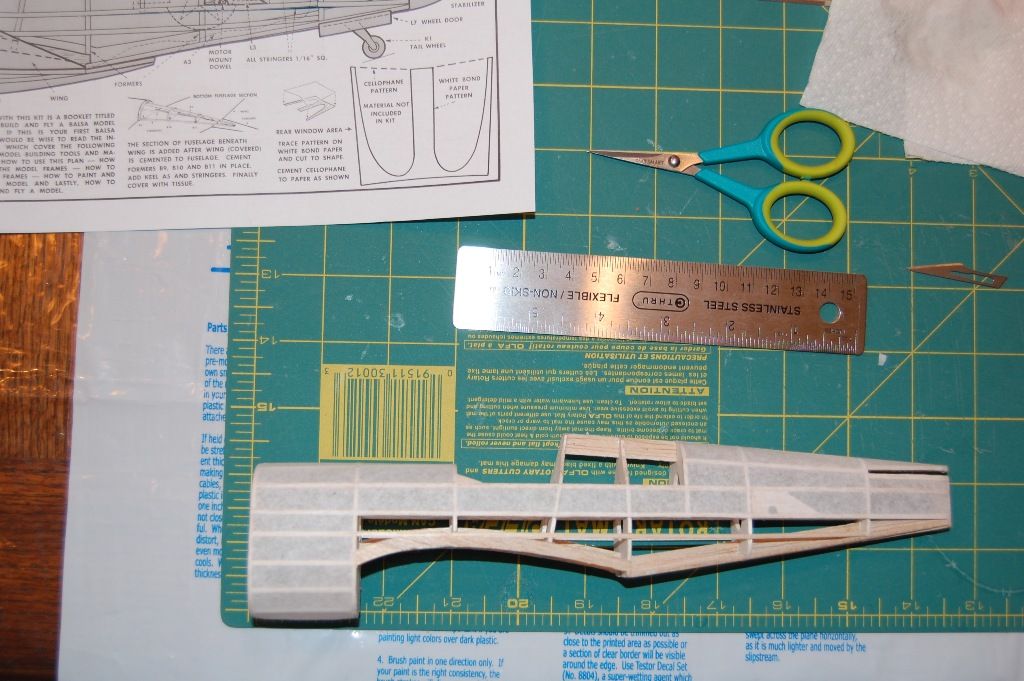
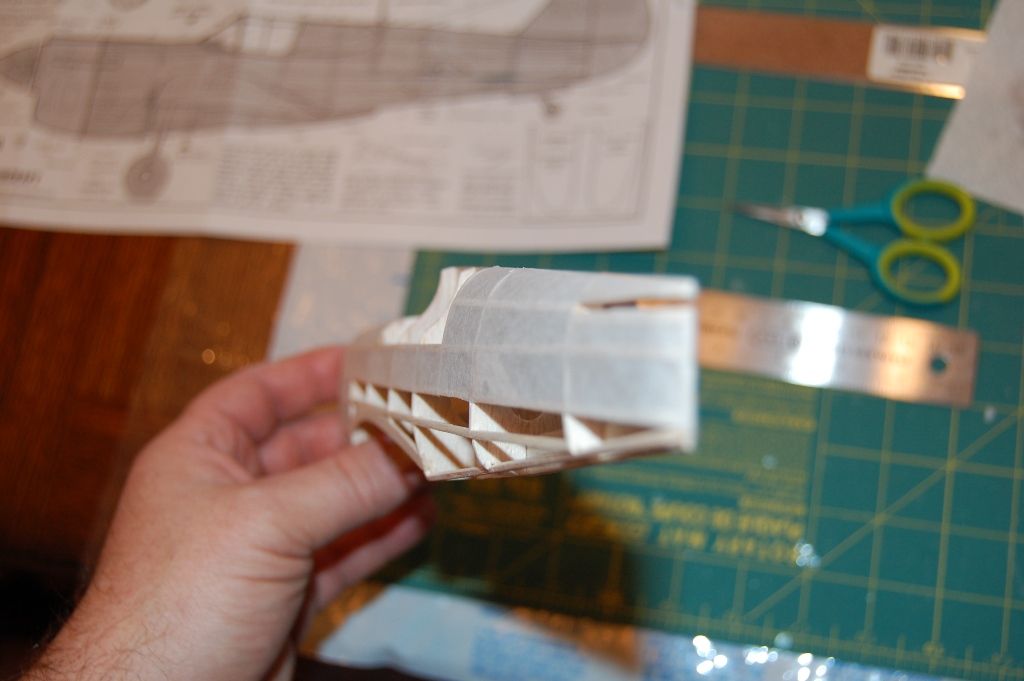
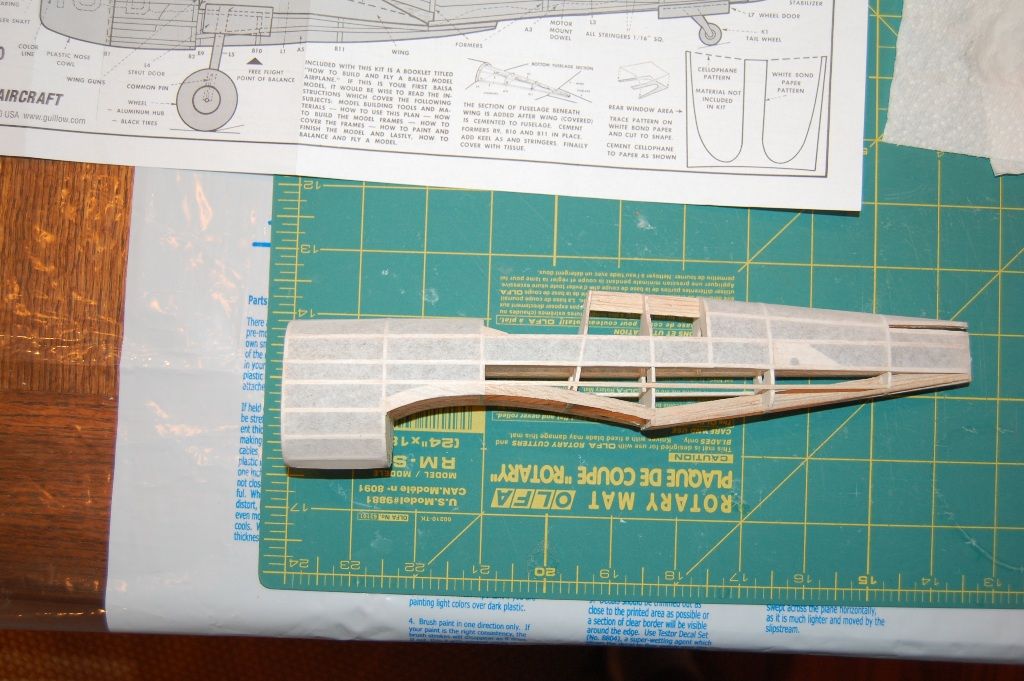
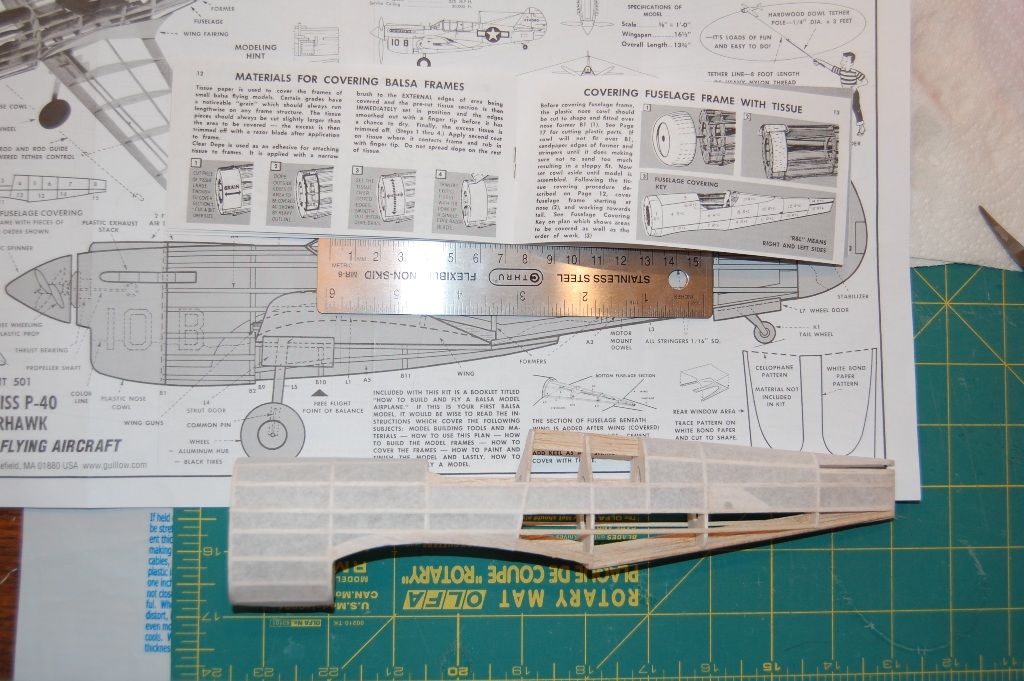
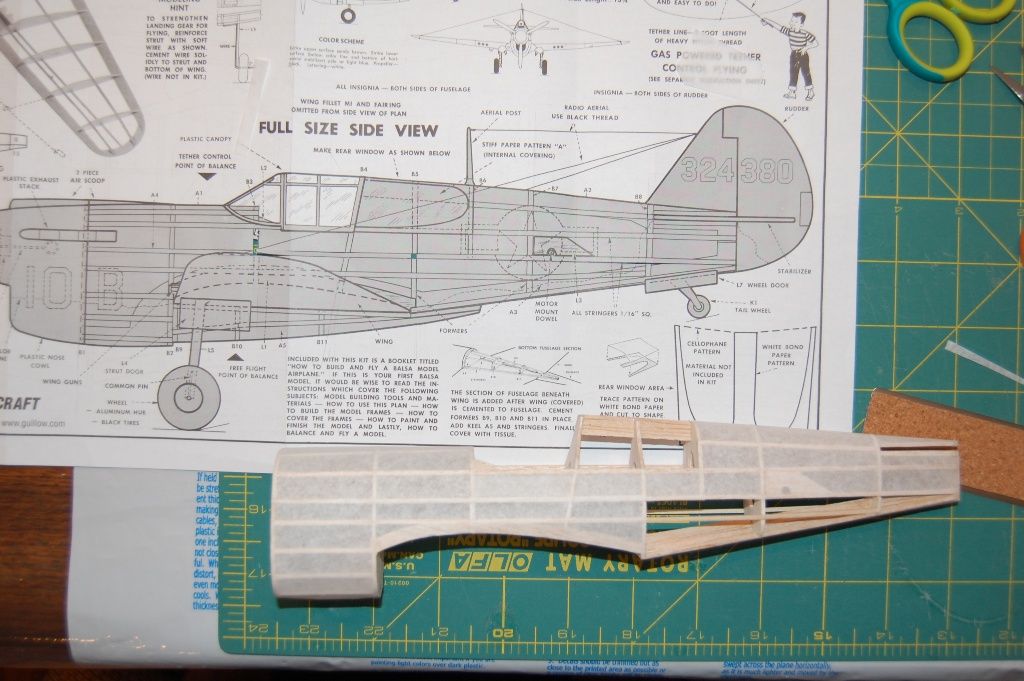
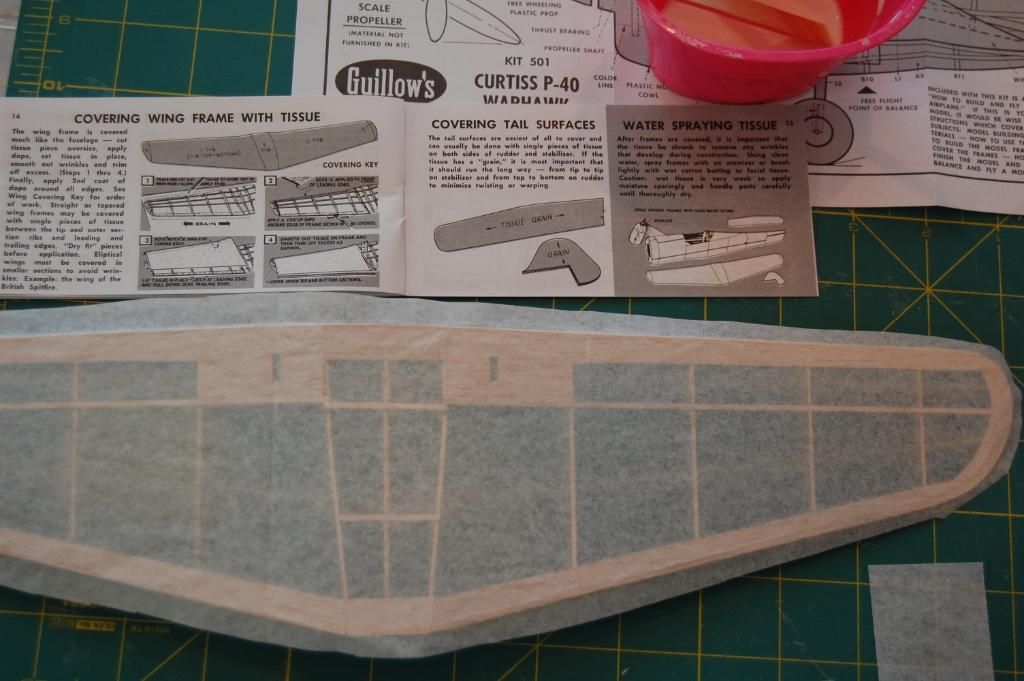
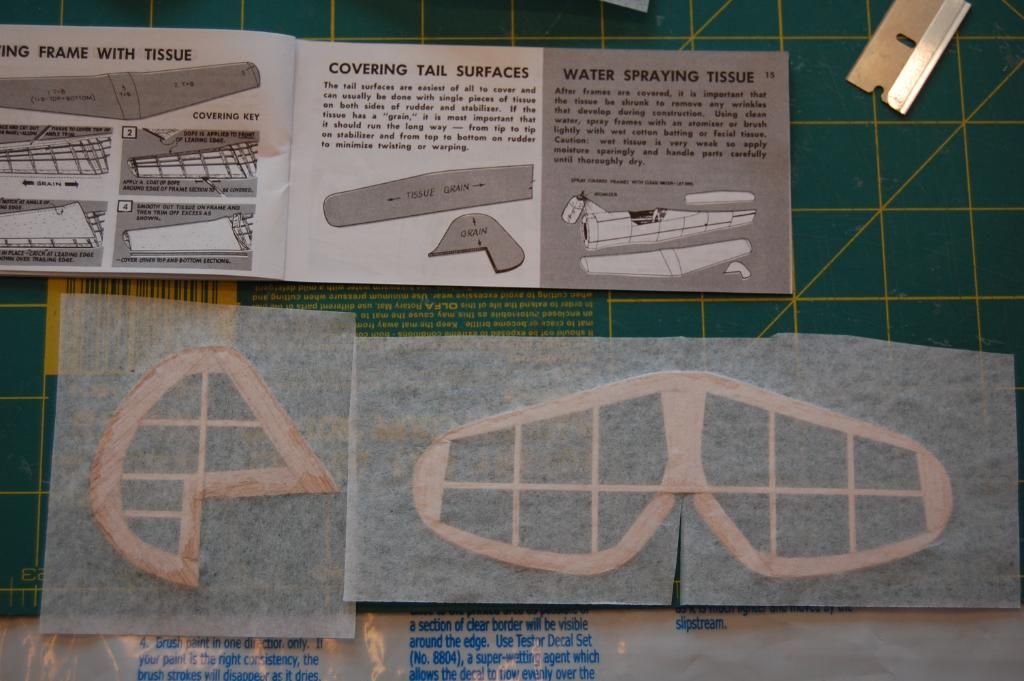
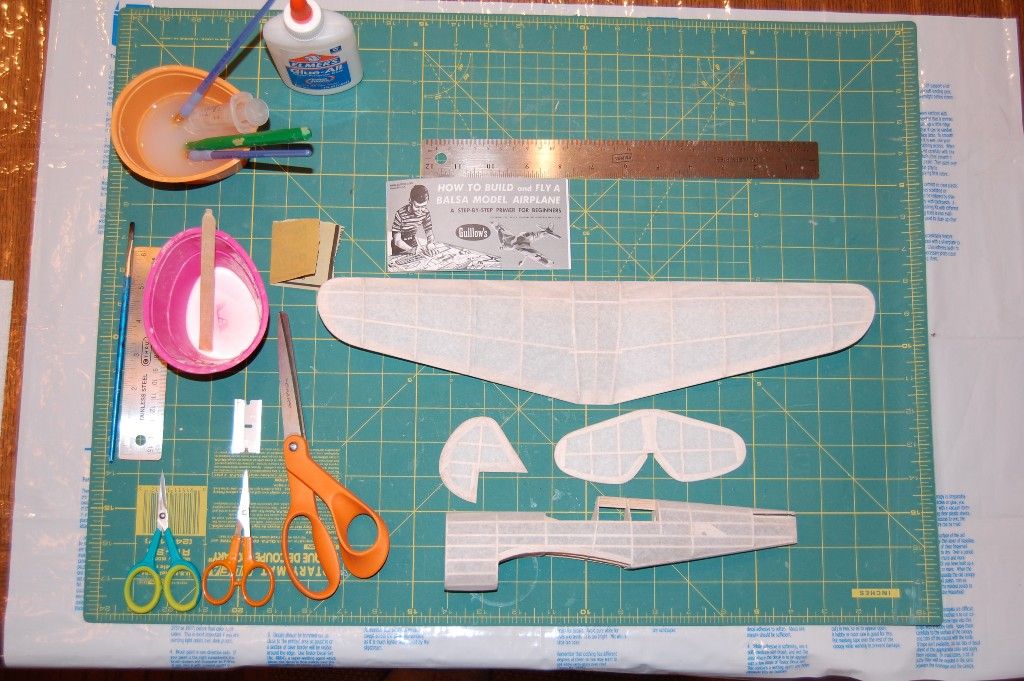
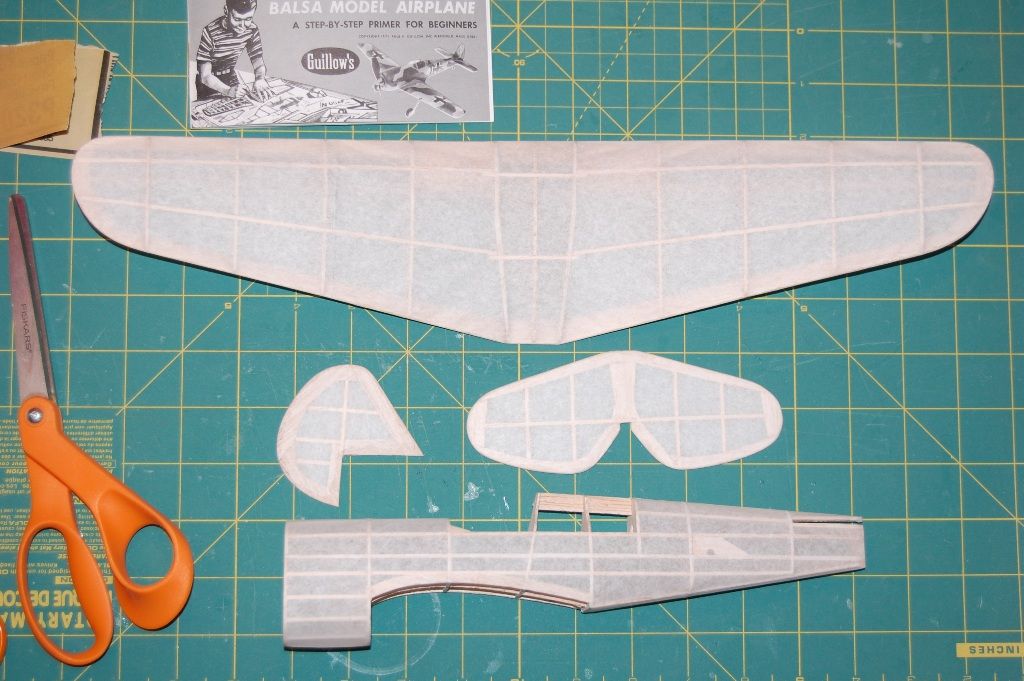
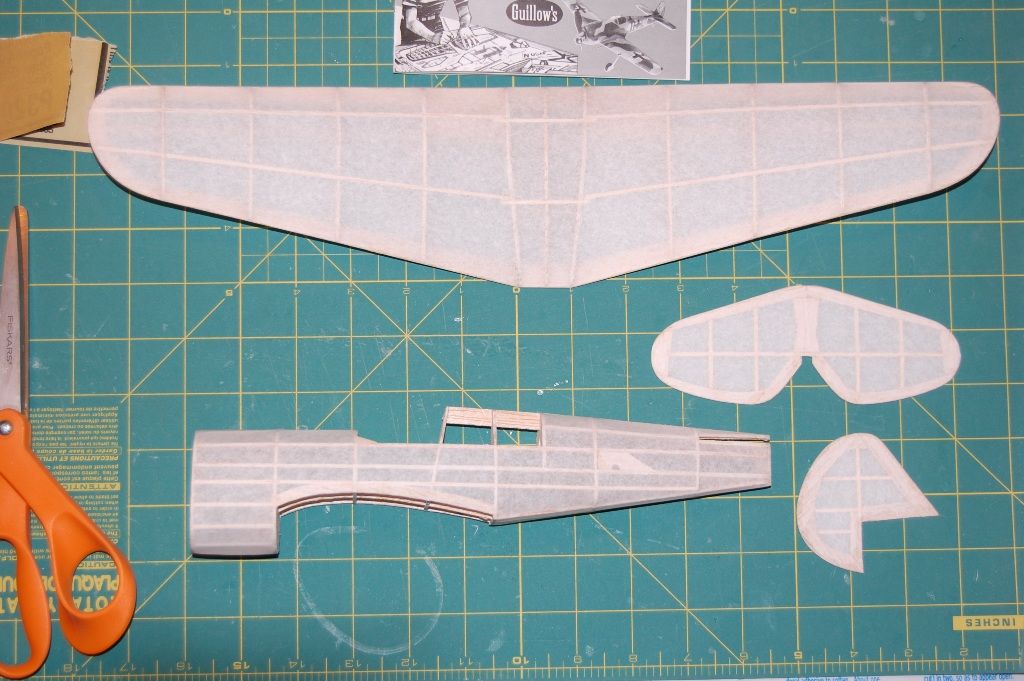
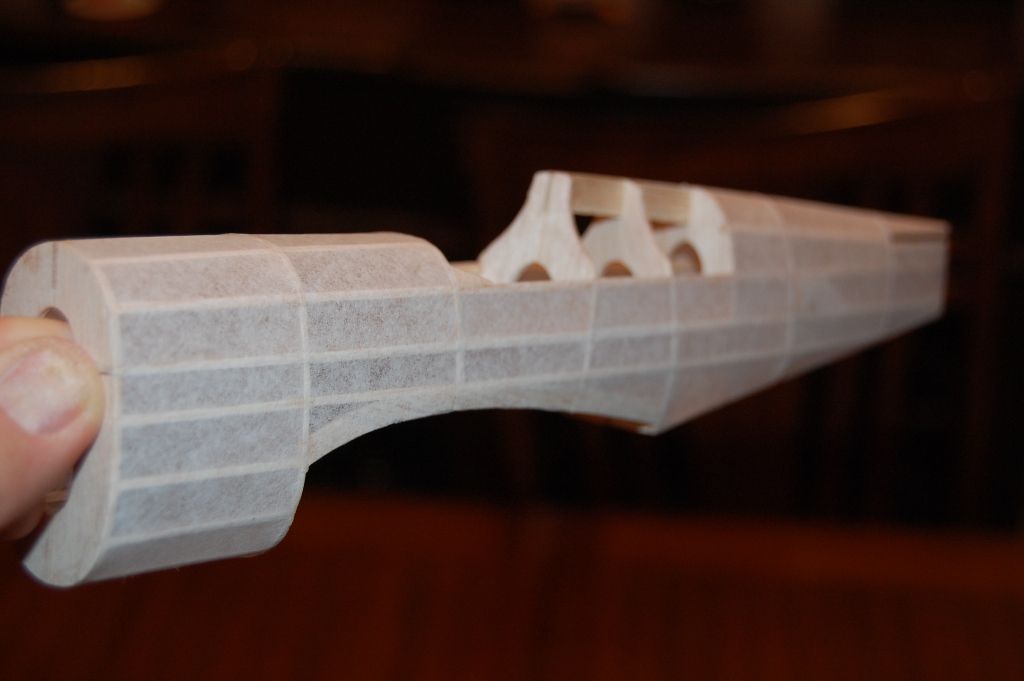
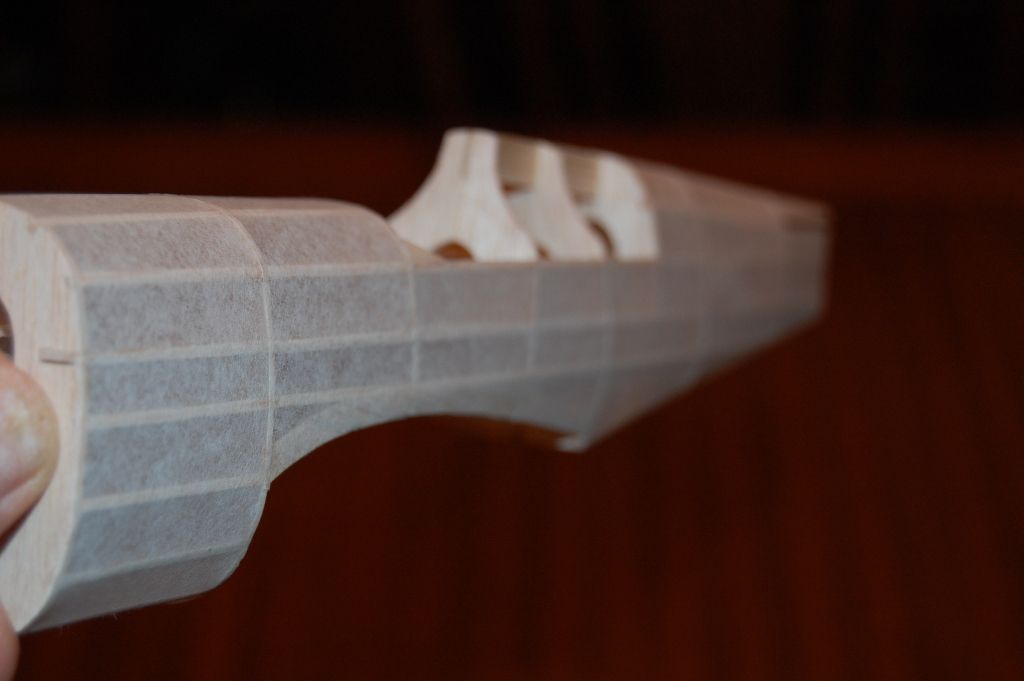
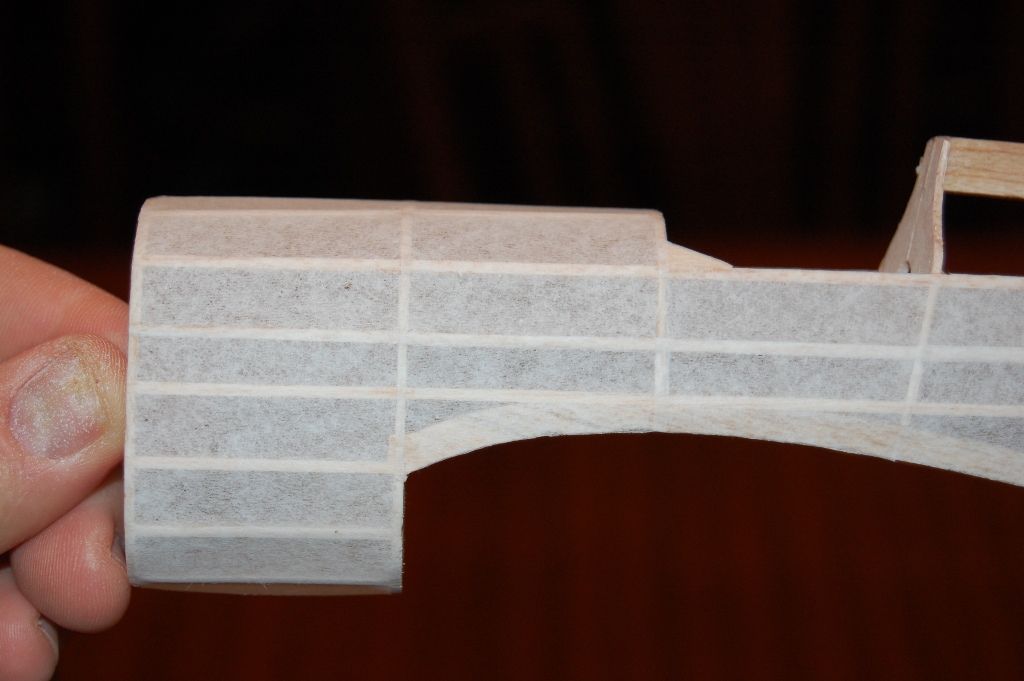
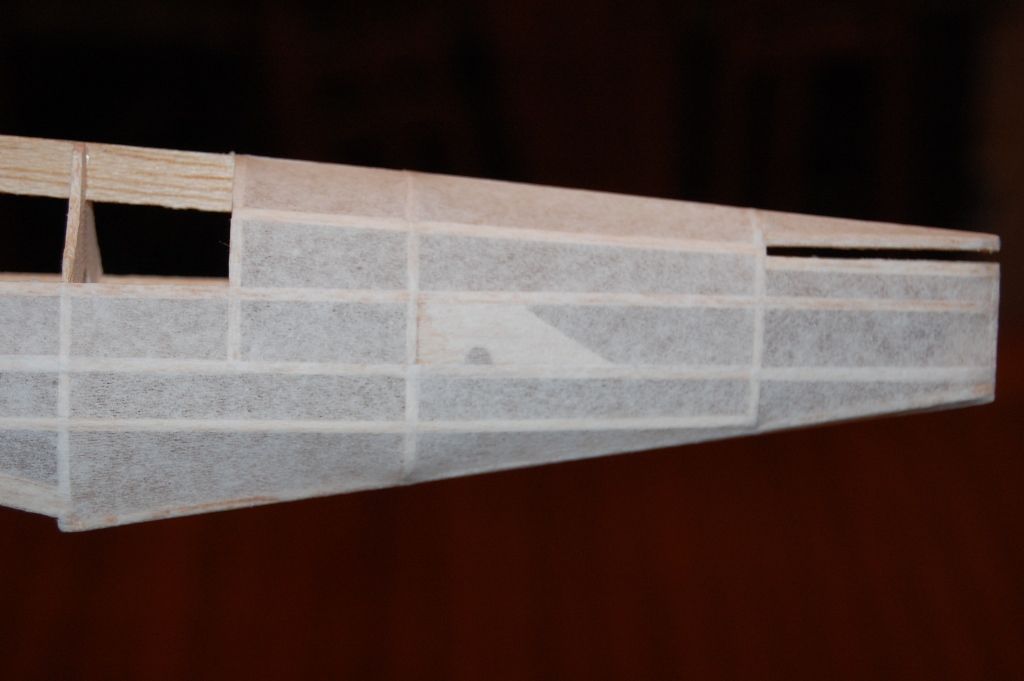
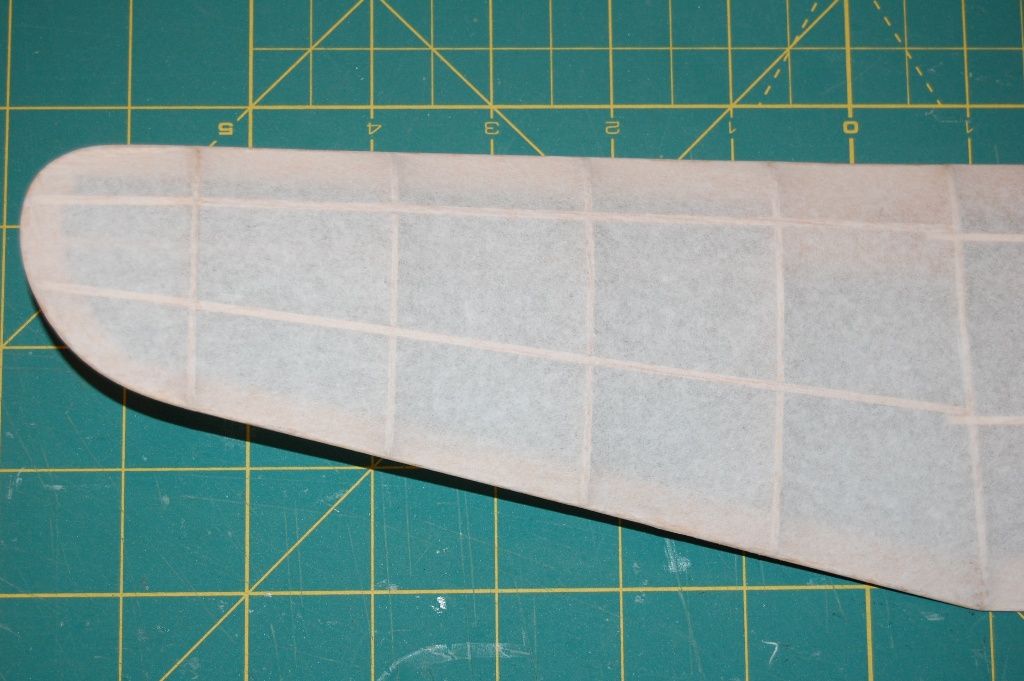
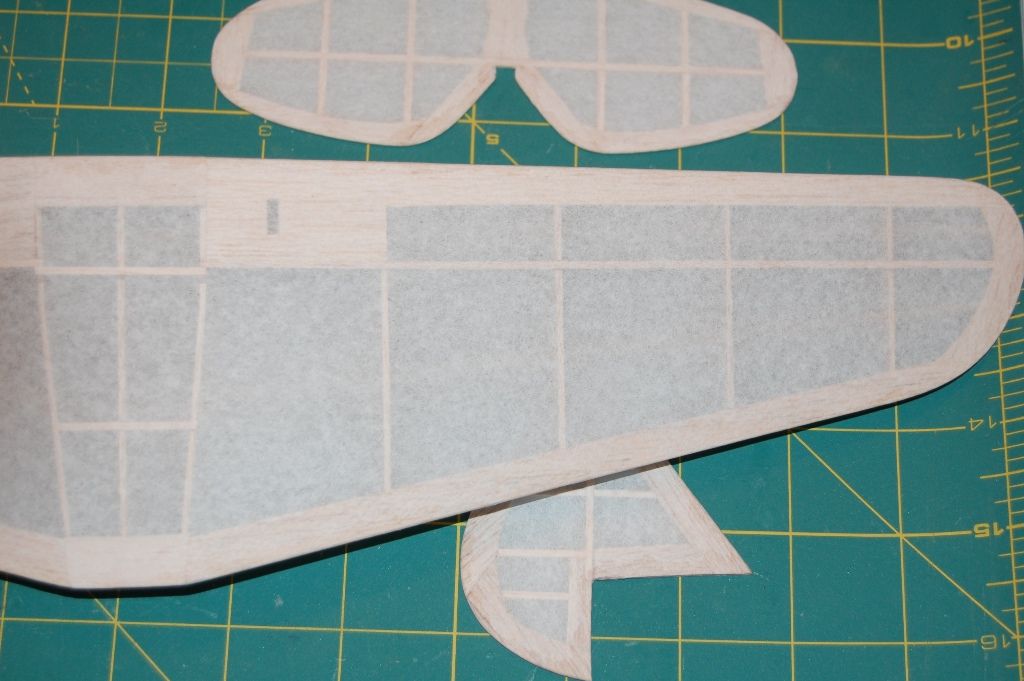
On this forum, I have shown different techniques of covering using different types of tissues. I have used domestic, Esaki and Guillows tissue. I have used the dry method covering in sections and used the wet method to apply tissue. The wet method produces the best looking model but is the hardest to master, especially when using domestic tissue. This time I decided to use the Guillows directions when applying tissue. I took a bunch of pictures as I was going along. The directions show how to cover the fuselage in multiple sections for a wrinkle free finish. Guillows uses dope to attach the tissue, I used 50/50 water/Elmers glue. I also used the kit tissue. I normally scallop the formers before covering, this produces a smooth covering job. With Guillows diagram, I was unable to do this since I had to attach the tissue to the formers. Because of this, I had to make sure everything was sanded even so no wrinkles would develop. Guillows does stress sanding in the directions. I covered dry and I must say it was real simple. Like all building stages, you just have to take your time. Everything went on like a charm and no wrinkles developed. The portion of the fuselage behind the canopy could use another stringer running towards the stab, there is a starved look there. I cut the pieces of tissue out directly over a xeroxed copy of the plans, this limits trimming. I covered the wing, stab and rudder as per the directions. I do have a method for covering the top of the wing so there are no wrinkles and it is explained in my Messerschmidt build. http://balsamodels.com/phpBB/viewtopic.php?t=1589
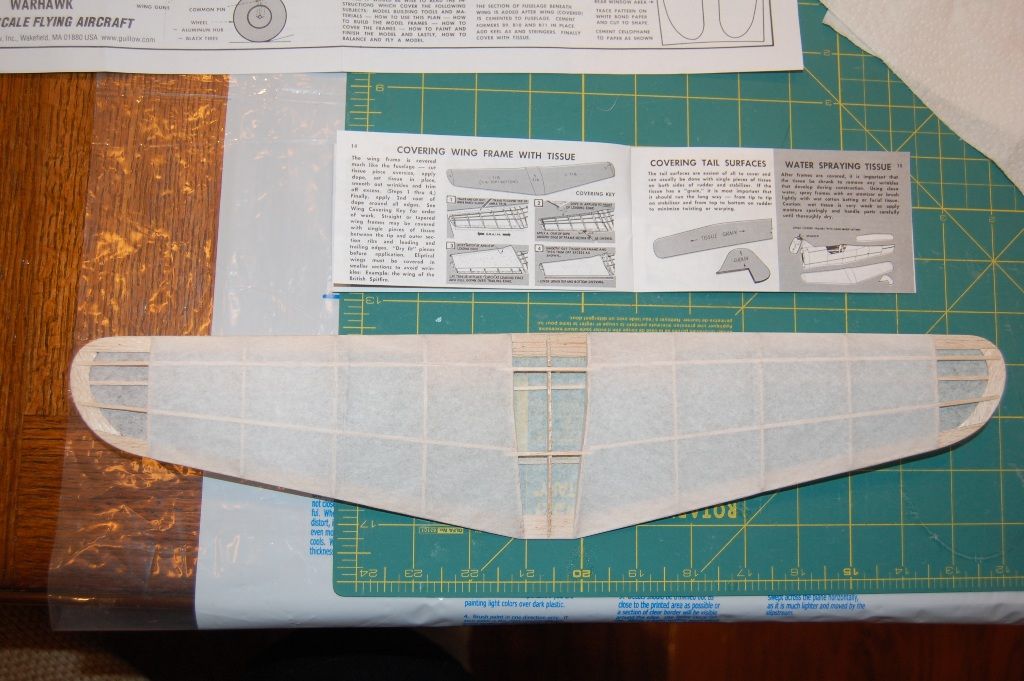
After all was covered, I sprayed with alcohol and everything shrunk nice and taught. Now I am ready for two coats of dope. I don't ever see me covering like this again, but it does work if you are looking for a wrinkle free smooth covering job, especially if you are struggling with other methods.
Image
Image
Image
Image
Image
scigs30
 
Posts: 844
Joined: Mon Nov 06, 2006 11:31 am

Postby scigs30 » Tue Feb 09, 2010 10:56 pm

I messed up and did section 9 first...Oh well no big deal. You cover the right and left side at the same time so two pieces are cut out.
Image
Image
Image
Image
Image
Image
Image
Image
Image
Image
scigs30
 
Posts: 844
Joined: Mon Nov 06, 2006 11:31 am

Postby scigs30 » Tue Feb 09, 2010 11:01 pm

Now the bottom pieces.
Image
Image
Image
Image
Image
Image
Image
Image
Everything is ready to shrink.
Image
Image
scigs30
 
Posts: 844
Joined: Mon Nov 06, 2006 11:31 am

Postby scigs30 » Tue Feb 09, 2010 11:05 pm

Everything has been sprayed with alcohol and there are no wrinkles.
Image
Image
Image
Image
Image
Image
Image
Image
scigs30
 
Posts: 844
Joined: Mon Nov 06, 2006 11:31 am

Next

Return to General Building Questions

Who is online

Users browsing this forum: Bing [Bot] and 35 guests